Short Answer
You can add 9 of these 11 WooCommerce Black Friday store tweaks with the free WPCode plugin. Each one is a short snippet, so you don’t need a new plugin for every tweak. Tag your snippets as you add them, then deactivate them together after Cyber Monday.
Key Takeaways
- Every store-facing tweak here runs on the free plan.
- Paid plans add WooCommerce dropdown locations, scheduling and email alerts. Conversion tracking comes with the Plus plan and up.
- Cart and checkout tweaks work differently on the block cart. Each cart snippet below says which cart it works on.
- Tag every sale snippet, so turning them off later takes a few clicks.
You probably have your Black Friday deals picked already.
But setting up those store changes can mean installing several plugins you’ll only need for a few weeks.
With WPCode, one free plugin handles these store changes. You can reuse the same snippets for your next sale, too.
We tested every snippet on a WooCommerce 11.2 store running a block theme, with the block cart and checkout. We also tested the classic-cart versions, so you can follow the instructions that match your store.
Use the table of contents below to navigate this post.
Before You Start: Tag It, Test It, Check Your Cart
Three habits make the rest of this list safer. They take about five minutes.
You won’t need a child theme or FTP for any of this. WPCode saves each snippet in your WordPress database, so a theme update doesn’t touch it.
1. Tag every snippet “black-friday”
When you save a snippet in WPCode, type it into the Tag field in the Basic info box, just above Priority.
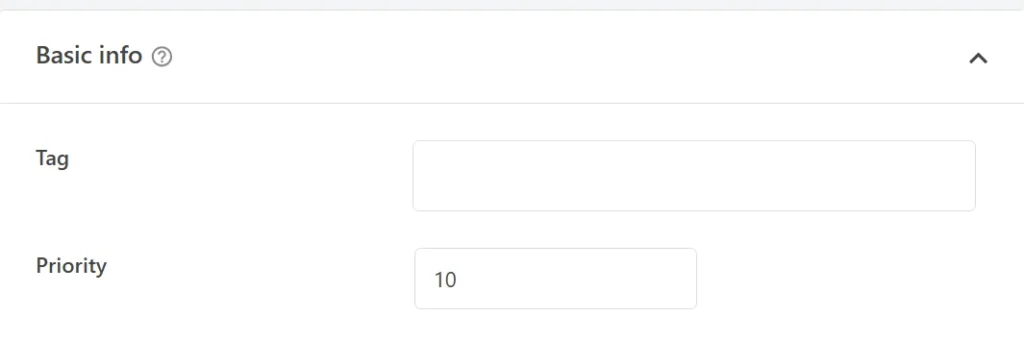
See how to use tags in our documentation on how to create your first WPCode snippet. After the sale, you can filter your snippet list by that tag and switch them all off together.
2. Check which cart you have
This decides which snippets you need in the cart and checkout section.
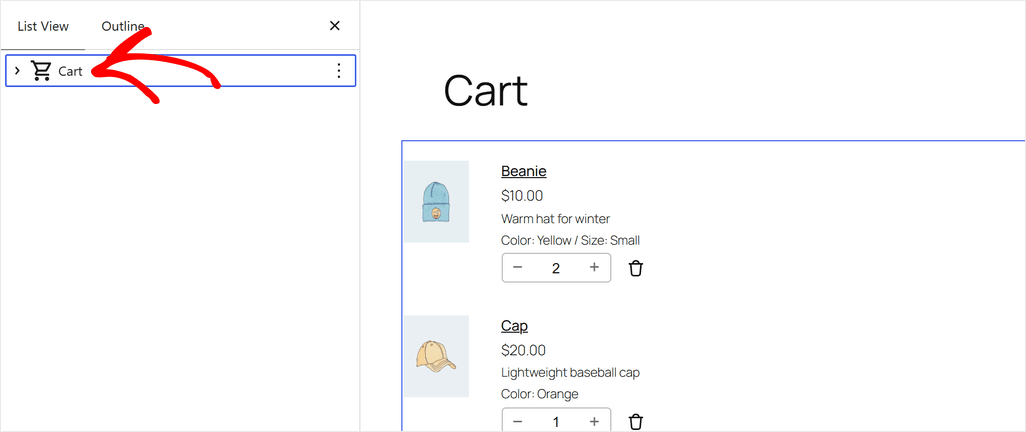
Go to Pages in your dashboard and edit your Cart page. If you see a Cart block in the editor, you have the block cart. If you see a [woocommerce_cart] shortcode, you have the classic cart.
Since WooCommerce 8.3, new stores usually start with the block cart and checkout.
Stores that updated from an older version keep whichever cart they already had.
3. Add snippets when traffic is low, and check each one
WPCode catches some errors for you (more on that in tweak 10). But depending on your theme and plugins, a snippet can act differently on different sites.
So after you save each one, open your shop in a private window and check the page it changes.
💡 New to WPCode?
Install the free plugin from Plugins » Add New Plugin in your WordPress dashboard. Search for “WPCode,” then click Install Now and Activate.
The free version covers 9 of the 11 tweaks below. The other two need a paid plan: email alerts work on any paid plan, and conversion tracking needs Plus or higher.
Your Black Friday Checklist at a Glance
Here’s every tweak in one place, with the plan each one needs.
| Tweak | Where it shows | Plan |
|---|---|---|
| Percent-off sale badge | Shop and product pages | Free |
| Countdown to the sale’s end | Any page you pick | Free |
| Sale bar across the top | Every page | Free |
| Special offer pop-up | Any page you pick | Free |
| “Sale ends Monday” note | Product pages | Free (paid adds a dropdown) |
| Auto-applied coupon | Cart and checkout | Free |
| Free shipping line | Cart | Free |
| Per-order limit on doorbusters | Cart and checkout | Free |
| Trust note above Place Order | Checkout | Free |
| Email alerts when a snippet breaks | Your inbox | Paid |
| Conversion event tracking | Your ad accounts | Plus and up |
Shop and Product Page Tweaks
These five change what shoppers see before they reach the cart. Each one is written for both block and classic themes.
1. Show “% Off” Instead of “Sale” (Free)
WooCommerce’s sale badge just says “Sale.” Shoppers can’t see how much they’ll save.
This snippet swaps it for the real discount, like “17% off.”
When some sizes or colors are cheaper than others, the badge shows the biggest saving, like “Up to 25% off.”
To add it, go to Code Snippets » + Add Snippet and choose Add Your Custom Code (New Snippet). Give it a title you’ll recognize, like “BF sale badge,” and pick PHP Snippet as the code type. Then paste this in:
// Show the discount on sale badges, e.g. "17% off" instead of "Sale".
function bf_sale_badge_text( $product ) {
	if ( $product->is_type( 'variable' ) ) {
		$prices = $product->get_variation_prices();
		$best   = 0;
		foreach ( $prices['regular_price'] as $id => $regular ) {
			$sale = $prices['sale_price'][ $id ];
			if ( $regular > 0 && $sale < $regular ) {
				$best = max( $best, ( $regular - $sale ) / $regular * 100 );
			}
		}
		return $best ? 'Up to ' . round( $best ) . '% off' : '';
	}
	$regular = (float) $product->get_regular_price();
	$sale    = (float) $product->get_sale_price();
	if ( $regular > 0 && $sale > 0 && $sale < $regular ) {
		return round( ( $regular - $sale ) / $regular * 100 ) . '% off';
	}
	return '';
}

// Classic themes and shortcode shop pages.
add_filter( 'woocommerce_sale_flash', function ( $html, $post, $product ) {
	$text = bf_sale_badge_text( $product );
	return $text ? '<span class="onsale">' . esc_html( $text ) . '</span>' : $html;
}, 10, 3 );

// Block themes.
add_filter( 'woocommerce_sale_badge_text', function ( $text, $product ) {
	$new = bf_sale_badge_text( $product );
	return $new ? $new : $text;
}, 10, 2 );
Leave the Insert Method on Auto Insert and the Location on Run Everywhere.
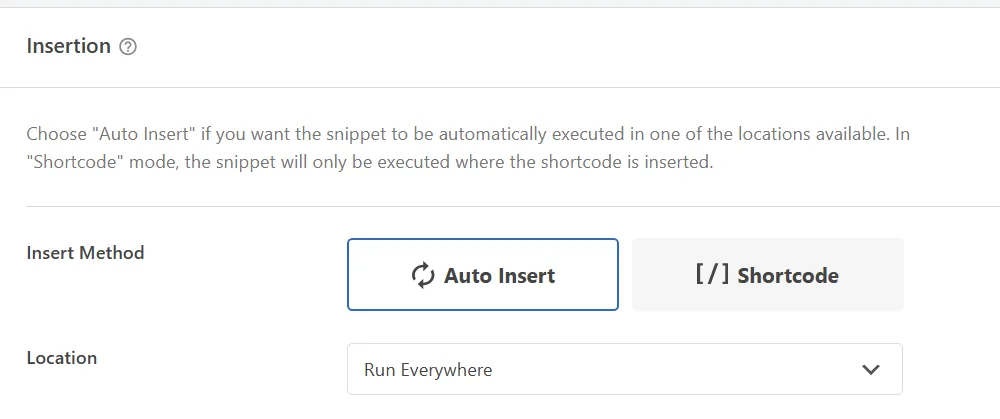
Then switch the snippet to Active and click Save Snippet.
The snippet has two parts because block themes print their own badge. The first part handles classic themes, and the second handles block themes.
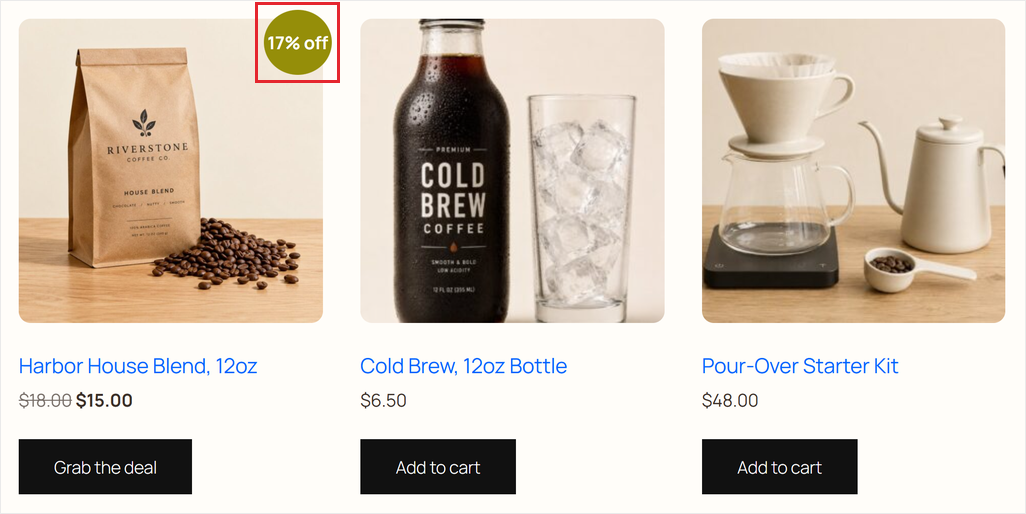
Want the button to match?
Add these lines to the bottom of the same snippet. Sale items will say “Grab the deal” instead of “Add to cart.”
add_filter( 'woocommerce_product_add_to_cart_text', function ( $text, $product ) {
	return $product->is_on_sale() ? 'Grab the deal' : $text;
}, 10, 2 );
add_filter( 'woocommerce_product_single_add_to_cart_text', function ( $text, $product ) {
	return $product->is_on_sale() ? 'Grab the deal' : $text;
}, 10, 2 );

2. Add a Countdown to the Sale’s End (Free, Any Store)
A deadline gives shoppers a reason to decide today. This one works on any WordPress site, with or without WooCommerce.
Create a new snippet, choose HTML Snippet as the code type, and paste this in:
<div id="wpcode-countdown-timer"></div>
<script>
(function () {
    // Your sale's end: date, time, then your store's offset from UTC
    var endTime = new Date("2026-11-30T23:59:59-05:00").getTime();

    var timer = setInterval(function () {
        var now = new Date().getTime();
        var timeLeft = endTime - now;

        if (timeLeft < 0) {
            clearInterval(timer);
            document.getElementById("wpcode-countdown-timer").innerHTML = "This sale has ended";
            return;
        }

        var days = Math.floor(timeLeft / (1000 * 60 * 60 * 24));
        var hours = Math.floor((timeLeft % (1000 * 60 * 60 * 24)) / (1000 * 60 * 60));
        var minutes = Math.floor((timeLeft % (1000 * 60 * 60)) / (1000 * 60));
        var seconds = Math.floor((timeLeft % (1000 * 60)) / 1000);

        document.getElementById("wpcode-countdown-timer").innerHTML =
            days + "d " + hours + "h " + minutes + "m " + seconds + "s ";
    }, 1000);
})();
</script>
Keep the date in this format: year-month-day, then the time, then your offset from UTC. -05:00 is US Eastern time in November.
Match it to your site’s timezone in Settings » General. That way, the timer ends when your coupon does.
Every shopper sees it reach zero at the same moment, wherever they are. It shows “This sale has ended” once the date passes.
Next, pick where it shows. Set the Location to Insert After Paragraph.
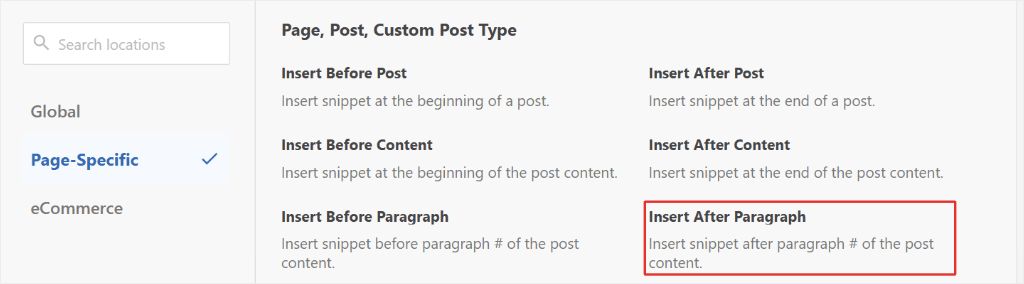
Pick a paragraph number, like 2. This location works inside a page or post’s text, so use it on a sale landing page, not the Shop page.
Then, under Smart Conditional Logic, add a Page URL rule with your sale page’s address, like /black-friday/, so the timer only appears there. Both are on the free plan.
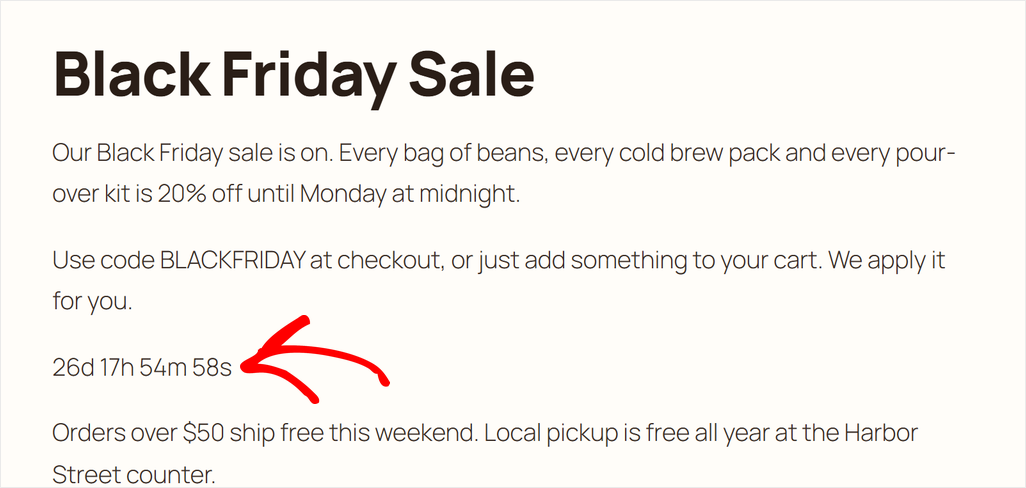
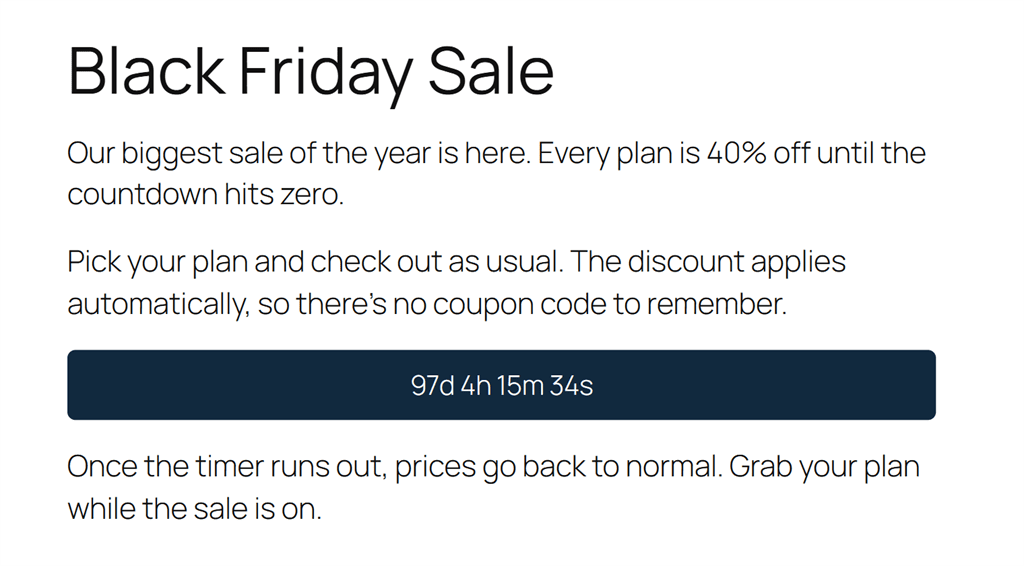
This snippet gives you a plain, unstyled timer.
If you want to style it, check out our guide to adding a countdown timer in WordPress. It shows you how to build a box like the one in the screenshot below.
Its style block works here once you change #wpcode-countdown-1 to #wpcode-countdown-timer.
3. Put a Sale Bar Across the Top of Every Page (Free, Any Store)
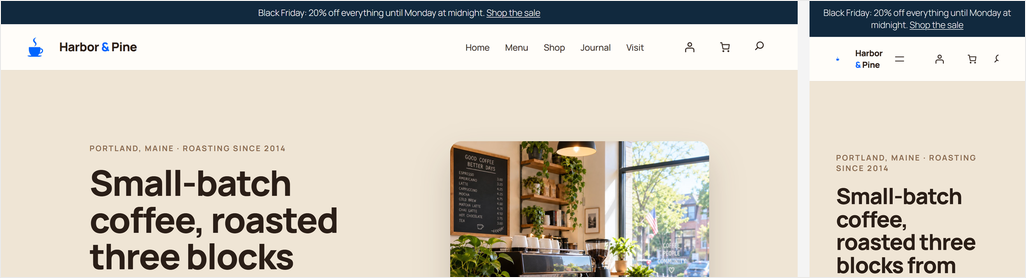
Shoppers who land on a product from an ad may never see your homepage banner. A bar at the top of every page tells them a sale is on.
Create an HTML Snippet and paste this in, with your own wording and link:
<div class="bf-sale-bar">Black Friday: 20% off everything until Monday at midnight. <a href="/shop/">Shop the sale</a></div>
<style>
.bf-sale-bar { background: #11293E; color: #ffffff; text-align: center; padding: 10px 16px; font-size: 16px; }
.bf-sale-bar a { color: #ffffff; text-decoration: underline; }
</style>
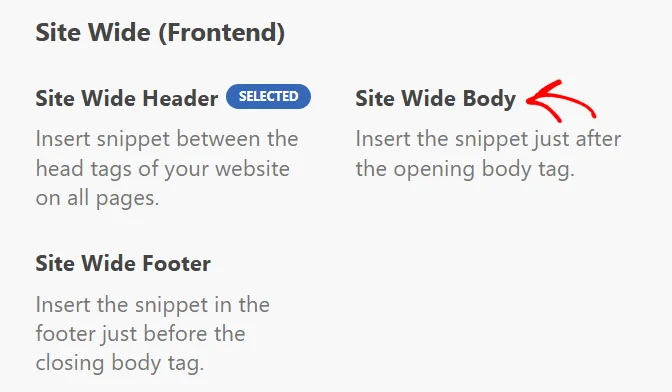
Set the Location to Site Wide Body, one of WPCode’s header and footer locations. That puts the bar at the very top of the page, above your header.
WooCommerce has a built-in Store Notice that does something similar. On block themes, it’s hard to find, though.
The Customize link usually isn’t in the Appearance menu, so you open /wp-admin/customize.php directly and go to WooCommerce » Store Notice.
The WPCode version is easier to reach, and on paid plans you can schedule it to stop on a set date. That way, the bar comes down on time, even if you forget.
4. Show a Special Offer Pop-up (Free, Any Store)
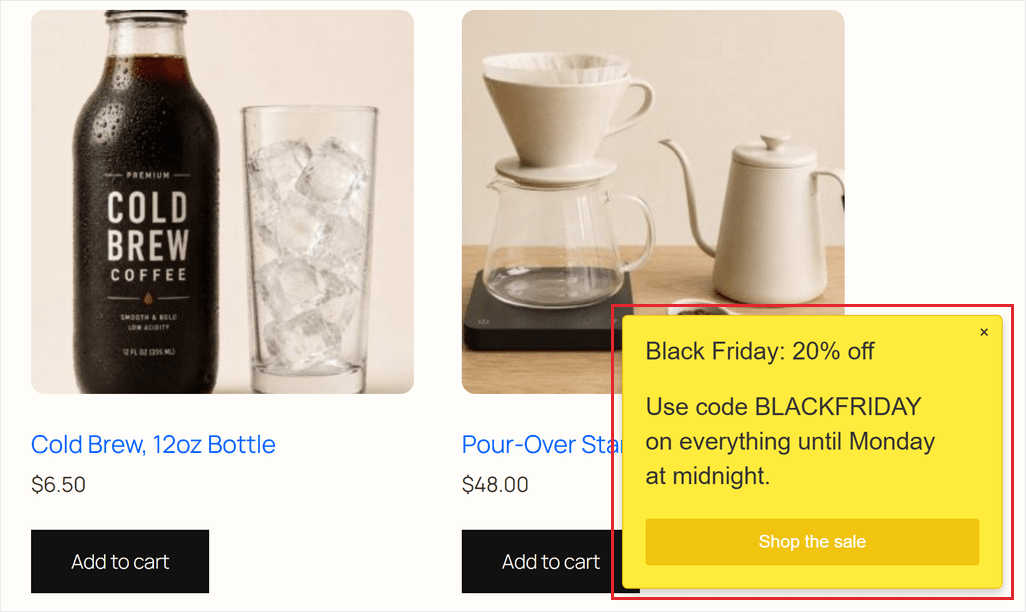
Some shoppers browse without ever seeing your coupon code. A small pop-up in the corner puts it in front of them.
This one comes ready-made in the WPCode library.
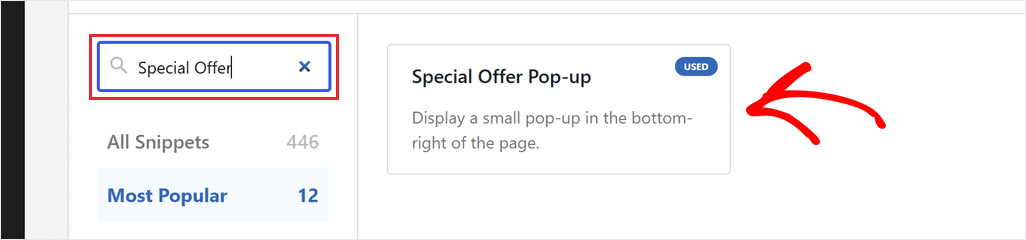
To use it, go to Code Snippets » + Add Snippet, search for “Special Offer Pop-up,” and click Use snippet.
On a fresh install, the card may say Connect to library to unlock (Free) first. Click it and follow the prompts to connect your site to the WPCode Library. It’s free, and you only do it once.
The snippet opens in the editor, ready to edit. Its settings sit at the top of the code, under Customizable Settings.
Change $offer_button_link from /your-special-offer-link to your sale page. Then change $offer_title and $offer_message, so the pop-up shows your real deal and coupon code.
To show it only on some pages, add a Page URL rule under Smart Conditional Logic, the same way as the countdown. And add your “black-friday” tag before you save.
Then set it to Active and save.
5. Add a “Sale Ends Monday” Note on Product Pages (Free, Paid Adds a Dropdown)
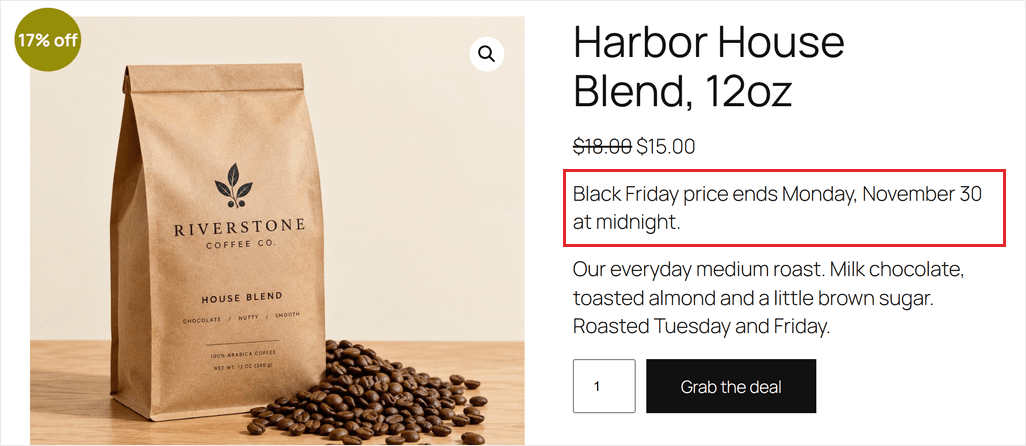
A one-line note on the product page about when the price goes back up gives shoppers a reason to buy now.
WPCode Lite
On the free plan, add this as a PHP Snippet set to Run Everywhere:
add_action( 'woocommerce_single_product_summary', function () {
	global $product;
	if ( $product && $product->is_on_sale() ) {
		echo '<p class="bf-sale-note">Black Friday price ends Monday, November 30 at midnight.</p>';
	}
}, 11 );
It shows just under the price, and only on products that are on sale. Change the date in the note to match your sale, and say “11:59 PM” if “midnight” could be read as the start of the day.
WPCode Pro
On a paid plan with a classic theme, you can skip the PHP.
Create an HTML Snippet with just the note, and pick Before the Single Product Summary from the WooCommerce group on the Location dropdown’s eCommerce tab.
On a classic theme, the note shows above the product images, not under the price.
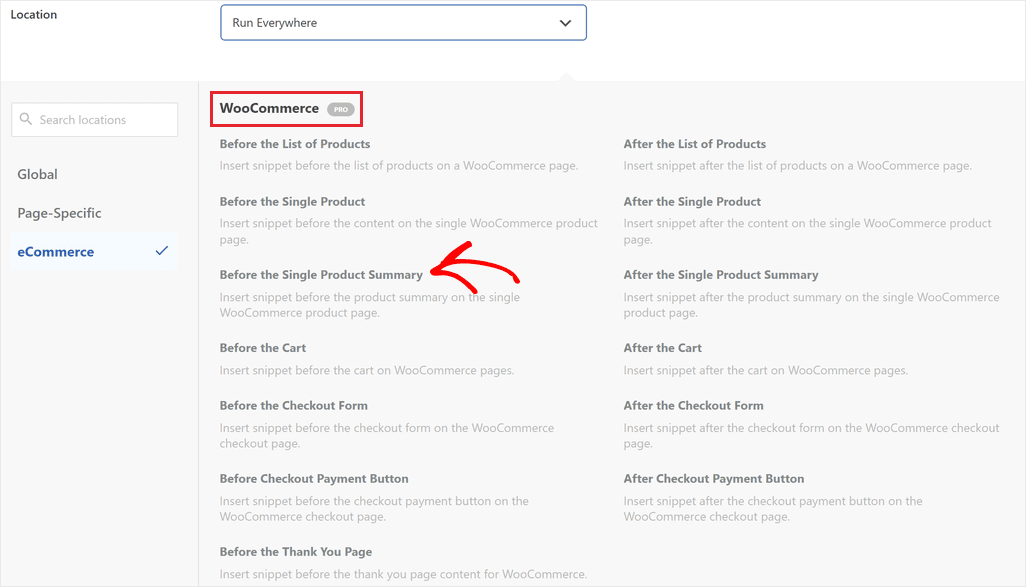
On a block theme, that location prints the note at the very top of the product page, so keep the PHP version there.
The dropdown version also shows on every product page, not only the ones on sale. Use it when your whole store is on sale.
Paid plans can also limit any snippet to WooCommerce pages, like Shop Page or Single Product Page, under Smart Conditional Logic.
Cart and Checkout Tweaks
Many WooCommerce snippets you’ll find online print text using classic cart hooks, like woocommerce_before_cart. The block cart doesn’t run those hooks.
WPCode’s cart and checkout locations use the same hooks, so those dropdown options only work on the classic cart.
Snippets that change prices or apply coupons work on both carts. That covers tweaks 6 and 8.
Tweaks 7 and 9 add text to the page, so each one comes in two versions: the block-cart version we tested, and a classic-cart version.
6. Apply the Black Friday Coupon Automatically (Free)
Shoppers forget coupon codes, or type them wrong. This snippet adds your code to every cart for them.
First, create the coupon in WooCommerce under Marketing » Coupons (on some stores, it’s WooCommerce » Coupons).
If you’ve never used coupons, check that Enable the use of coupon codes is on in WooCommerce » Settings » General.
Then add this as a PHP Snippet set to Run Everywhere, with your own code on the $code line:
// Apply your Black Friday coupon to every cart automatically.
add_action( 'woocommerce_before_calculate_totals', function ( $cart ) {
	static $running = false;
	$code = 'blackfriday'; // Your coupon code, in lowercase.

	if ( $running || ( is_admin() && ! wp_doing_ajax() ) || $cart->is_empty() || $cart->has_discount( $code ) ) {
		return;
	}

	$coupon = new WC_Coupon( $code );
	if ( ! $coupon->get_id() || is_wp_error( ( new WC_Discounts( $cart ) )->is_coupon_valid( $coupon ) ) ) {
		return; // Missing, expired or not valid for this cart: do nothing.
	}

	$running = true;
	$cart->apply_coupon( $code );
	$running = false;
} );
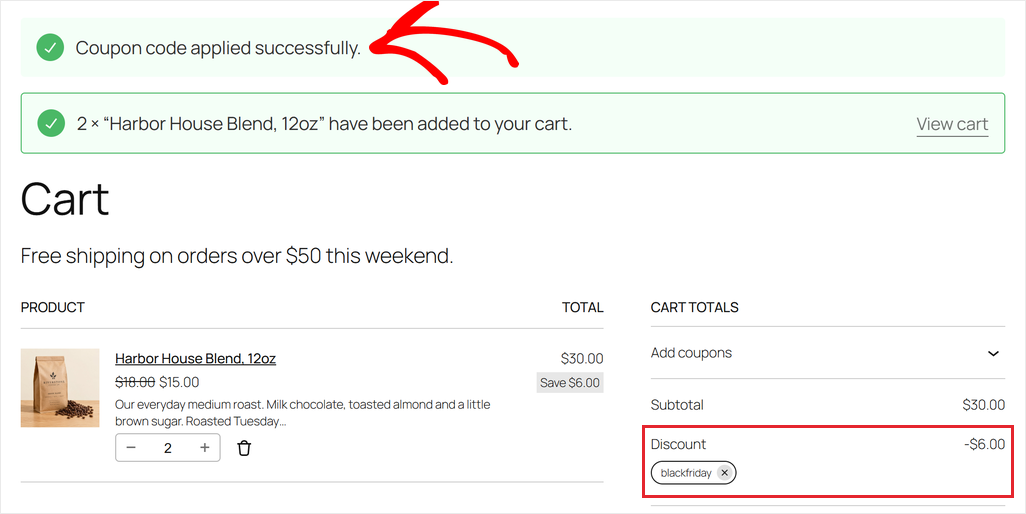
When a shopper adds something to their cart, WooCommerce applies the code and shows “Coupon code applied successfully.”
If the coupon has expired or the cart doesn’t qualify, the snippet does nothing, and shoppers don’t see an error. So even if you forget to switch the snippet off, the coupon’s expiry date ends the discount.
Set it in the Coupon expiry date field on the coupon’s General tab.
Pick the day after your sale ends. WooCommerce expires a coupon at 00:00 on the date you choose, so a sale that runs through November 30 needs December 1.
⚠️ Note
If a shopper removes the coupon, the snippet adds it back the next time the cart updates.
It works for every shopper, logged in or not. To stop shoppers from adding a second coupon on top of it, open the coupon’s Usage restriction tab and check Individual use only.
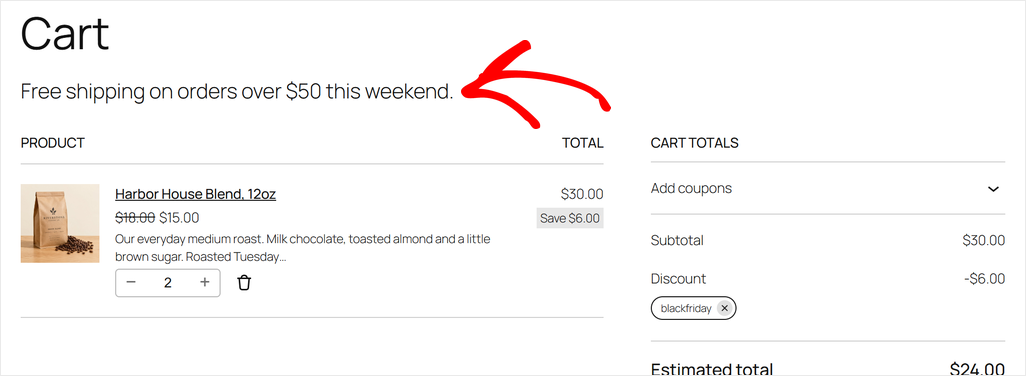
7. Tell Shoppers About Free Shipping in the Cart (Free)
Free shipping over a set amount only helps if shoppers know about it. The cart is the best place to tell them.
To set this up, add this as a PHP Snippet set to Run Everywhere, with your own amount:
add_filter( 'render_block_woocommerce/cart', function ( $content ) {
	return '<p class="bf-shipping-note">Free shipping on orders over $50 this weekend.</p>' . $content;
} );
The message doesn’t turn on free shipping by itself.
You set that up in WooCommerce » Settings » Shipping, by adding a Free shipping method with a minimum order amount to your shipping zone.
The downside is that this message is static.
It doesn’t show how close they are to free shipping, like “Spend $12 more.” The block cart changes quantities without reloading the page, so a number like that would go out of date.
On the classic cart? Use this version instead. It shows the same line above the cart table.
add_action( 'woocommerce_before_cart', function () {
	echo '<p class="bf-shipping-note">Free shipping on orders over $50 this weekend.</p>';
} );
8. Limit Your Best Deals to 2 per Order (Free)
Your best deal can sell out to one buyer. A per-order limit spreads it across more customers.
If you only want to allow one per order, you don’t need a snippet. Open the product, go to the Inventory tab, and check Sold individually.
But for a limit above one, add this as a PHP Snippet set to Run Everywhere.
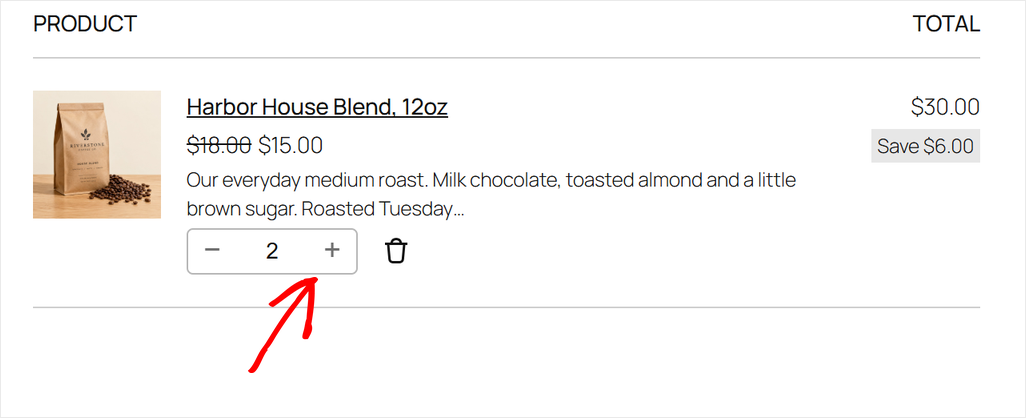
Put your product IDs on the return array( 343 ); line, separated by commas, like array( 343, 351 ). For a different limit, change every 2 in the snippet. It works on simple products, not products with variations.
// Limit these products to 2 per order. Add your product IDs.
function bf_limited_products() {
	return array( 343 );
}

// Block cart and checkout.
add_filter( 'woocommerce_store_api_product_quantity_maximum', function ( $max, $product ) {
	return in_array( $product->get_id(), bf_limited_products(), true ) ? 2 : $max;
}, 10, 2 );

// Classic quantity box.
add_filter( 'woocommerce_quantity_input_args', function ( $args, $product ) {
	if ( in_array( $product->get_id(), bf_limited_products(), true ) ) {
		$args['max_value'] = 2;
	}
	return $args;
}, 10, 2 );

// Stop add-to-cart from going over the limit.
add_filter( 'woocommerce_add_to_cart_validation', function ( $passed, $product_id, $quantity ) {
	if ( ! in_array( (int) $product_id, bf_limited_products(), true ) ) {
		return $passed;
	}
	$in_cart = 0;
	foreach ( WC()->cart->get_cart() as $item ) {
		if ( (int) $item['product_id'] === (int) $product_id ) {
			$in_cart += $item['quantity'];
		}
	}
	if ( $in_cart + $quantity > 2 ) {
		wc_add_notice( 'You can buy up to 2 of this item per order.', 'error' );
		return false;
	}
	return $passed;
}, 10, 3 );

// Stop the classic cart's Update button from going over the limit.
add_filter( 'woocommerce_update_cart_validation', function ( $passed, $cart_item_key, $values, $quantity ) {
	if ( in_array( (int) $values['product_id'], bf_limited_products(), true ) && $quantity > 2 ) {
		wc_add_notice( 'You can buy up to 2 of this item per order.', 'error' );
		return false;
	}
	return $passed;
}, 10, 4 );
To find a product’s ID, go to Products and hover over its name. The ID shows under the title.
In our test, the cart’s quantity box stopped at 2, and trying to add a third showed “You can buy up to 2 of this item per order.”
9. Add a Trust Note Above Place Order (Free)
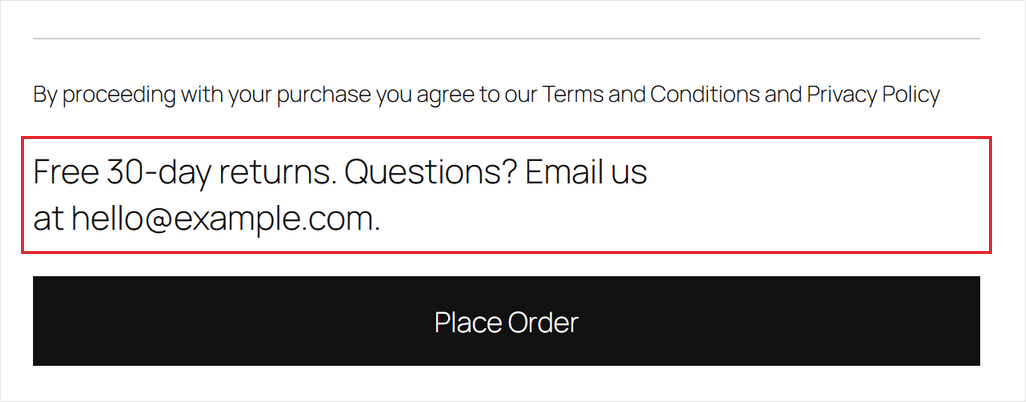
Right before they pay, shoppers wonder about returns and shipping. A short note above the button answers that.
Add this as a PHP Snippet set to Run Everywhere, with your own policy and email:
add_filter( 'render_block_woocommerce/checkout-actions-block', function ( $content ) {
	return '<p class="bf-trust-note">Free 30-day returns. Questions? Email us at [email protected].</p>' . $content;
} );
Only promise what your store actually offers. Keep it to one line, so it doesn’t push the button down on phones.
On phones, WooCommerce shows the order summary between the note and the button. On a computer, the note sits right above it.
On the classic checkout? Use this version instead. It shows the note just above the Place Order button.
add_action( 'woocommerce_review_order_before_submit', function () {
	echo '<p class="bf-trust-note">Free 30-day returns. Questions? Email us at [email protected].</p>';
} );
Protect and Measure the Sale
These two don’t change what shoppers see. They help you catch problems during the sale and check that your ad tracking works.
10. Get Notified When a Snippet Breaks (Free Error Protection, Paid Email Alerts)
The free version of WPCode test-runs PHP before switching a snippet on, so code with a syntax error won’t go live.
And if a snippet throws an error in your dashboard, WPCode switches it off.
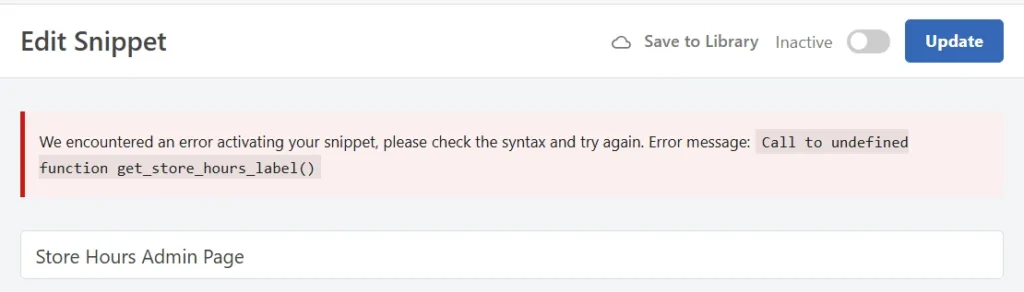
An error that only happens on your storefront, like in the cart, doesn’t switch the snippet off. WPCode marks it with a red error icon in your Code Snippets list, and the snippet stays on.
That’s why it’s worth checking your shop after every new snippet, like we suggested at the start.
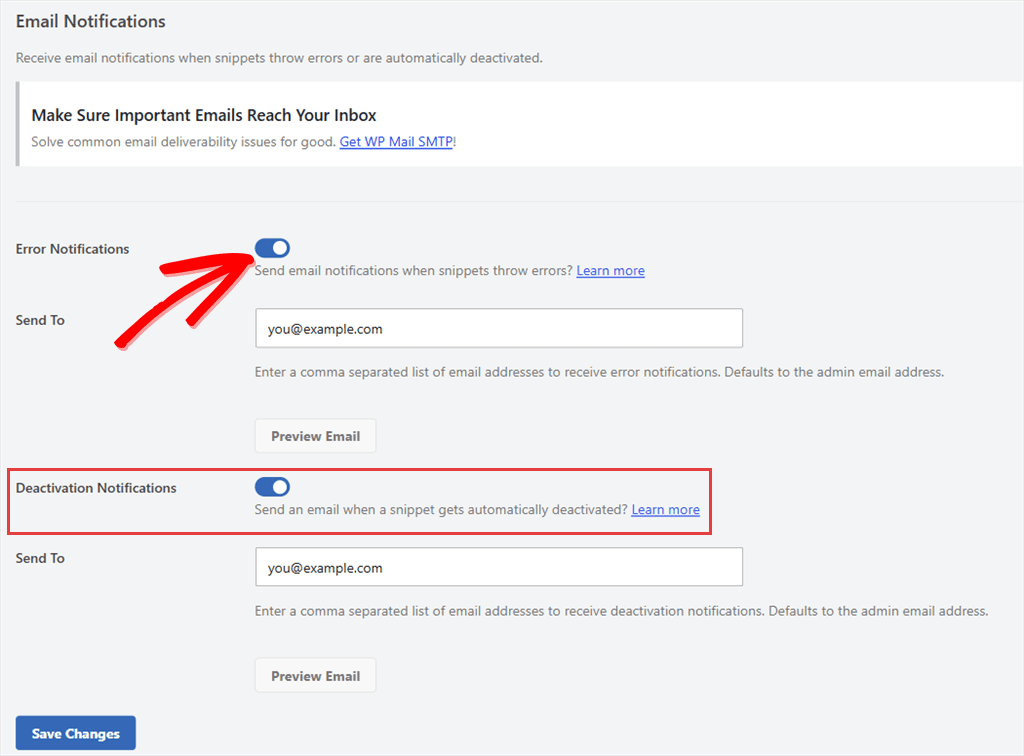
On a paid plan, you can get an email the moment any snippet throws an error, storefront included. Turn it on in Code Snippets » Settings » Error Handling.
Paid plans also keep code revisions. If an edit goes wrong, you can roll the snippet back to the last version that worked.
11. Check That Your Purchase Events Reach Your Ad Platforms (Plus and Up)
If you’re running Black Friday ads, you need to know your store is sending purchase events to the right ad platforms.
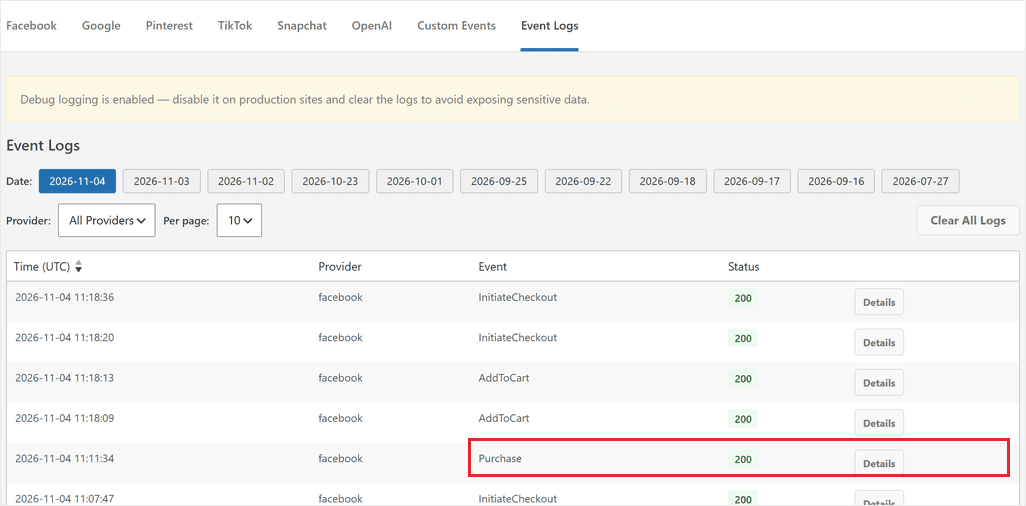
WPCode’s Conversion Pixels addon sends WooCommerce purchase events to Facebook, Google Ads, TikTok, Pinterest, Snapchat and OpenAI. It’s included on the Plus plan and up.
Its Event Logs show the events your server sends to Facebook, TikTok, Pinterest, Snapchat and OpenAI. Two things have to be set first. Add each platform’s API token, because without one, events go from the browser and skip the log. Then turn on Event Logging, which is off by default. Place a test order before the sale starts and look for the Purchase event. When you’re done, turn logging off and clear the logs.
Google Ads events don’t show in the logs, so check those in your Google Ads account. Our guide to Google Ads conversion tracking shows where.
Turn It All Off After Cyber Monday
After Cyber Monday, or when your sale ends, take the tweaks down, so nobody sees the promotional content for a sale that’s over.
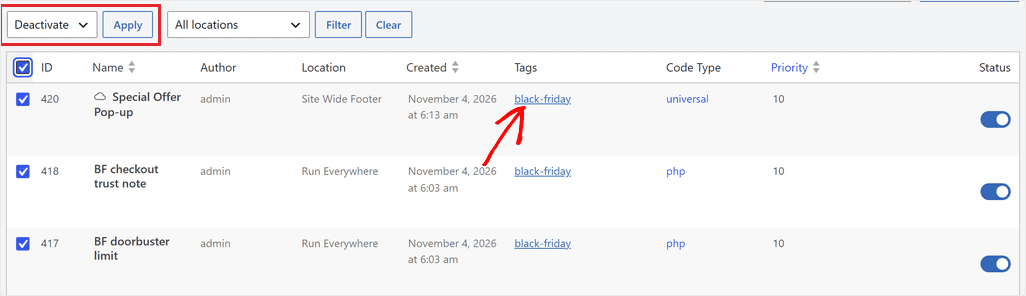
On the free plan, go to Code Snippets and click the black-friday tag in the Tags column. The list now shows only your sale snippets.
Select them all, choose Deactivate from the bulk actions, and click Apply.
Deactivate them rather than deleting them. Next year, you can update the dates and switch them back on.
The coupon stops by itself if you set its expiry date, and on a paid plan, you can schedule each snippet instead.
In the snippet editor’s Schedule snippet box, set an End Date, for example, December 1 at 12:00 AM.
WPCode stops running the snippet after that moment. The schedule uses your site’s timezone, set in Settings » General.

A few changes live in WooCommerce, not WPCode, so switch those back by hand:
- Uncheck Sold individually on any doorbuster.
- Remove or edit the Free shipping method if it was only for the sale.
FAQs: WooCommerce Black Friday
When should I start setting up my WooCommerce store for Black Friday?
Give yourself at least a week before the sale starts. That leaves time to add each snippet, check it on your store, and fix anything before traffic picks up.
Will these snippets slow down my store?
They add very little. Each one is a few lines of code, and most only run on the page they change. The badge and coupon snippets do one quick calculation when a product or cart loads.
Do these snippets work on the classic cart?
Yes. The sale badge, countdown, sale bar, pop-up, product note, coupon and quantity limit work with either cart. The free shipping line and the trust note each have a block-cart and a classic-cart version.
If you’re on a paid plan with the classic cart, you can also use WPCode’s cart and checkout locations from the dropdown.
Should I run different offers on Black Friday and Cyber Monday?
That’s up to you. If you do, make two copies of the sale bar and countdown, one for each day. Then switch them over once Black Friday’s offer ends, or schedule them on a paid plan.
Can I reuse these snippets next year?
Yes. Deactivate them instead of deleting them. Next November, update the dates and coupon code, then switch them back on.
Get Your Store Ready for Black Friday
You’ve now got 11 ways to get your WooCommerce store ready for Black Friday. Nine of them work on WPCode’s free plan.
Start with the sale badge, the countdown and the auto-applied coupon. They’re quick to add, and they make your sale easier to spot and use.
Test each snippet before the sale starts. Then switch your sale tweaks off after Cyber Monday.
Ready to add your first tweak today?
Get WPCode for free →
Want your sale tweaks to stop on their own on December 1?
See WPCode pricing →
Additional Resources
These guides help you get more out of WPCode before and after the sale.
- How to Add a Countdown Timer in WordPress: style your countdown and place it on more pages
- How to Get Notified When a Code Snippet Breaks Your Site: set up alerts before sale week
- How to Check Your Facebook Pixel Events Are Actually Firing: confirm your sale tracking works