
Documentation, Reference Materials, and Tutorials for WPCode
Would you like a snippet to run only during business hours, on certain days of the week, or between two dates? All you need is a WPCode snippet and a paid WPCode license.
In this guide, we’ll walk you through scheduling WPCode snippets with start and end dates and with scheduling rules.
Requirements: The Schedule snippet dates and the scheduling rules need a paid WPCode license.
Before you get started, make sure WPCode is installed and activated on your WordPress site.
To get started, we’ll open a snippet and give it a start and end date.
WPCode gives you two ways to schedule a snippet. For a single window with a fixed start and end, the Schedule snippet dates are the quickest option. For repeating schedules, such as weekdays only or business hours, you’ll use scheduling rules, which we cover in the next sections.
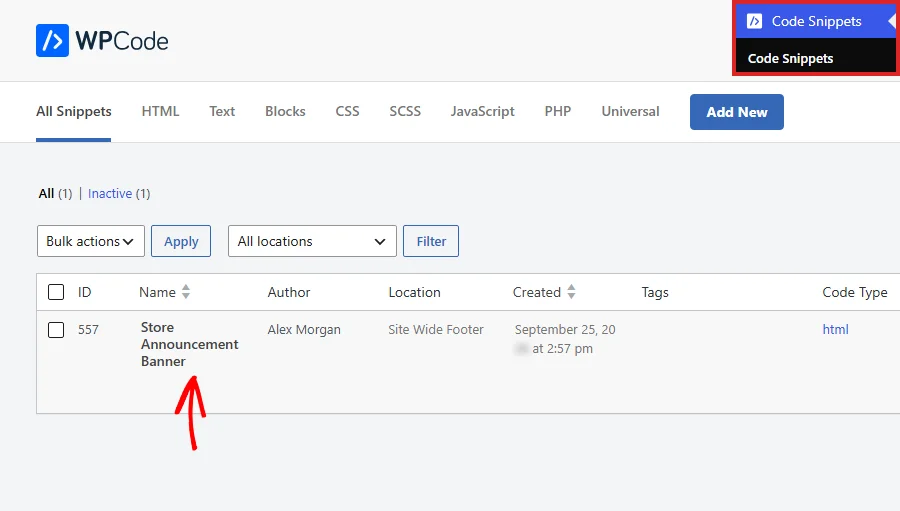
From your WordPress admin sidebar, go to Code Snippets » Code Snippets. Then click the title of the snippet you want to schedule.
In the snippet editor, scroll down to the bottom of the Insertion box. There, click the Start Date field in the Schedule snippet row and pick the date and time you want the snippet to start. Then set the End Date field the same way.
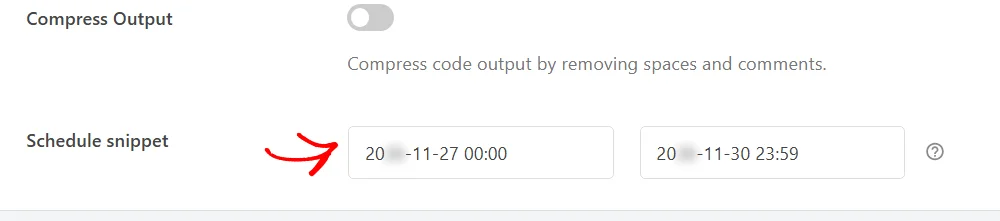
Both fields are optional. With only a start date, the snippet runs from that moment on. With only an end date, it runs until that moment and then stops.
The end time is included, so an end of 23:59 keeps the snippet running through the last minute of that day.
After you save an active snippet with these dates, the Code Snippets list shows a Scheduled icon next to its status toggle. That makes scheduled snippets easy to spot later.
Scheduling rules are part of Smart Conditional Logic. They let you build schedules that repeat, such as every weekday, or combine a schedule with other rules. If you haven’t used conditional logic before, our guide on using Smart Conditional Logic explains how rules and groups work.
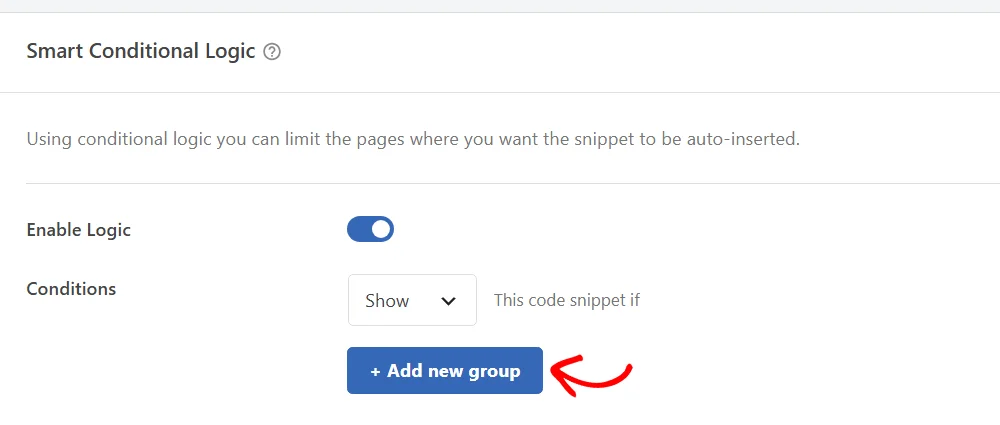
In the snippet editor, scroll down to the Smart Conditional Logic box and turn on the Enable Logic toggle. Then click + Add new group.
The new group starts with a Logged-in rule. Next, click the Logged-in field to open the rule picker. Then click Advanced in the picker’s sidebar, where the four scheduling rules are listed:
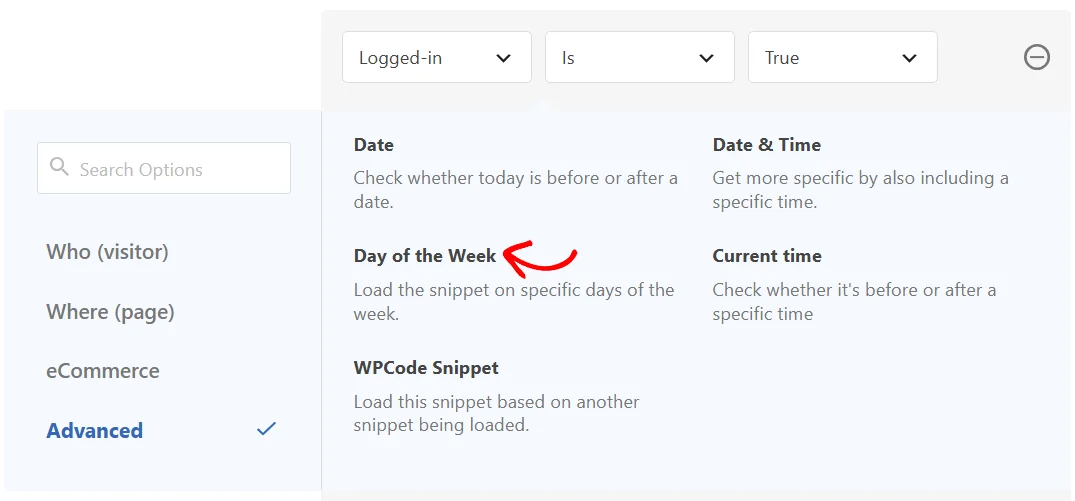
The fifth item in the list, WPCode Snippet, isn’t a scheduling rule. It checks whether another WPCode snippet is loaded on the page.
All four rules use your site’s timezone, which you set under Settings » General in WordPress. It’s worth checking this setting before you build a schedule, so 9:00 means 9:00 where your business is.
For our example, we’ll set up a live chat announcement that shows on weekdays from 9:00 AM to 5:00 PM. The first rule picks the days.
In the picker, choose Day of the Week. Leave the comparison on Is. Next, click the value field and select Monday through Friday.
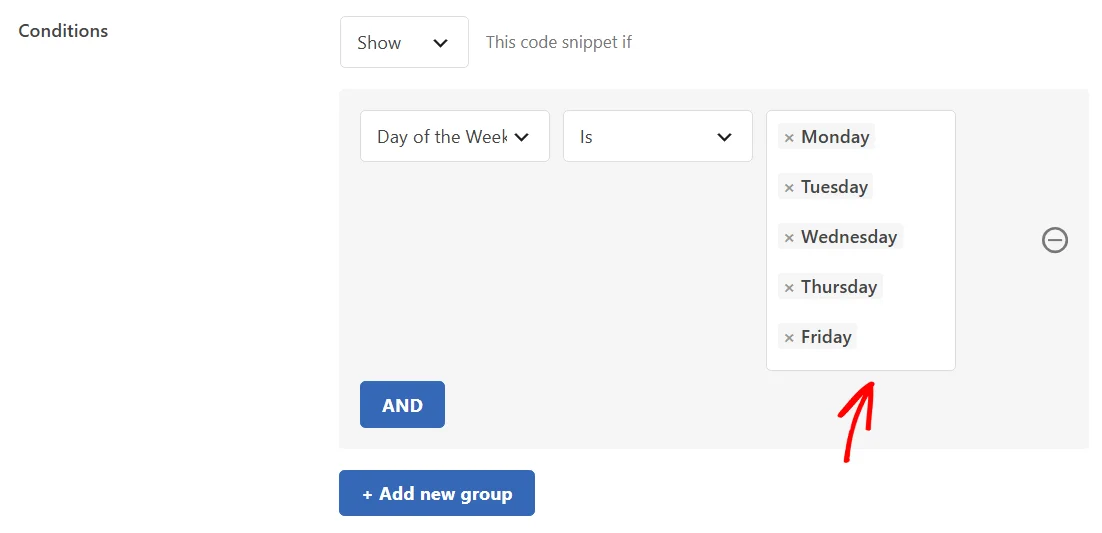
The rule matches when today is any of the days you selected. To run a snippet on every day except a few, choose Is not and select the days to skip.
Next, we’ll add two Current time rules: one for the opening time and one for the closing time. Rules in the same group must all be true, so the snippet runs only on the right days and at the right hours.
Inside the group, click AND to add a second rule.
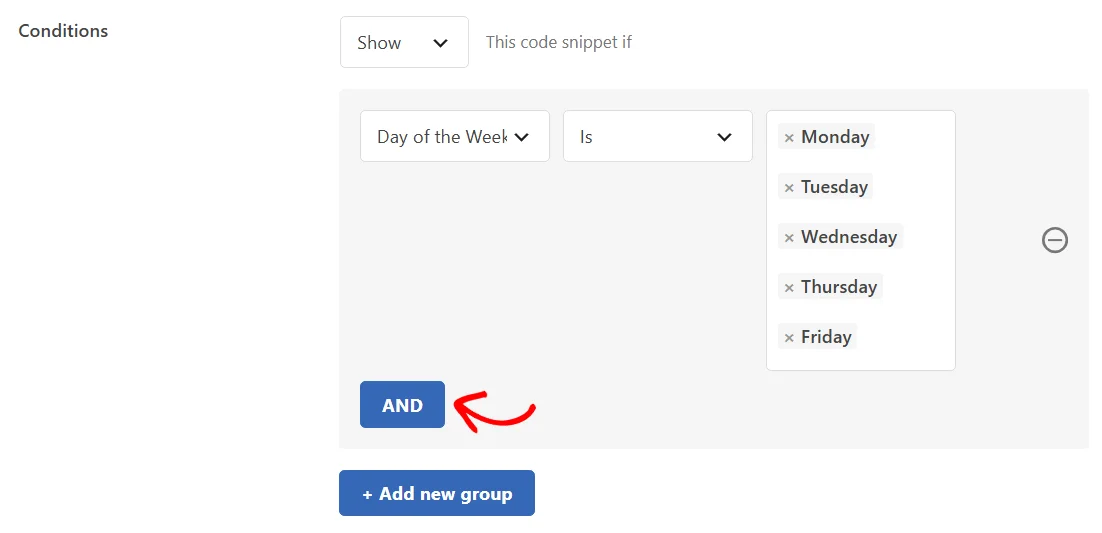
Next, open the new rule’s picker and choose Current time from the Advanced category. Then set the comparison to Is on or After and the time to 09:00.
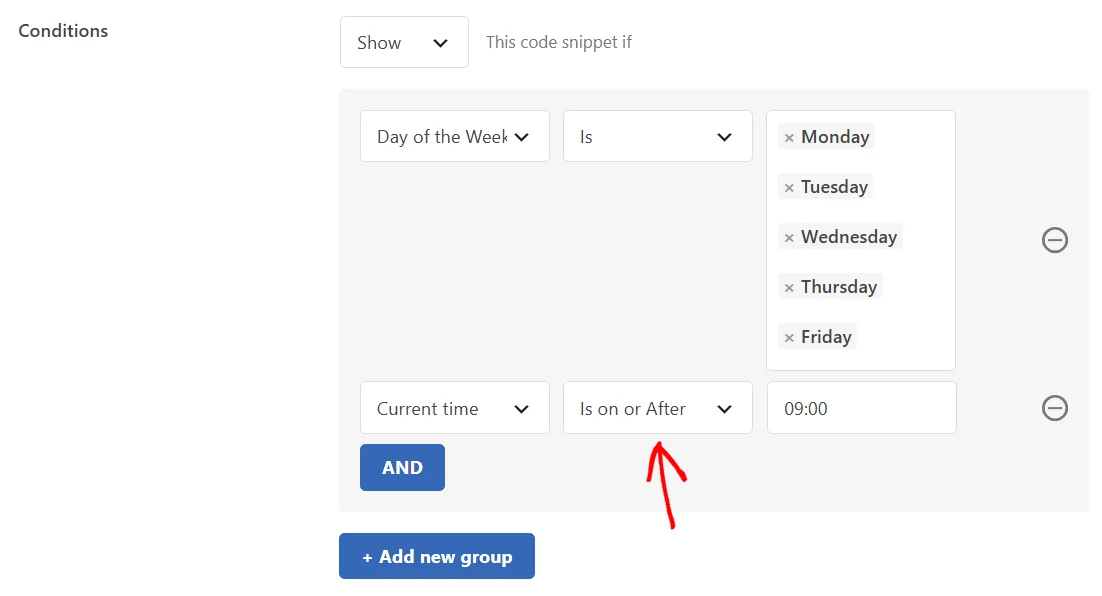
Now click AND again and add another Current time rule. This time, set the comparison to Is Before.
When you click the value field, a time picker opens with hour, minute, and AM or PM controls. You can also type the time in 24-hour format.
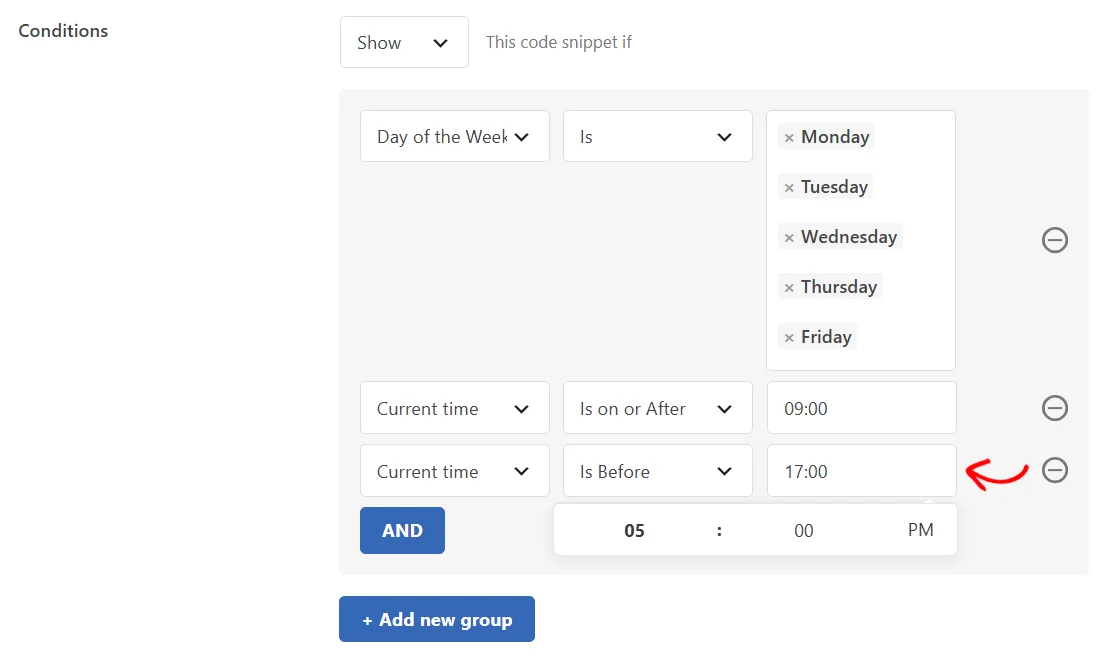
For this rule, pick 5:00 PM, which the field shows as 17:00. Here’s the finished group.
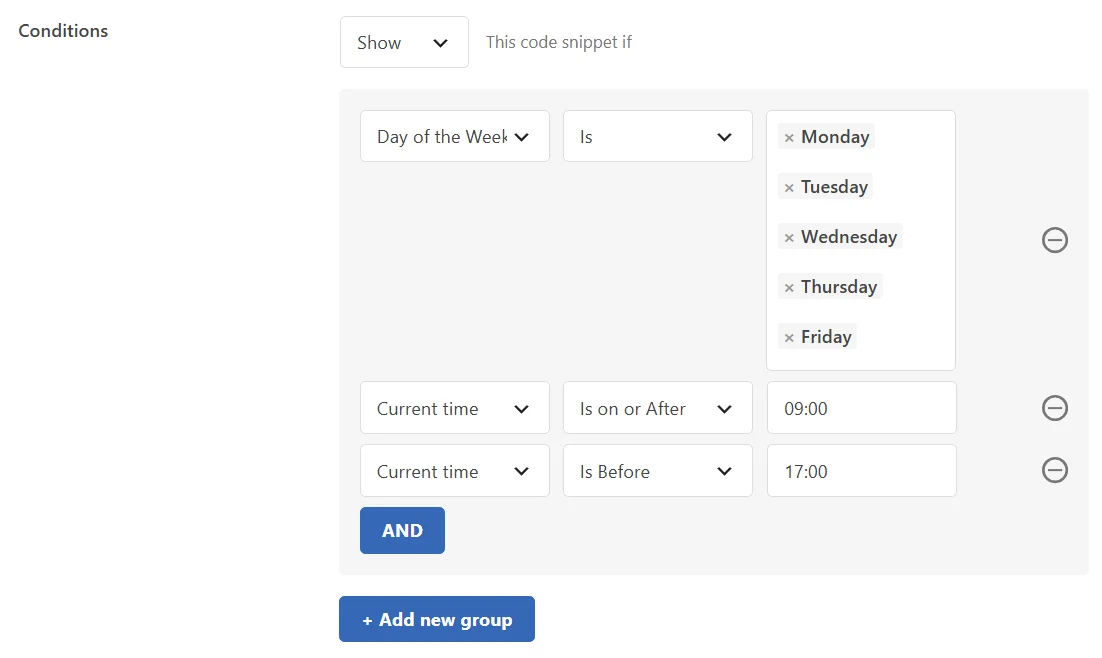
Is Before 17:00 stops the snippet at 5:00 PM exactly. Is on or Before 17:00 keeps it running through 5:00 PM and stops it at 5:01 PM.
Current time compares with Is, Is Before, Is After, Is on or Before, and Is on or After. Pairing two of them sets the edges of your time range.
For a one-time event, such as a holiday sale, use two Date & Time rules to mark when it starts and ends. Unlike the Schedule snippet dates, these rules can sit in the same group as other rules. For example, you can add them to the weekday and business hours group above.
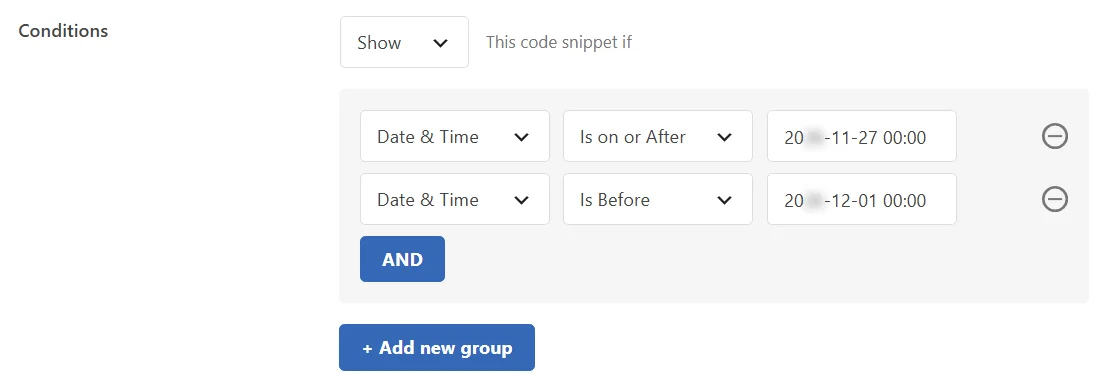
In a group, choose Date & Time from the Advanced category. Next, set the comparison to Is on or After and pick the start date and time.
Then click AND and add a second Date & Time rule. For this rule, set the comparison to Is Before. When you click its value field, a calendar opens so you can pick the end date and time.
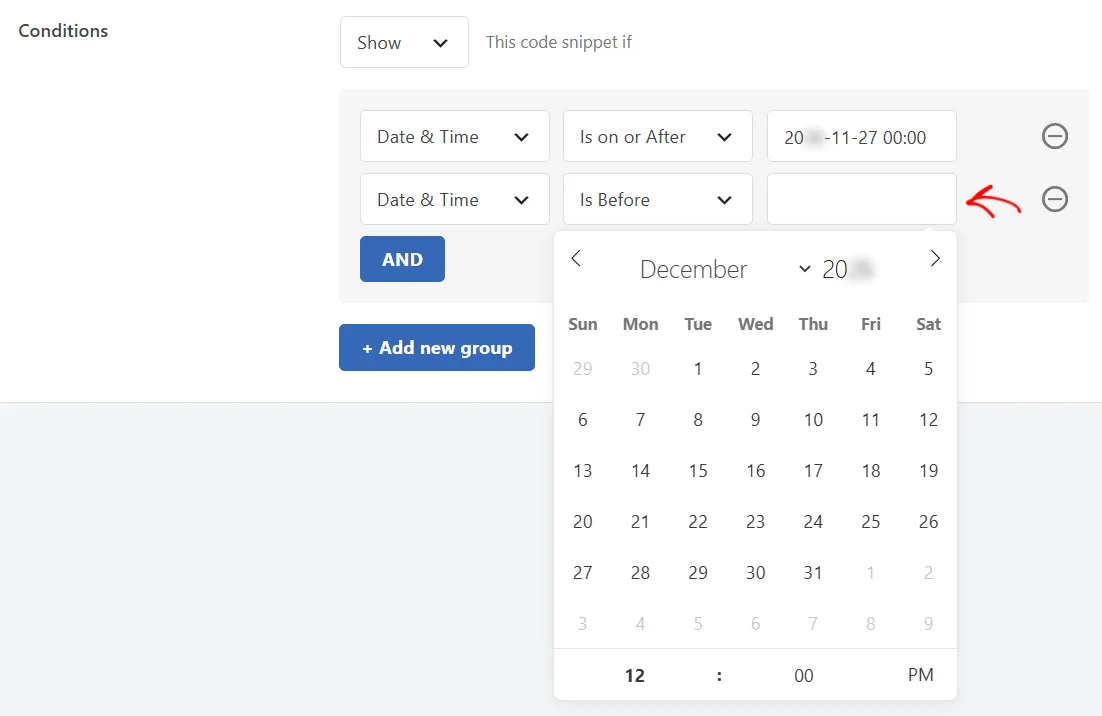
Here, the snippet starts at midnight on November 27 and stops at midnight on December 1, so it runs through the whole of November 30.
If you don’t need a specific time, the Date rule works the same way with whole days. For example, Date Is on or Before November 30 includes all of November 30.
When your schedule is ready, click Update at the top of the snippet editor. On a snippet you haven’t saved yet, this button reads Save Snippet instead.
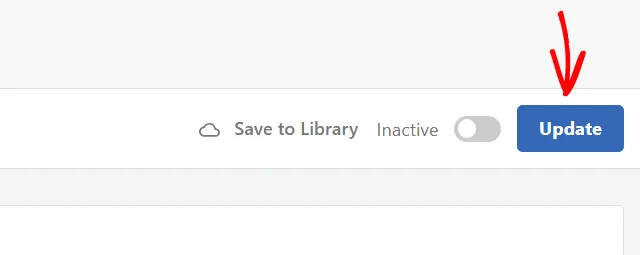
Your schedule takes effect once the snippet is saved and its status toggle, just left of the Update button, reads Active.
That’s it! You now know how to schedule WPCode snippets with start and end dates and with scheduling rules. Next, take a look at our complete guide to snippet locations to choose where on the page your scheduled snippet appears.
Below, we’ve answered some of the most common questions about scheduling snippets in WPCode.
Both the Schedule snippet dates and the scheduling rules use the timezone set in your WordPress settings under Settings » General. A visitor’s own timezone doesn’t change when the snippet runs.
Yes, with two groups. WPCode compares Current time within a single day, so one group with Is on or After 22:00 and Is Before 06:00 never matches. Instead, create one group with Current time Is on or After 22:00, and a second group with Current time Is Before 06:00. The snippet runs when either group matches.
To skip a single day, add a Date rule with Is not and that date to the group. To skip several days in a row, duplicate the schedule into two groups. Add Date Is Before your first closed day to one group, and Date Is After your last closed day to the other.
Both apply. The snippet runs only inside the Schedule snippet window and only when its conditional logic rules match.
Yes. WPCode checks the Schedule snippet dates and the conditional logic rules when the snippet’s shortcode runs, as well as when it inserts the snippet automatically.
A shortcode outputs the snippet only where its rules match, even when the Show dropdown is set to Hide. Our guide on using Smart Conditional Logic covers this in more detail.
WPCode checks the schedule each time WordPress builds a page. If your site uses a page caching plugin, visitors may see a cached copy of the page that was built earlier. In that case, the snippet appears or disappears once the cache refreshes. See how to clear your cache in WordPress to refresh it right away.
Future-proof your website with WPCode Snippets and improve the way you manage code across all your websites.
Copyright © 2026 WPCode. WPCode® is a registered trademark of WPCode, LLC


The WordPress® trademark is the intellectual property of the WordPress Foundation. Uses of the WordPress®, names in this website are for identification purposes only and do not imply an endorsement by WordPress Foundation. WPCode is not endorsed or owned by, or affiliated with, the WordPress Foundation.