
TL;DR:
To change your WordPress font, install WPCode, go to Code Snippets » Add Snippet, choose the CSS type, and paste a font-family rule targeting body and h1, h2, h3. Set it to auto-insert in the header and activate it. Your font change goes live and stays live no matter which theme you’re running.
Every WordPress theme ships with a default font. It was chosen by the theme developer, not you. And most of the time, it’s not quite what you had in mind for your site.
Changing it sounds simple. But most tutorials either point you to the Customizer, where your CSS quietly disappears if you switch themes, or tell you to edit your theme’s style.css file.
That second option is a reliable way to break your site if something goes wrong.
There’s a better approach to changing your font in WordPress.
You add a small CSS snippet once, using WPCode. It lives inside WPCode instead of your theme files. So when you update your theme or swap to a new one entirely, your font stays exactly where you left it.
This guide covers how you can easily change your font using a code snippet, the recommended approach.
But to make sure you can select the best approach for you, we also walk you through how to change your website font using your WordPress customizer and page builders.
Key Takeaways
- WPCode stores your font snippet outside your theme. Theme updates and theme switches do not remove it.
- Adding the Google Fonts embed code in the header makes the font available before your CSS applies the
font-familyrules. - Target
bodyandh1, h2, h3separately. Headings often inherit from different default rules than body text. - Use two fonts maximum: one for headings, one for body text. More than two adds load time and visual noise.
- The Customizer’s Additional CSS is tied to your active theme. Switch themes and it disappears. The WPCode method does not have this problem.
Before You Start Changing Your Site Font with a Code Snippet
Two things to sort out before diving in:
- Pick your font. Go to Google Fonts, browse the library, and note the exact names of the fonts you want. You’ll need them when writing the CSS in Step 3. The pairing table below is a good starting point.
- Know your theme type. Classic themes use the Customizer (Method 2). Block-based themes like Twenty Twenty-Five use the Full Site Editor instead. Method 2 below covers both. If you’re not sure which you have, check under Appearance in your WordPress admin. If you see Customize, it’s a classic theme.
WPCode installation is covered in Step 1 of Method 1. No other setup needed.
Here is a table of contents, so that you can skip to any method you want to use below.
- What Is CSS? (And Why It Controls Your Fonts)
- How to Pick a Font for Your WordPress Site
- Method 1: Change Your WordPress Font Using WPCode
- Method 2: Change Font Using the WordPress Customizer
- What About Elementor, SeedProd, and Other Page Builders?
- Which Method Should You Use?
- Frequently Asked Questions
- Add Your Font Snippet With WPCode: No Theme Editing Needed
What Is CSS? (And Why It Controls Your Fonts)
CSS stands for Cascading Style Sheets. It’s the code that controls how your site looks. This includes your fonts, colors, spacing, and element sizes.
Your WordPress theme already uses CSS to set a default font. So, when you add your own CSS, you’re not replacing the theme’s stylesheet. You’re adding a rule that takes priority over it.
Check out our guide on what a code snippet is to understand the different types, what they do, and where to insert them.
While there are different ways you can insert this CSS code, the safest place to add it is through a dedicated snippet manager like WPCode. Not your theme’s style.css file, or functions.php.
If you edit your parent theme files directly, those changes are overwritten the next time the theme updates. A child theme helps you avoid this problem.
How to Pick a Font for Your WordPress Site
Before you write any CSS, you need a font.
Google Fonts is the easiest starting point. It’s free, has over 1,800 options, and works in WordPress without uploading any files.
Browse the library, pick a style, and copy the embed code; we’ll use that in a moment. For a full walkthrough, see how to add Google Fonts in WordPress.
As a general best practice, stick to one or two font families. One for headings. One for body text. This keeps your design consistent and avoids loading unnecessary font files.
Here’s a quick guide to selecting a font based on your site type:
| Site type | Body font style | Heading font style | Example pairing |
|---|---|---|---|
| Business / SaaS | Clean sans-serif | Bold sans-serif | Open Sans + Montserrat |
| Blog / content | Readable serif | Bold sans-serif | Merriweather + Poppins |
| Portfolio / creative | Minimal sans-serif | Display serif | Raleway + Lora |
| eCommerce | Clean sans-serif | Bold sans-serif | Lato + Oswald |
| Restaurant / lifestyle | Elegant serif | Display or script | Playfair Display + Lato |
Method 1: Change Your WordPress Font Using WPCode
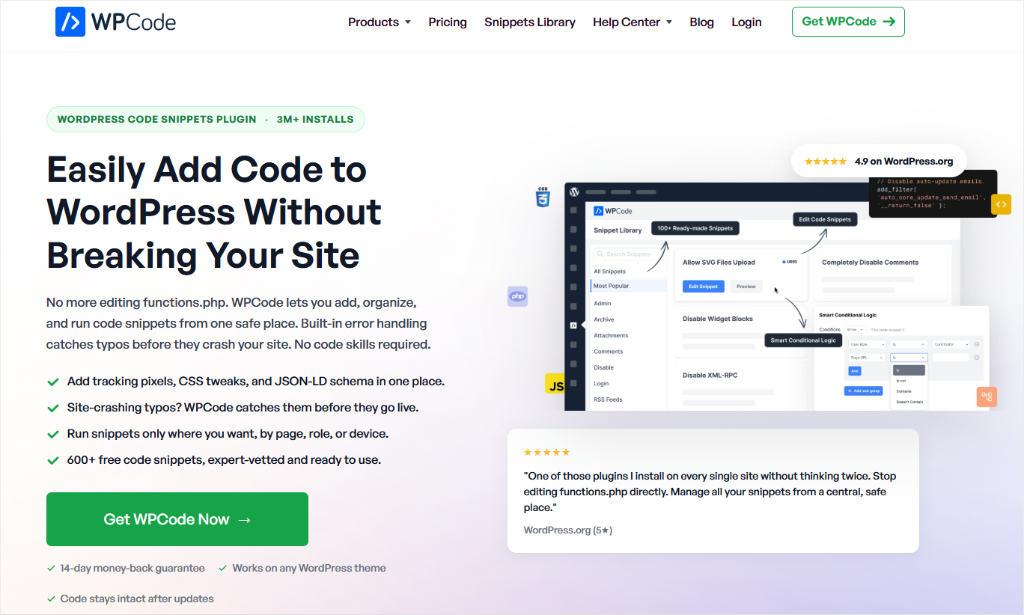
Using WPCode is the method we recommend. Apart from allowing you to easily modify your fonts, it allows you to tweak the font later and want to undo it. WPCode keeps a revision history, which means no guessing what the CSS used to say.
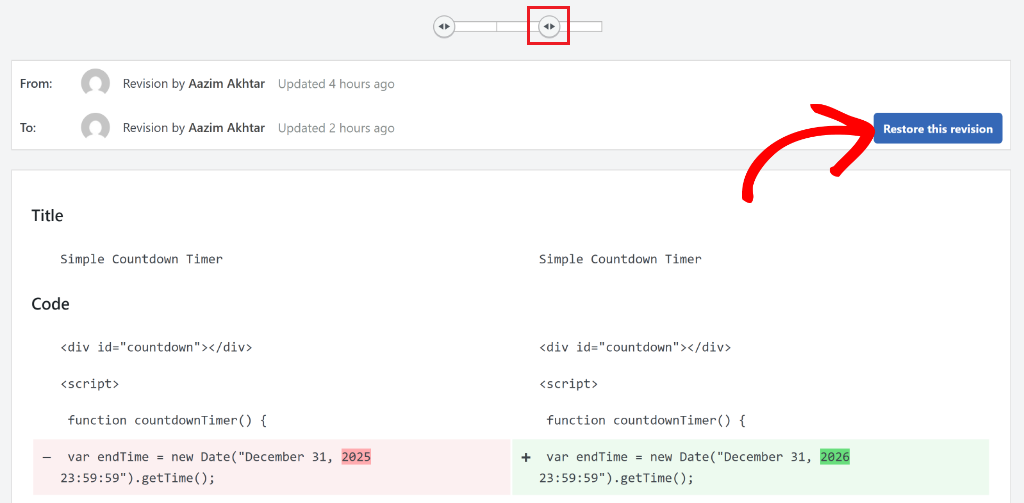
Here is a full tutorial on how to track code snippet changes and make revisions.
Step 1: Install WPCode
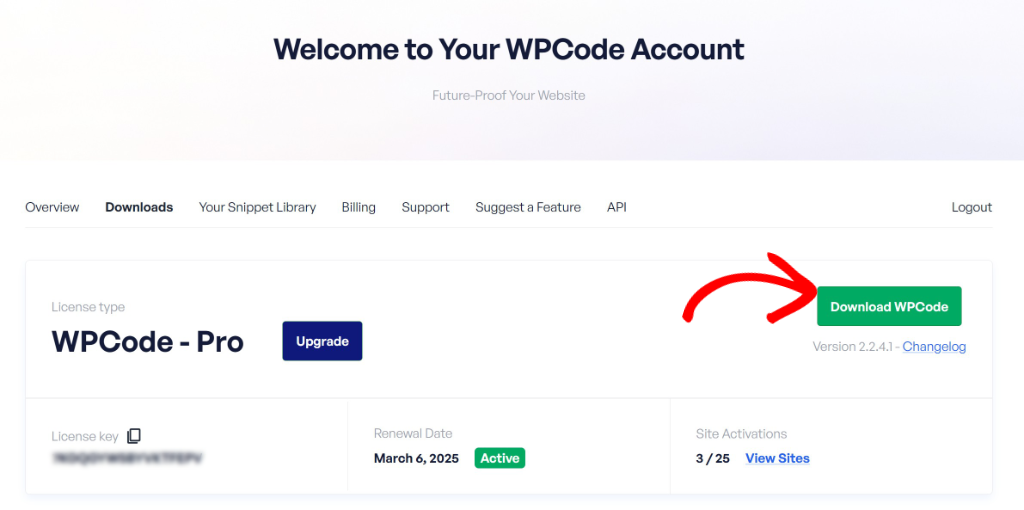
First, install WPCode from the WordPress plugin directory. If you want to use the free version, or download it from wpcode.com.
Install WPCode from the WordPress plugin directory for the free version, or download it from the WPCode website if you’re using Pro. For the Pro version, you will need to activate it.
For this tutorial, we will use WPCode Lite since you can do everything we describe below on the free plan. To get it, simply navigate to Plugins » Add New. In the search box, type ‘WPCode’ and look for the plugin.
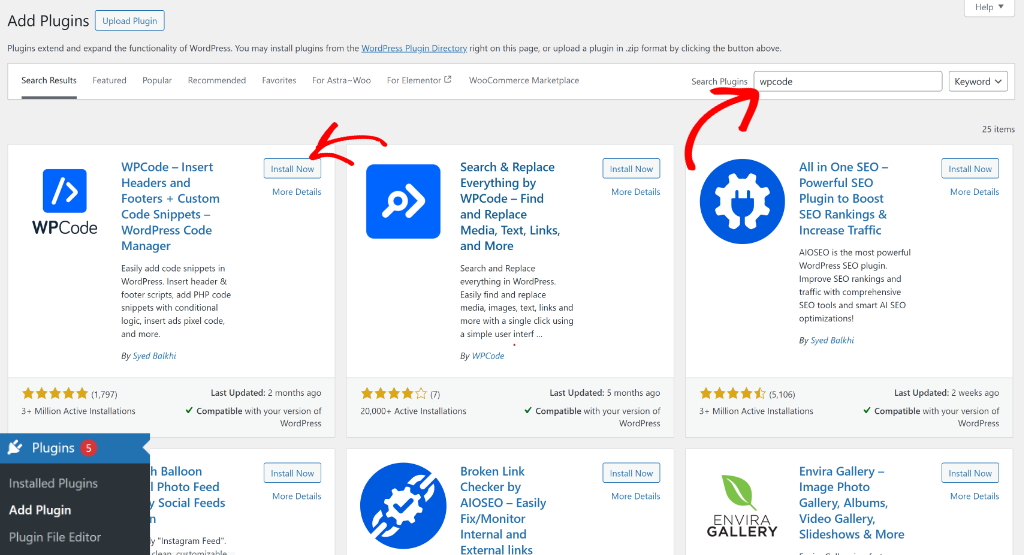
After that, install and activate the plugin as you would any other.
If you want to use a pro version, first purchase a plan. Then log in to your WPCode account. Here, download the plugin and upload, install, and activate it in your WordPress dashboard.
Here is a full step-by-step guide on how to set up WPCode if you need assistance.
That’s all the setup needed.
Step 2: Add Your Google Font Embed Code
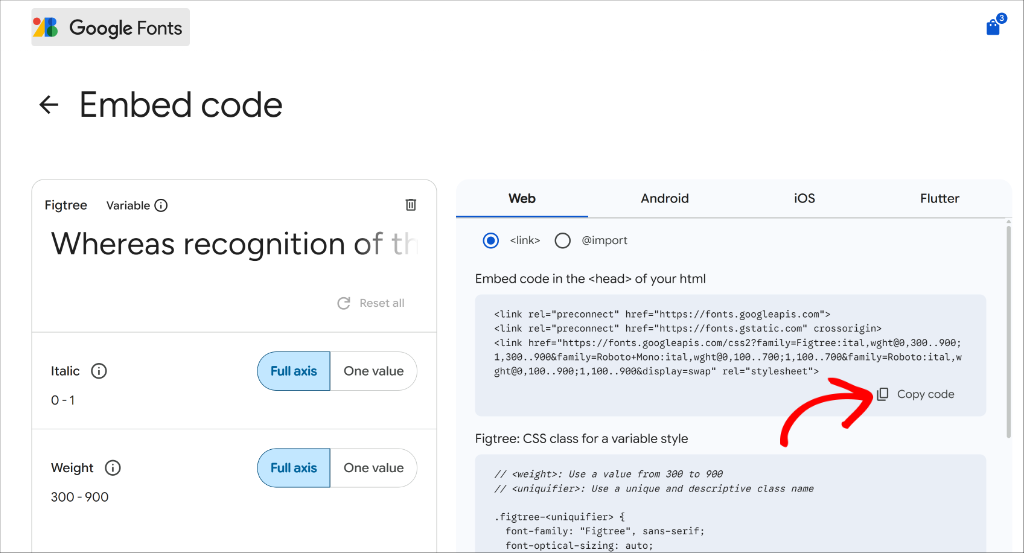
Next, go to Google Fonts, select your font. Choose the styles you want (Regular 400 and Bold 700 are a good start), and copy the <link> embed code.

Next, you will see different embed code options for the selected font.
From here, copy the embed code under the ‘Web’ tab that you’ll need to paste into WPCode’s Header & Footer section of your WordPress website.
Then, in WordPress, go to Code Snippets » Header & Footer. Paste the embed code into the Header section and click Save Changes.
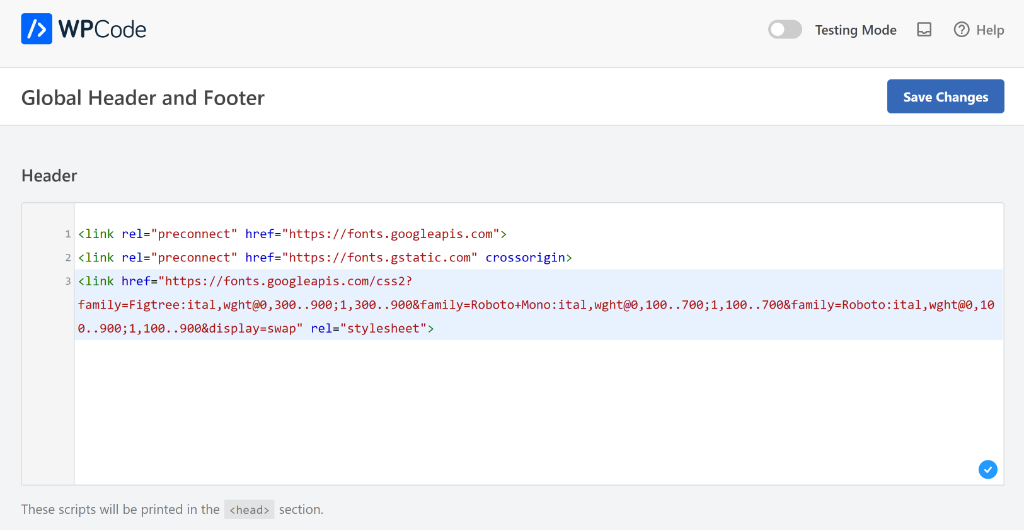
This loads the font on your site. The next step tells WordPress where to apply it.
You can learn more by following our guide on how to add header and footer code in WordPress.
Step 3: Create a CSS Snippet
Loading the font isn’t enough on its own; your theme’s CSS is still telling WordPress to use its default font instead. This CSS snippet overrides that.
Go to Code Snippets » Add Snippet and select “Add Your Custom Code (New Snippet).”
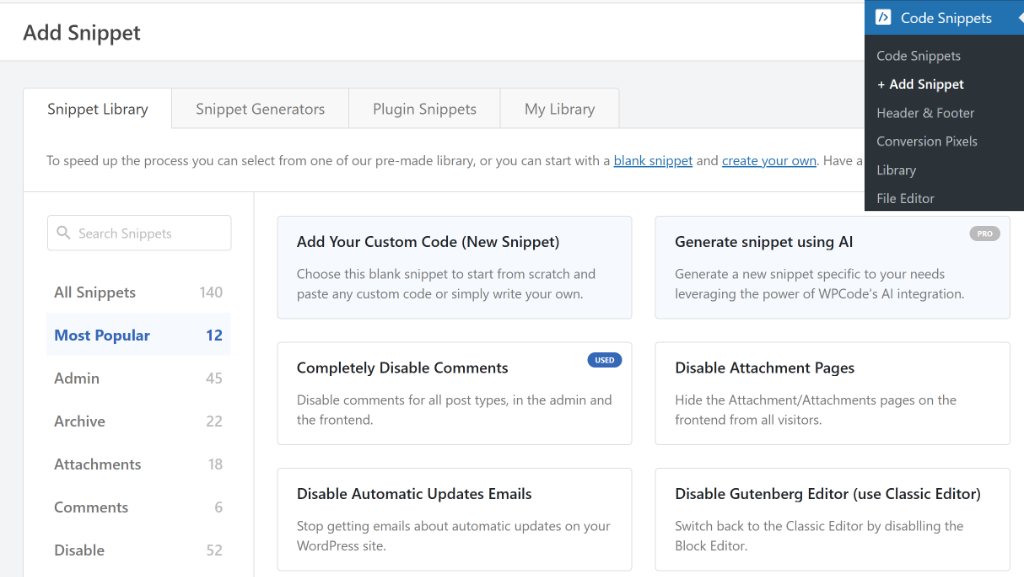
Then, on the next screen, find the CSS Snippet option and select it.
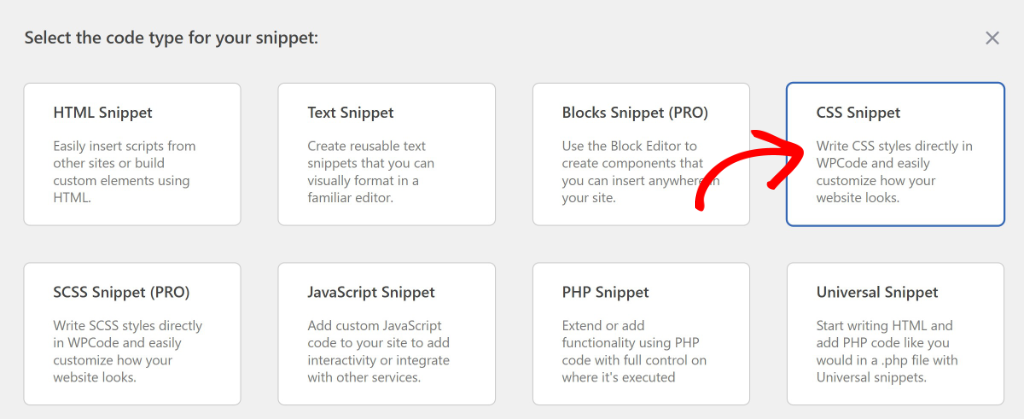
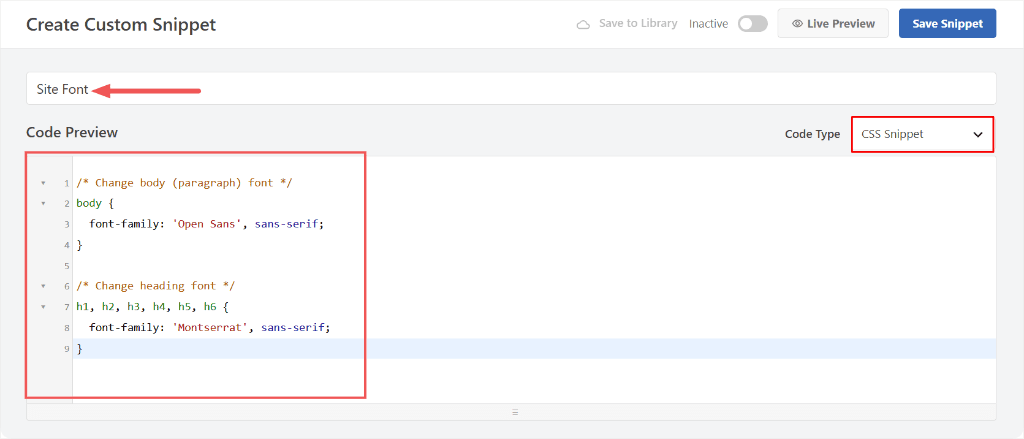
Give it a name like “Site Font”; this works fine.
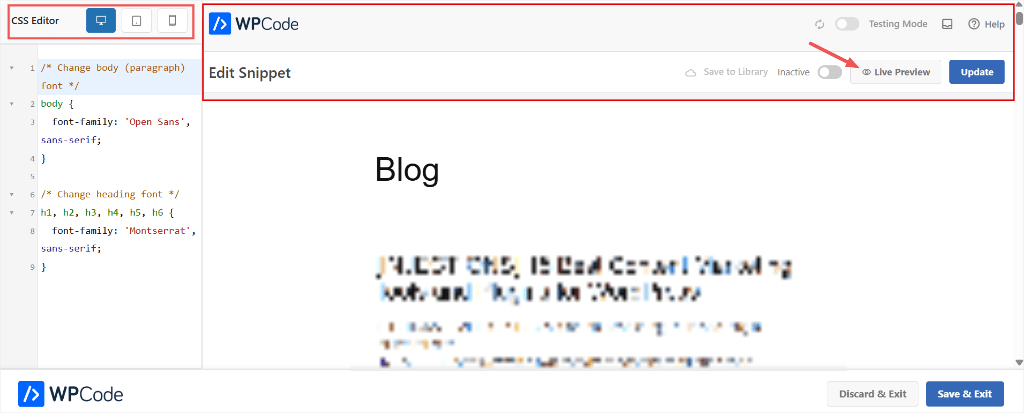
Paste this into the code editor:
/* Change body (paragraph) font */
body {
  font-family: 'Open Sans', sans-serif;
}

/* Change heading font */
h1, h2, h3, h4, h5, h6 {
  font-family: 'Montserrat', sans-serif;
}
Replace Open Sans and Montserrat with the font names you chose from Google Fonts. Keep the fallback as sans-serif or serif. This tells the browser what to use if the Google Font fails to load.
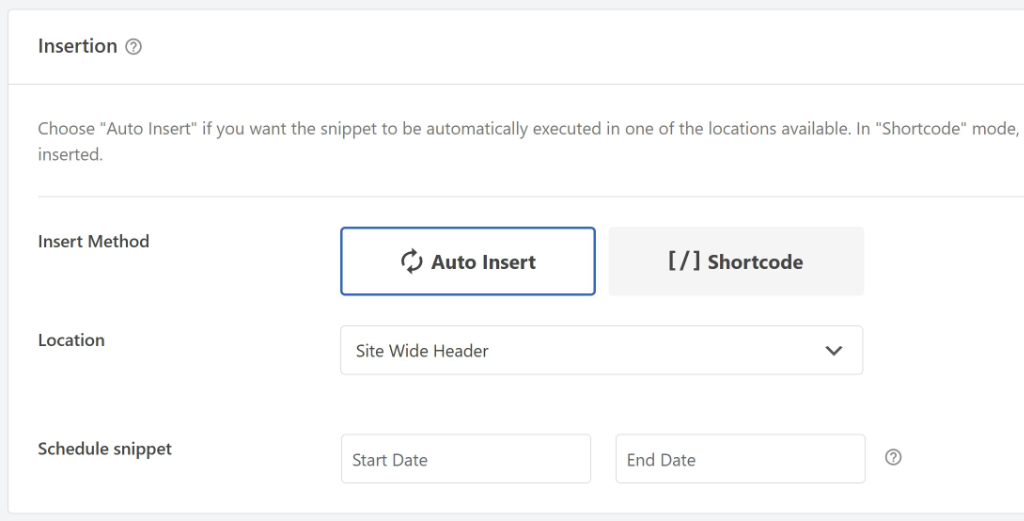
Step 4: Set to Auto Insert and Activate
Scroll down to the Insertion section and make sure Auto Insert is toggled on. Then, with the dropdown, set the location to Site Wide Header.
After this, scroll back to the top and toggle the snippet to Active in the top right. Click Save Snippet.
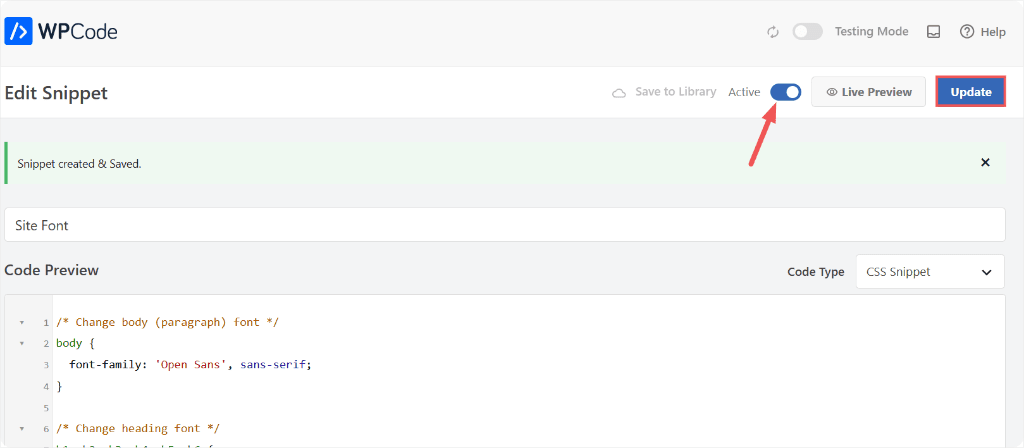
Your font is now live across your entire site. Visit your Live site and check your current font.
On top of that, you can change your font to any font you want, not just Open Sans. See the screenshot below and see how I changed it to Story Script.

This CSS lives in WPCode, not in your theme files. Switch themes or run a theme update, and your font snippet stays active either way.
See Changes in Real Time (WPCode Pro)
WPCode Pro users get the Live Preview button, which helps you see how your fonts will look live before activating the code snippet. Since adding fonts is very visual, Live Preview helps you double-check.
To do this, click on the “Live Preview” button at the top to see how your fonts look live on your site.
Method 2: Change Font Using the WordPress Customizer
If your theme uses the classic WordPress Customizer, there’s a built-in CSS panel you can use instead.
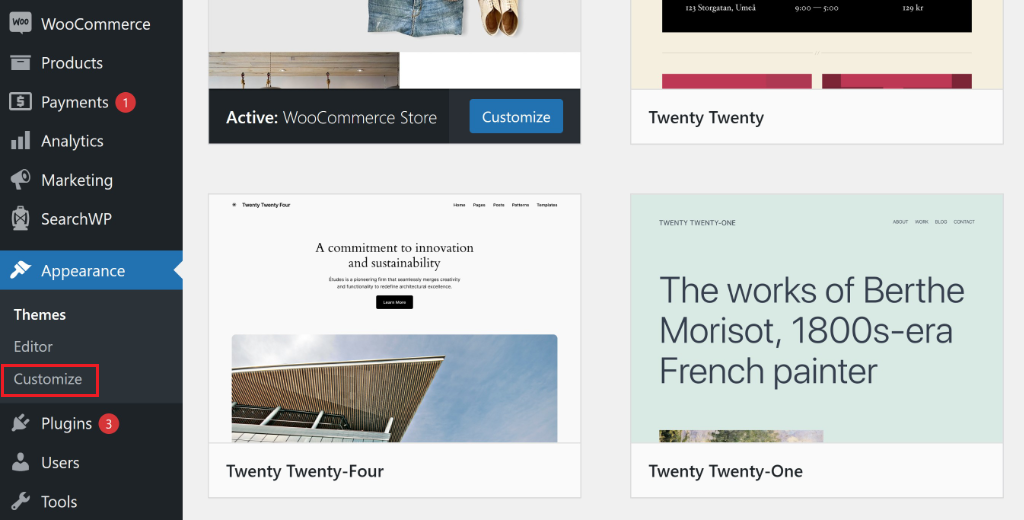
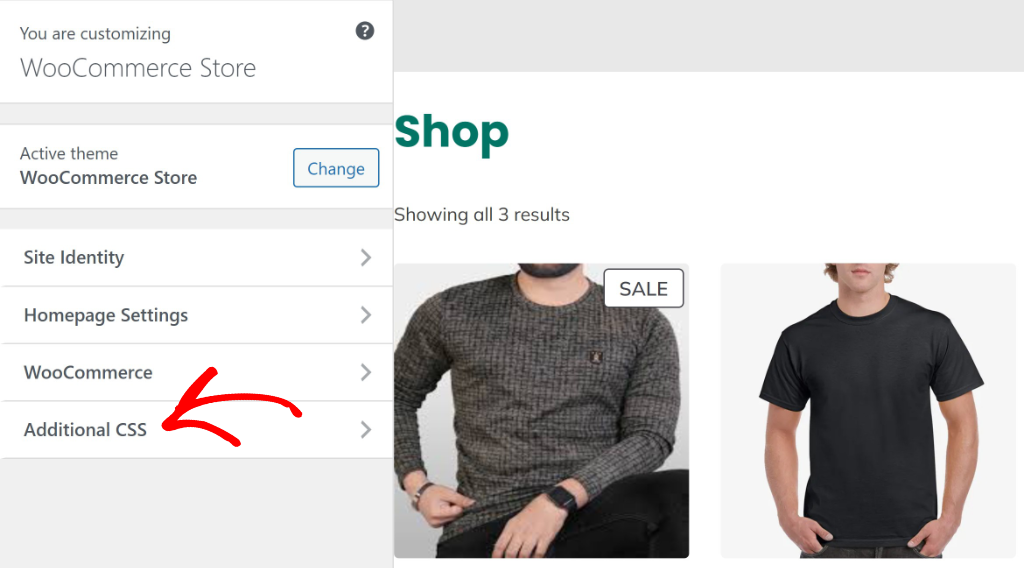
Go to Appearance » Customize.
In the left panel, click Additional CSS. Paste your font CSS, the same code from Step 3 above. Click Publish.
This CSS is tied to your current theme. Switch to a different theme and it disappears. The WPCode method does not have this limitation. The snippet stays active no matter which theme is running.
For a full overview of all four ways to add CSS in WordPress, see how to add custom CSS to your WordPress site.
What About the Full Site Editor?
Step 1: Install your font
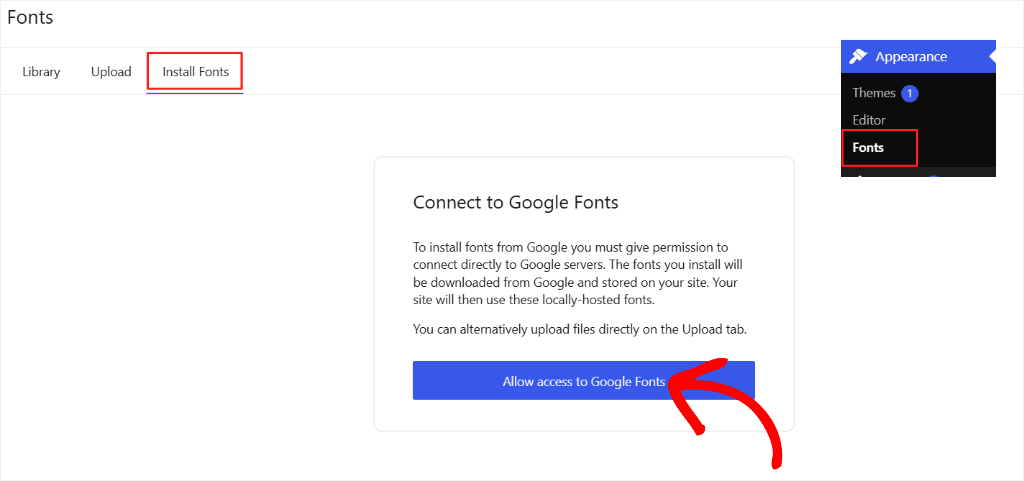
If your WordPress installation includes the Fonts library (available in newer versions of WordPress), go to Appearance » Fonts and open the Install Fonts tab.
The first time you open it, WordPress asks permission to connect to Google. Click Allow access to Google Fonts.
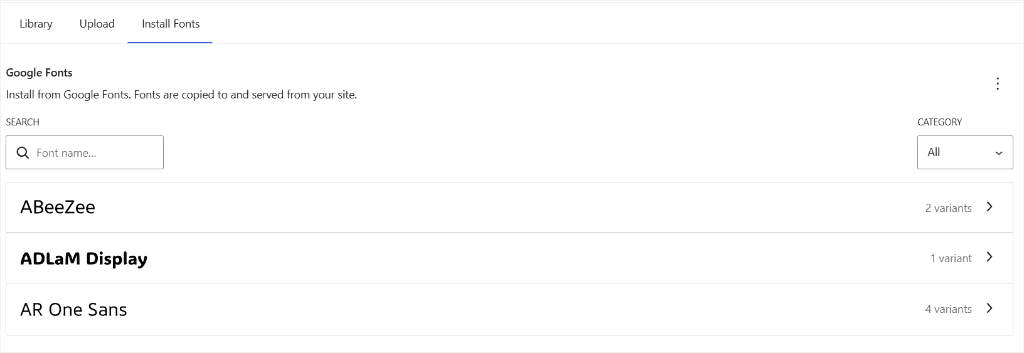
When installed through the WordPress Fonts library, the font files are stored on your own server instead of being requested from Google each time someone visits your site.
Once connected, search for your font by name, click it, choose your variants, and install it. It appears in your Library tab once installed.
Prefer to use your own font file? Click the Upload tab and drop in a .ttf, .otf, .woff, or .woff2 file instead.
Step 2: Apply it in the Editor
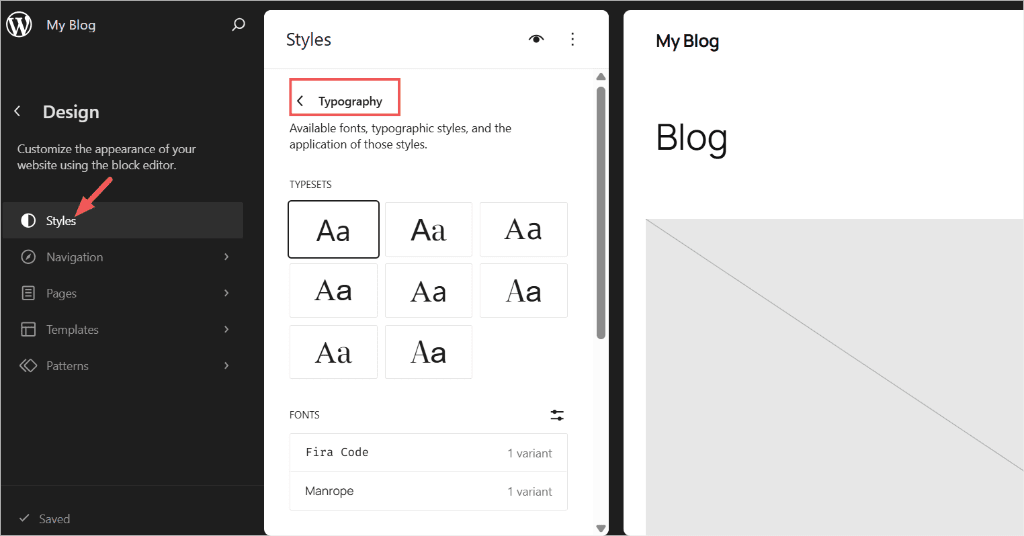
After that, go to Appearance » Editor and click the Styles icon (the circle split in half) in the top right corner.
Open Typography in the right sidebar. From here, you can set fonts for your headings and body text from the fonts you just installed. No CSS required.
Because typography settings are part of your theme’s design, switching to another theme usually means you’ll need to configure them again.
If you want your CSS customizations to stay independent of your active theme, the WPCode method is often the more convenient long-term option.
What About Elementor, SeedProd, and Other Page Builders?
If you built your site with a page builder, fonts are handled inside the builder itself.
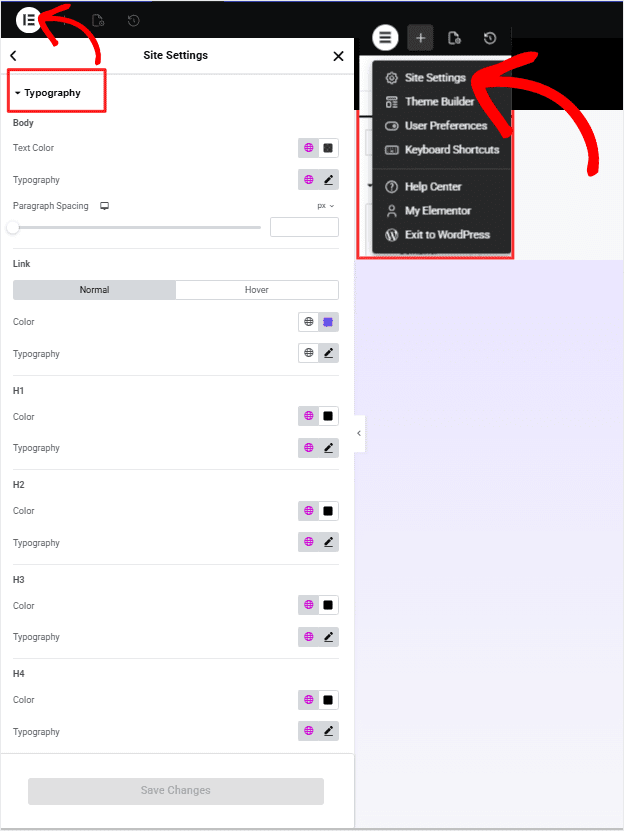
In Elementor, open Site Settings » Typography (or Global Fonts, depending on your Elementor version). From there, you can choose fonts for your headings and body text without writing CSS.
SeedProd works similarly.
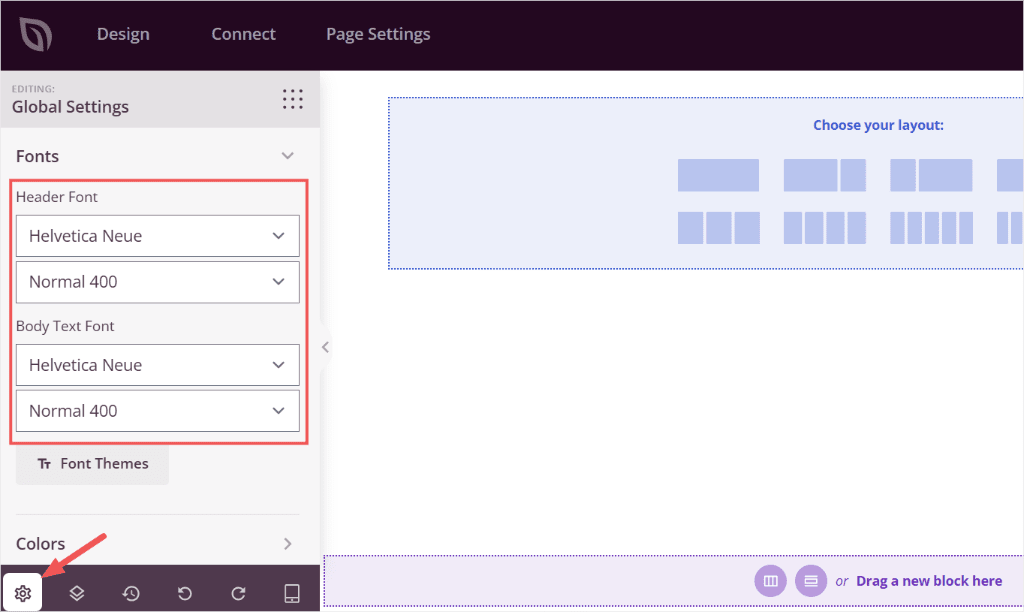
Open the SeedProd editor and click the gear icon in the bottom-right corner to open Global Settings and go to the Fonts tab.
From here, pick your heading font and body font directly from SeedProd’s built-in Google Fonts library. No CSS required.
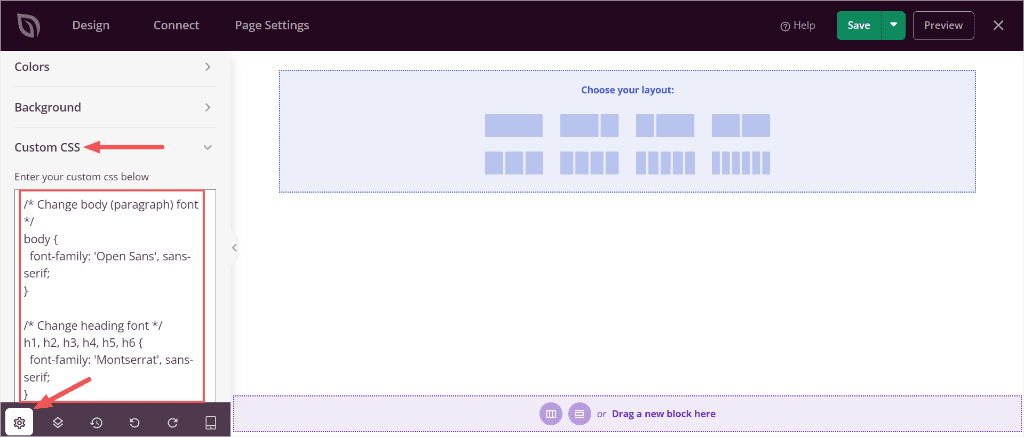
If you are using a self-hosted or custom font file instead, go to Global Settings » Custom CSS and paste a font-family rule pointing to your uploaded file.
/* Change body (paragraph) font */
body {
  font-family: 'Open Sans', sans-serif;
}

/* Change heading font */
h1, h2, h3, h4, h5, h6 {
  font-family: 'Montserrat', sans-serif;
}
These controls affect content built inside the page builder. For site areas outside the builder (the header, footer, and widget areas), the WPCode CSS snippet method above is still the most reliable option.
Which Method Should You Use?
You just built your WordPress site, or you’re finally getting around to making it look the way you always imagined. You don’t want to learn CSS from scratch. You want to make one change, have it work, and move on.
Here’s how all three methods stack up:
| WPCode Snippet | Customizer Additional CSS | Page Builder Fonts | |
|---|---|---|---|
| Beginner-friendly? | ✅ Yes | ✅ Yes | ✅ Yes |
| Free? | ✅ Yes | ✅ Yes | Depends on your builder |
| CSS needed? | Copy-paste only | Copy-paste only | No code at all |
| Survives a theme change? | ✅ Yes | ❌ No | ✅ Yes (inside builder only) |
| Works site-wide? | ✅ Yes | ✅ Yes | Only inside the builder |
| Easy to switch off? | ✅ One toggle | Delete the code manually | Varies by builder |
If you expect to switch themes later, WPCode is usually the more convenient option because the CSS isn’t tied to your current theme.
Your font choice travels with you. Swap themes, try a new design, run an update, the snippet stays on. Everything else resets around it. For more on keeping your customizations safe through any change, see how to keep your website customizations intact with WPCode.
Frequently Asked Questions
Will changing my WordPress font slow down my site?
Loading web fonts adds additional network requests, although the impact is usually small when you limit yourself to one or two font families and you use the <link> embed method. WPCode inserts the Google Fonts embed code into your site’s header, allowing the browser to request the font early during page loading.
What if my font change isn’t showing up?
Start by clearing your cache. A caching plugin may be serving an older version of the page. If the font still isn’t changing, open your browser’s Inspect tool and check the font-family rule on the element. Another CSS rule may have higher specificity. Try using a more specific selector or check whether another CSS rule is overriding yours. Browser developer tools can help you identify which rule is taking precedence.
Does switching themes remove my custom fonts?
With WPCode, no. With the Customizer’s Additional CSS, yes. That’s the main reason we recommend the WPCode method for anything you plan to keep long-term.
How many fonts should I use on my WordPress site?
Two is recommended. One for headings, one for body text. More than two makes your site feel inconsistent and adds unnecessary load time for visitors.
Add Your Font Snippet With WPCode: No Theme Editing Needed
You have a working font snippet now. It’s sitting in WPCode, not in your theme. Every update your theme gets, every new theme you try, every redesign you run, your fonts come with you.
That’s the thing, theme file edits don’t give you. The moment you switch themes, anything stored there resets. WPCode doesn’t reset.
Everything covered in this tutorial can be done with the free version of WPCode. More than 3 million sites already use it for this kind of customization.
Browse the WPCode Code Snippets Library →
When you’re ready to go further, the live preview mode in WPCode Pro lets you see font changes in real time before saving. No more tab switching to check the result.
Start with the free plugin. The font snippet takes about two minutes to set up.
- 👉 Try WPCode Pro to access everything this snippet plugin has to offer →
- 👉 Get started with WPCode for free →
Additional Resources
Now that your fonts are sorted, here is what to do next with WPCode.
- How to Add Header and Footer Code in WordPress (Easily): Add scripts and embed codes to your site header or footer without editing theme files.
- How to Copy-Paste Code Snippets Into WordPress: The full guide to adding any code snippet safely using WPCode.
- How to Add Custom Code in WordPress (Safely For Free): Broader overview of every type of custom code you can add with WPCode.

