

Last year, I made a small change to a custom function on my WordPress site that completely broke my checkout process. The worst part? I couldn’t remember exactly what I had changed or how to undo it.
Not knowing which part of code broke your site can be frustrating. I spent several hours digging through the code, trying different combinations, and testing various fixes.
That’s when I realized I needed a better system for tracking my code changes. Just like WordPress automatically saves revisions of your posts and pages, I required something that would keep track of every code modification I made.
If you’ve been in a similar position as I was, then you’re not alone. With the right plugin, you can easily keep track of all the changes made to a code snippet on your website.
In this guide, I’ll show you how to track code changes and revisions in WordPress, so you never have to panic about broken code again.
Why You Need to Track Code Changes and Revisions?
Making changes to your WordPress site’s code or adding custom snippets without tracking them is like performing surgery without keeping medical records. You might remember what you did today, but good luck recalling the details next month.
I’ve seen too many website owners get stuck in this exact situation. Either a developer or a user adds a snippet to the functions.php file, make a small tweak to improve performance, or modify a plugin’s behavior. Everything works fine initially.
Then weeks later, something breaks. Maybe a plugin update conflicts with their custom code, or they need to make another change but can’t remember what the original code looked like.
Without proper tracking, you’re left guessing. You might accidentally delete working code while trying to fix a problem, or spend hours recreating something you already built perfectly the first time.
Code revision tracking solves these headaches by creating a detailed history of every change you make. You can see what code looked like before and after each modification and instantly restore any previous version.
This becomes even more important if you work with a team or hire developers. When multiple people make changes to the same codebase, tracking revisions prevents conflicts and makes it easy to see who changed what and when.
That said, let’s look at an easy to keep track of all the changes to your code snippets.
Tracking Changes and Revisions to Code Snippets
Setting up code revision tracking might sound complicated, but WPCode makes the entire process straightforward.
WPCode is the best code snippet plugin for WordPress that makes it very easy to add, edit, and manage custom snippets to your site. It offers a powerful code revisions feature that lets you see exactly what changes were made to your snippet and who made them so that you can easily go back to what works.
Besides that, WPCode also comes with a snippet library with over 140+ verified snippets from experts. You can add custom features and functionality to your site without writing code yourself.
Note: For this tutorial, I will use the WPCode premium version because it includes the Code Revisions feature. You’ll find this feature in WPCode Basic and higher pricing plans. There is also a WPCode Lite version, but it doesn’t allow you to track changes to your custom snippets.
With that, let’s look at the steps for tracking changes and restoring previous code versions.
Step 1: Install and Activate WPCode Plugin
First, you’ll need to visit the WPCode website and sign up for a new account.
Once you’ve created a new account, the next step is to download the WPCode plugin files.
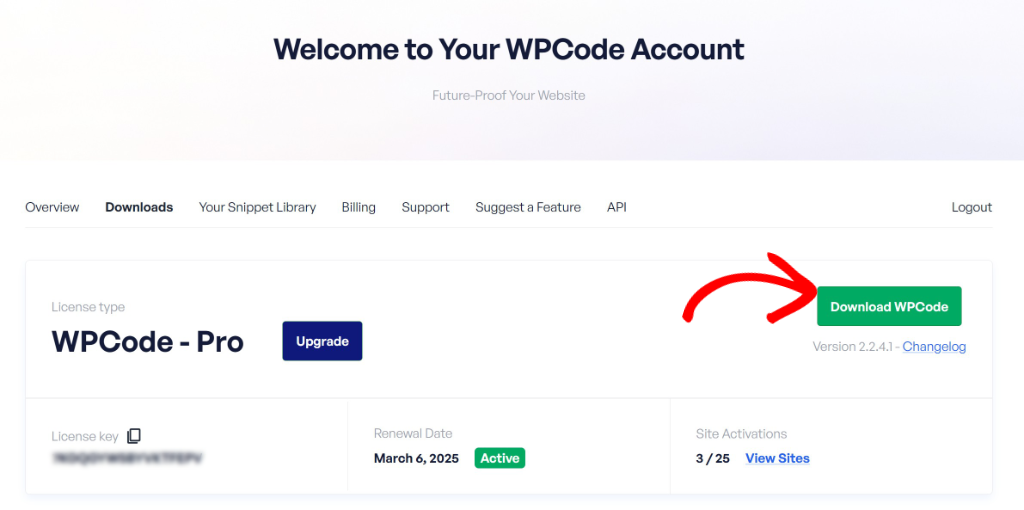
Simply head to your account area and switch to the ‘Download’ tab. After that, click the Download WPCode button and save the ZIP files on your computer.
Next, you’ll need to upload the plugin files to your WordPress website. If you need help, then please see this guide on how to install a WordPress plugin.
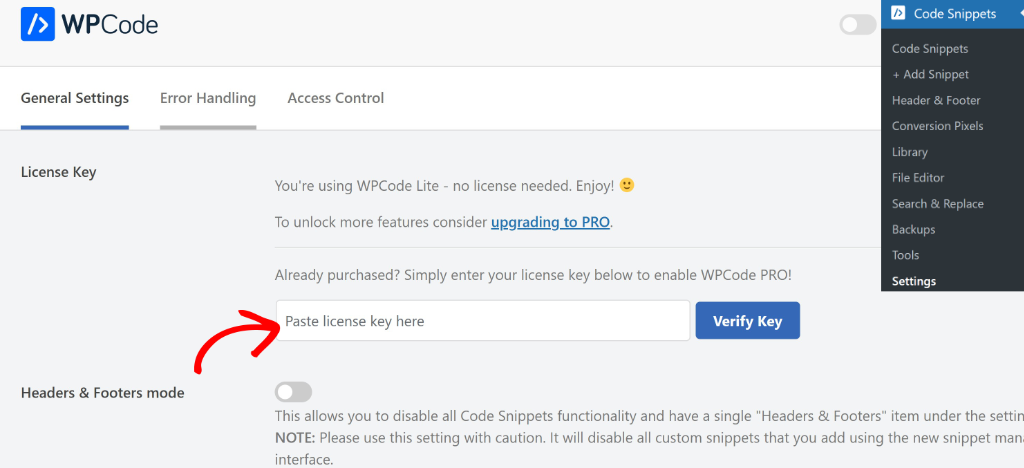
Upon activation, you can go to Code Snippets » Settings in your WordPress dashboard and enter your license key. You can find this key in your WPCode account area.
Step 2: Add a Custom Code Snippet
Now that WPCode is active on your site, you can use it to add custom code snippets on your site and track changes.
Simply head to Code Snippets » Add New from your WordPress dashboard. Here, you can pick a snippet from WPCode’s a pre-built library. For example, you can add a snippet to show a back to top button, enable maintenance mode, add social share buttons, disable comments, and more.
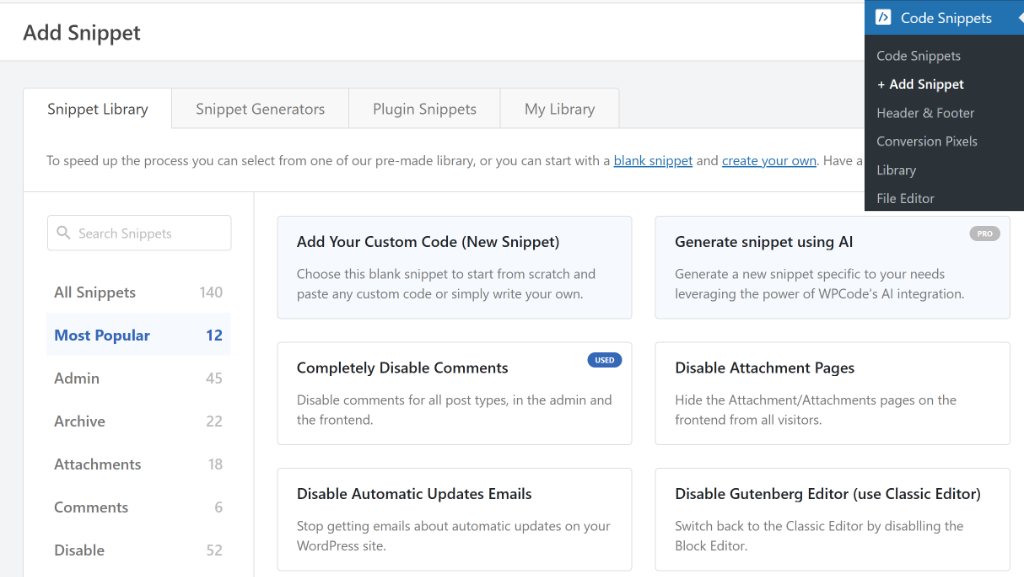
On the other hand, you can also use the ‘Add Your Custom Code’ option and enter your custom PHP, CSS, HTML, and JavaScript snippets.
To learn more, please see our guide on how to add custom code snippets in WordPress.
Step 3: View Changes to Code Snippets
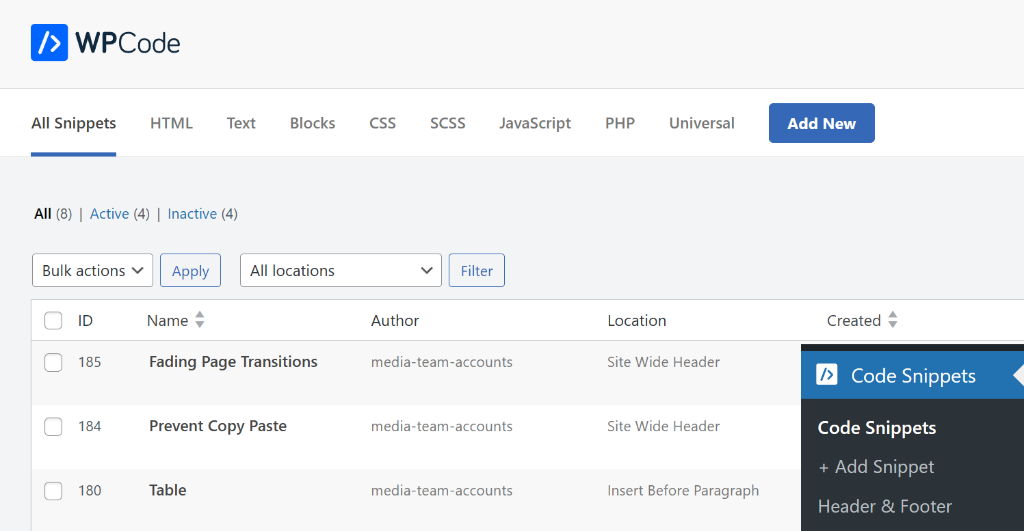
Next, you can head to Code Snippets from the WordPress dashboard. Here, you’ll see all the code snippets you’ve added to your website using WPCode.
Simply select the snippet for which you’d like to track changes.
Once you’re in the code editor in WPCode, you can scroll down to the Code Revisions section.
From here, you’ll see all the changes that were made to your snippet. WPCode shows the username of the person who made the changes and when were they made.
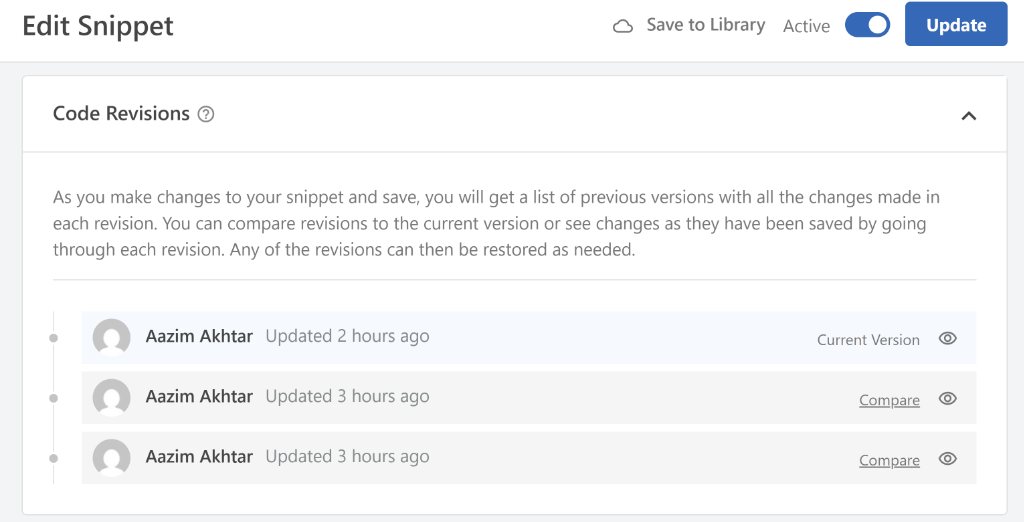
If you want to see what changes were made and compare it with previous versions, then simply click the Compare button.
On the next screen, you will see a side by side comparison of two versions of your code snippet. You can use the slider at the top to move between different versions.
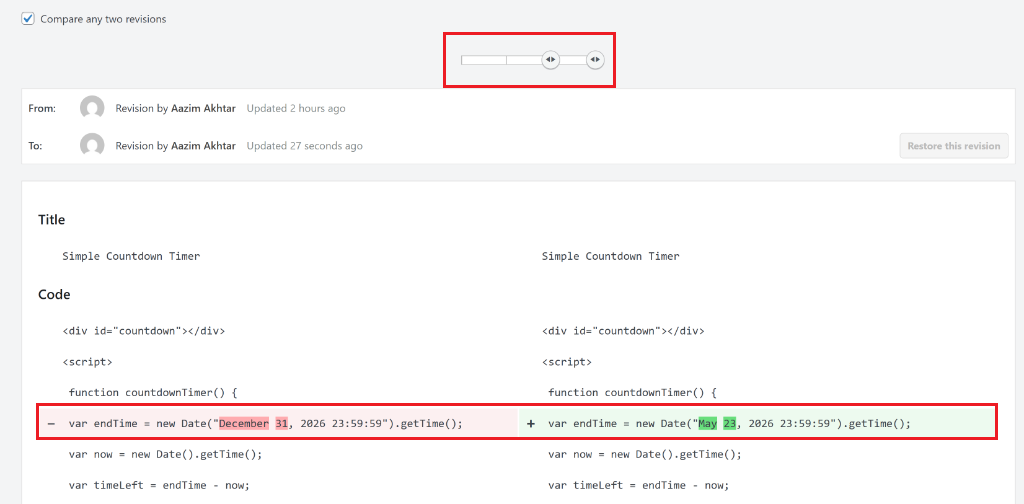
Besides that, WPCode will also highlight changes in the code snippet. For example, on the left, you’ll see the previous snippet version with the changes highlighted in red. While on the right, you’ll see the latest snippet version with changes highlighted in green.
Step 4: Restore Previous Code Snippet Version
Now, let’s say you want to restore the code snippet to a previous state and fix any errors it might be causing.
To do this, you will first need to move the slider on the far right towards the left. This will show a previous version of the code snippet.
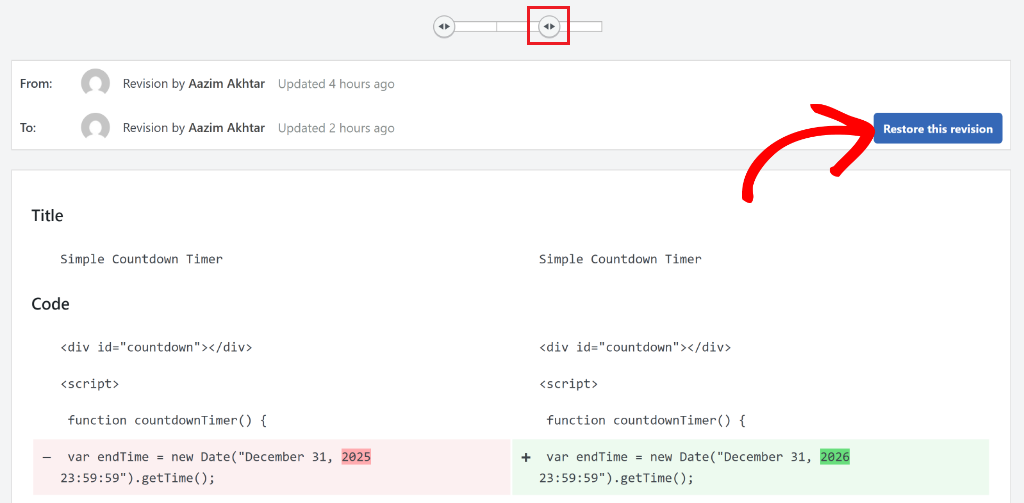
Once you know which version you want to roll back to, simply click the Restore this version button.
Next, you’ll be taken back to the code editor, where you’ll see the previous version of the code snippet restored.
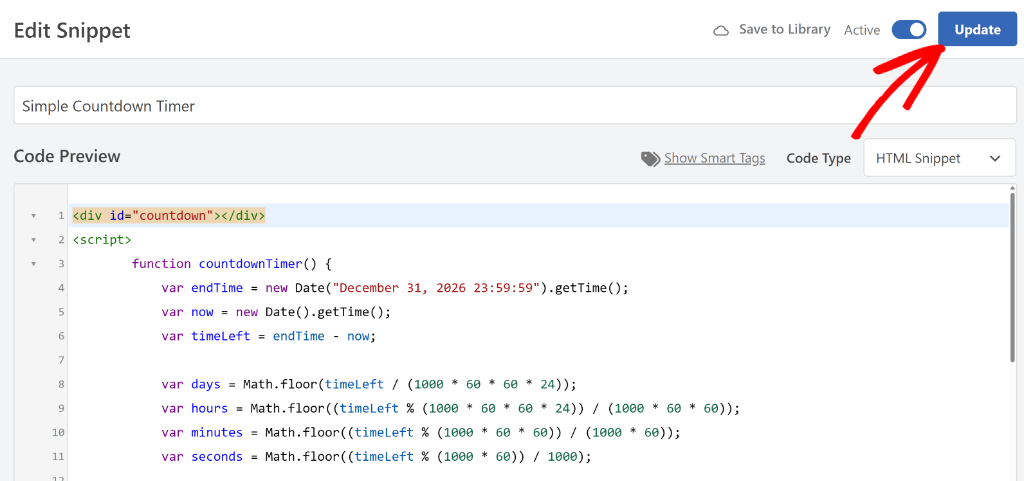
From here, you can simply click the ‘Update’ button and save your changes.
That’s it, you’ve successfully tracked changes to your snippets and restored the correct version.
FAQs About Tracking Code Changes in WordPress
Here are some common questions about tracking and restoring code changes in WordPress.
1. Why do I need to track code changes and revisions on my WordPress site?
Tracking code changes is essential because it helps you maintain a history of modifications, making it easier to identify and fix issues when they arise. It also helps prevent accidental loss of working code and facilitates collaboration if multiple people make changes to the codebase.
2. How do I restore a previous version of a code snippet?
In the WPCode editor, you can view the Code Revisions section, use the slider to compare different versions, and identify which one you want to restore. Once selected, click the “Restore this version” button and then update to save changes.
3. Can WPCode help if I am part of a development team?
Yes, WPCode’s revision tracking is especially beneficial for teams, as it helps prevent conflicts when multiple developers are working on the same codebase. It provides a clear history of amendments and the ability to see who made each change and when.
I hope this article helped you learn how to track code snippet changes and revisions in WordPress. You may also want to see our guide on how to disable auto linking of URLs in WordPress comments and how to replace images and media files in WordPress.
If you need help, then feel free to leave a comment below. And don’t forget to follow us on X (formerly known as Twitter) and subscribe to our newsletter for all the latest updates.


I want to know how to clean this code revision. I just need 2 code revisions of 1 file. In your current facility unlimited revisions of one file are being saved which is increasing the load on the server
Hi Sanjeev,
Thank you for the feedback, we are going to introduce a way to limit the number of revisions. Regarding server load, the revisions for the WPCode snippets are stored in a custom table that is only queried/loaded when the revisions list is loaded so it should not put any strain on your server in most instances.
I’m with Sanjeev! Please provide the ability to limit and delete the number of code snippet revisions. Until you add the new feature to your plugin, can you kindly provide us (via your reply) with a SQL database command that will allow us to delete all code snippet revisions? Thank you!
Thank you, Jonathan. WPCode revisions are stored in the “wp_wpcode_revisions” table, where “wp_” is your db table prefix.
Awesome. Thank you, Mircea. I have successfully deleted all code snippet revisions contained in the table you provided. Here’s what I suggest:
1. Add a new column (tab) to “Tools” titled, “Revisions”
2. Inside the new “Revisions” tab, add two new entries (with buttons, etc.) titled: “Delete all code snippet revisions from all code snippets” and another one titled “Delete all code snippet revisions for the following code snippet IDs: ______________” (where each code snippet ID is separated by a comma.
3. Add a “Delete All” button” and a “Limit Code Snippet Revisions” function under the Code Revisions section of each code snippet.
Again, thank you!
Another add for Item 2 above: Add another entry to the newly created “Revisions” tab titled; “Limit code snippet revisions to: ____” (showing a dropdown with numbers ranging from 0 to 10.
Cheers!
Apologies. Use the following SQL Commands instead:
To delete code snippet revisions from all code snippet:
DELETE FROM wp_wpcode_revisions;
To delete all revisions for a specific code snippet (e.g., with snippet_id 123):
DELETE FROM wp_wpcode_revisions WHERE snippet_id = 123;
To delete all revisions older than a certain date (e.g., September 1, 2025):
DELETE FROM wp_wpcode_revisions WHERE revision_date < '2025-09-01';
Cheerio!
Hi Mircea. Again, thank you. Following my last comment and for those interested, the following SQL command will do the trick:
TRUNCATE TABLE `wp_wpcode_revisions`;
Where wp_ is the site’s db table prefix.
Cheers!