
Running ads on Facebook without proper tracking is a bit like driving at night with no headlights. You’re moving, but you can’t really see where you’re going or what’s working.
Facebook Pixel helps fix that. It lets you track what visitors do on your WordPress site after they see your ad. But here’s where most people get stuck. The default tracking only captures basic actions like page views. It doesn’t tell you the full story.
That’s where custom event tracking comes in. With custom events, you can track specific actions like how far someone scrolls, whether they watched a video, or if they clicked a particular button. This gives you much richer data to work with when optimizing your ad campaigns.
In this guide, I’ll show you how to set up custom event tracking for Facebook Pixel in WordPress.
Why Set Up Custom Event Tracking for Facebook?
Setting up Facebook Pixel tracking sounds like unlocking key insights about how users behave on your site. With the base Pixel code working, standard tracking only goes so far. It tells you that someone visited your site, but it doesn’t tell you what they actually did while they were there.
For example, did they scroll through your pricing page? Did they watch your product video? Did they click your email link? Standard tracking has no idea.
Custom event tracking for Facebook solves all of this. Instead of uncovering surface-level data, you get a clear picture of exactly how people interact with your content. You can track scroll depth, video views, form submissions, button clicks, and more.
This means you can build laser-focused retargeting audiences. For example, you can target people who watched 75% of your product video but didn’t buy.
Or you can create a similar audience based on visitors who scrolled deep into your pricing page. That’s the kind of targeting that makes your ad spend work harder.
Now, let’s look at what Facebook Pixel is.
What Is Facebook Pixel Event Tracking?
Facebook Pixel is a small piece of code that you place on your WordPress site. It acts like a silent observer, watching what visitors do after they interact with your Facebook ads.
By default, it tracks basic actions like page views. These are called standard events. Think of them as the broad strokes, as they give you a general picture of your traffic.
Custom events take things a step further. They let you define and track specific actions that matter to your business. For example, you can fire a tracking event when someone scrolls 50% down your sales page, watches an embedded video, or submits a contact form.
This level of detail makes a big difference when running Facebook ad campaigns. Instead of guessing which ads are driving real engagement, you get hard data on exactly what people are doing on your site.
That said, let’s look at how you can set up custom event tracking for your Facebook pixels.
Setting Up Facebook Pixel Custom Event Tracking
For most site owners, setting up custom event tracking feels like it’s reserved for developers. You’d need to write custom JavaScript, figure out where to place it, and make sure it fires at exactly the right moment. That’s a lot to ask of someone who just wants better ad data.
There’s also the maintenance problem. Every time you update your theme or switch to a new one, there’s a good chance your tracking code gets wiped out. You’re back to square one without even realizing it.
The good news is that with WPCode’s Conversion Pixel Addon, you can set up these custom events without hiring a developer.
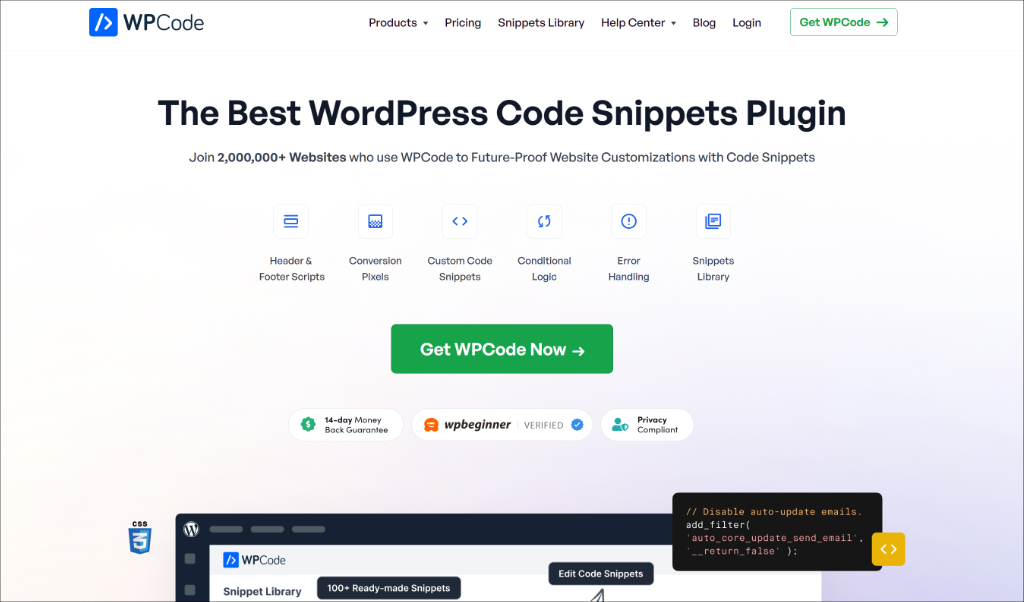
WPCode is the best code snippet plugin for WordPress that lets you add custom code without editing the theme files on your site. It also makes it very easy to manage all the snippets in one place.
You can add custom PHP, JavaScript, custom CSS, HTML, and other types of snippets. Plus, WPCode comes with over 140 verified snippets to add custom features and functionality to your WordPress website.
Let’s look at the steps you can follow to get started.
Step 1: Install and Activate WPCode
First, you need to install and activate the WPCode plugin on your WordPress site.
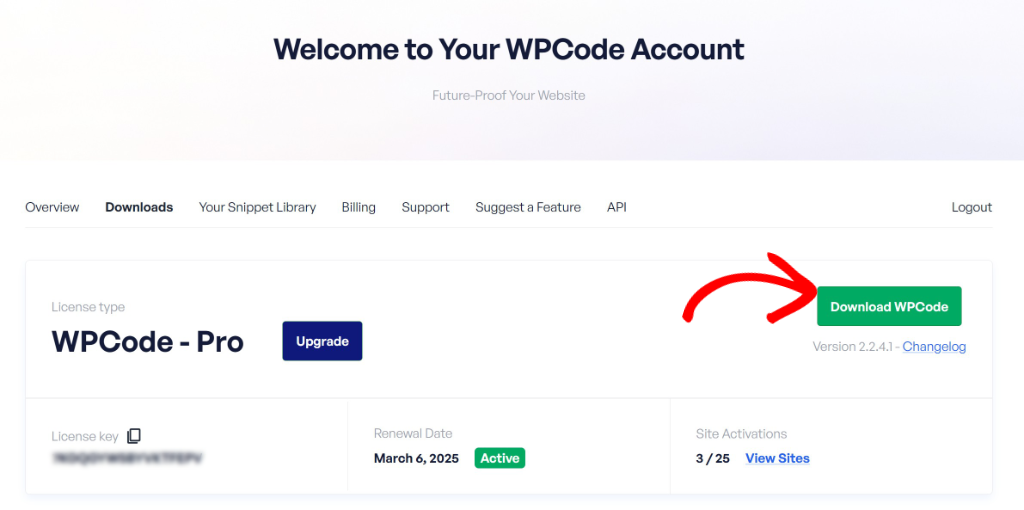
Note: You will need the WPCode Plus plan or higher to access the Conversion Pixel Addon. However, WPCode also has a free version.
After signing up for an account, you can head to the ‘Downloads’ tab in your account area and click the Download WPCode button to save the plugin ZIP files on your computer.
Next, you will need to upload the plugin files to your WordPress website. For details, see our tutorial on how to install a WordPress plugin.
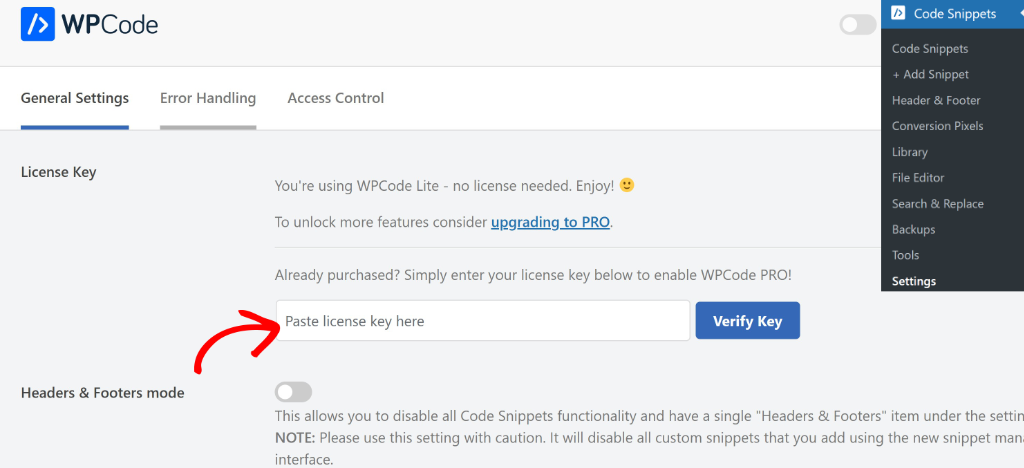
Upon activation, you will see a new menu item called Code Snippets in your WordPress dashboard. You will also need to verify your license key before you can access the Pro features. Simply head over to Code Snippets » Settings and enter your license key there.
Step 2: Install WPCode Conversion Pixel Addon
Now, you will need to install the Conversion Pixel Addon. To start, head over to Code Snippets » Conversion Pixels from your WordPress dashboard.
Here, you will see a popup message showing that the addon is not installed. Go ahead and click the Install Addon Now button.
Step 3: Connect Your Facebook Pixel to WPCode
Once the addon is active, you need to connect your Facebook Pixel to WPCode.
You can go to Code Snippets » Conversion Pixels from your WordPress dashboard. Here, you will see a list of supported platforms, including Facebook, TikTok, Pinterest, Snapchat, and Google.
Simply, click on the Facebook tab and enter your Facebook Pixel ID in the field provided.
To learn more, please see our detailed tutorial on how to install Facebook Pixel in WordPress that walks you through the entire setup process.
Step 4: Add Custom Event Details
With your Facebook Pixel connected, it’s time to set up your first custom event.
On the Conversion Pixels page, you will see a few tabs at the top. Click on the Custom Events tab, this is where you can create and manage all of your custom tracking events.

Here, you can start by entering a name for your event. There is also an optional field to enter a value for your event, such as a score or revenue.
Next, you can select from different triggers for your event. These include page scroll, a post type, email link, embedded video view, and much more.
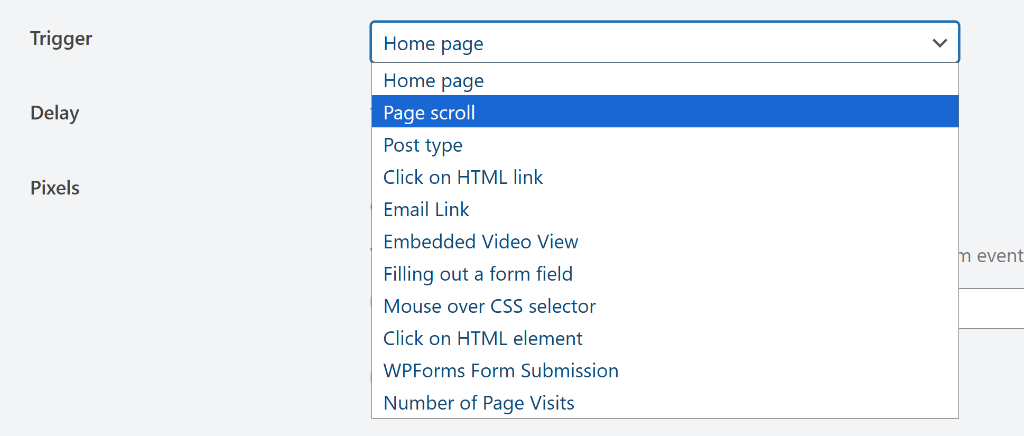
A trigger is simply the action that fires your tracking event. WPCode gives you several powerful options to choose from:
- Page Scroll Depth — fires the event when a visitor scrolls to a specific percentage of your page.
- Embedded Video View — tracks when someone watches an embedded video on your site.
- Email Link — fires the event when a visitor clicks an email link.
- HTML Element Click — tracks clicks on a specific element on your page, like a social media button or image.
- Mouse over CSS Selector — fires the event when a visitor hovers their mouse over a specific element.
- WPForms Form Submission — tracks when someone successfully submits a WPForms form.
- Post Type — fires the event when someone visits a specific post type on your site.
Each trigger has its own settings that appear once you select it. For example, if you choose Page Scroll Depth, you will be asked to enter a percentage. If you choose WPForms Form Submission, you will be asked to select which form to track.
Go ahead and select the trigger that best matches the action you want to track on your site.
Once you’ve done that, scroll and choose which pixel to enable this event for.
Simply click the toggle to enable the social media pixel, Facebook in this case. Then click the dropdown to choose the event, such as add to cart, payment info, contact, donate, purchase, and other user actions.
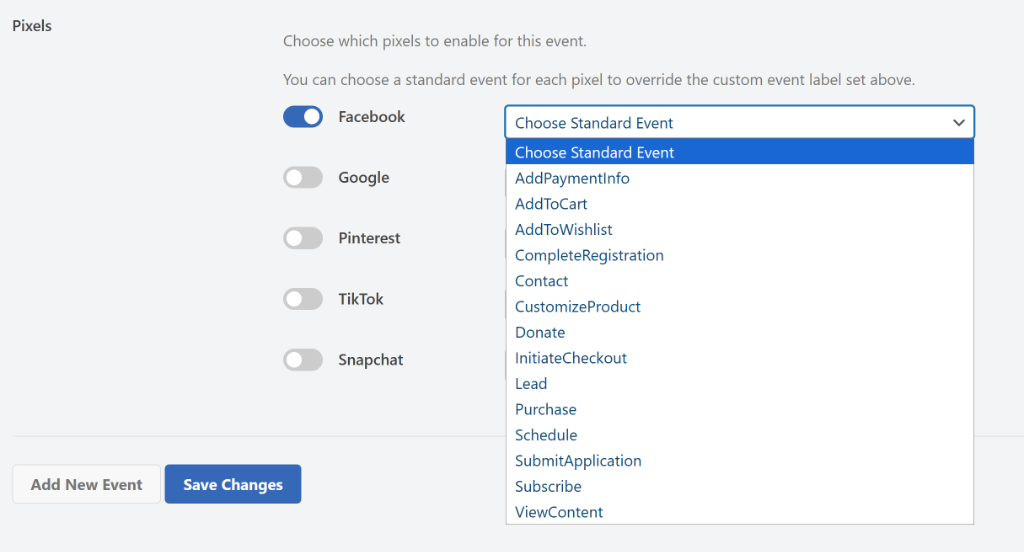
Mapping your custom event to a standard event is important. It allows Facebook’s ad platform to understand and categorize your custom tracking data. Think of it as translating your custom action into a language that Facebook’s algorithm already knows.
When you’re done, click the Save Changes button to store your settings.
That’s it, you’ve successfully set up custom event tracking for your Facebook Pixel in WordPress.
Bonus: Get the Most Out of Facebook Pixel Event Tracking
Now that your custom events are up and running, here are a few tips I’ve picked up from working with Facebook Pixel tracking that will help you get better results from your data.
Track the Actions That Actually Matter
It’s tempting to track everything, but that can quickly turn into noise. Focus on the actions that are closest to a conversion for your business. For example, a scroll depth event on your pricing page is far more valuable than a scroll depth event on your blog posts.
Use Custom Events to Build Better Audiences
One of the biggest advantages of custom event tracking is the ability to build highly specific retargeting audiences in Meta Ads Manager. For example, you can create an audience of people who submitted your lead form but never made a purchase. This kind of audience is much more likely to convert than a broad website visitor audience.
Map Events to the Right Standard Events
When mapping your custom events to Facebook Standard Events, think carefully about which standard event makes the most sense. Using the wrong standard event can be confusing and affect how your ads are optimized. For example, a form submission that generates a lead should be mapped to the Lead standard event, not the Purchase event.
Test Your Events Regularly
It’s good practice to check your Meta Pixel Helper every time you make changes to your site. Things like plugin updates or theme changes can sometimes affect how your tracking events fire. Catching these issues early saves you from losing valuable tracking data.
FAQs about Facebook Pixel Custom Event Tracking
1. What is the difference between a standard event and a custom event in Facebook Pixel?
A standard event is a predefined action that Facebook already recognizes, like a purchase, lead, or add to cart. A custom event is an action that you define yourself based on how people interact with your specific website. Custom events give you more flexibility to track the actions that matter most to your business.
2. Do I need coding knowledge to set up custom event tracking in WordPress?
No, you don’t. WPCode’s Conversion Pixel Addon lets you set up custom event tracking without writing any code. You simply fill out a form, choose a trigger, and map your event to a standard event. WPCode handles all the technical stuff behind the scenes.
3. Can I use the same custom event for multiple pixels at the same time?
Yes, you can. WPCode’s Conversion Pixel Addon supports multiple platforms, including Facebook, TikTok, Pinterest, Snapchat, and Google. When setting up a custom event, you can enable the toggle for each platform you want to fire the event on.
I hope this article helped you learn how to set up Facebook Pixel custom event tracking in WordPress. You may also want to see our guides on how to add scripts to specific pages in WordPress and how to load code snippets as files in WordPress.
If you need help, then feel free to leave a comment below. And don’t forget to follow us on X (formerly known as Twitter) and subscribe to our newsletter for all the latest updates.

