

If you’ve uploaded dozens of videos to your WordPress site, but they weren’t getting the visibility as expected, then you’re missing a key ingredient.
In my experience, I’ve spent hours optimizing titles and descriptions, yet my videos rarely appeared with those eye-catching thumbnails and rich snippets on Google.
That’s when I discovered video schema markup. It’s a special code that tells search engines exactly what your video content is about, when it was published, how long it runs, and other important details that help your videos stand out in search results.
After implementing video schema markup on my WordPress site, I noticed my videos started appearing with rich snippets within a few weeks. The click-through rates from search results improved significantly, and my video content began competing better against larger sites in my niche.
In this guide, I’ll show you how to add video schema markup to your WordPress site using WPCode.
What is Video Schema Markup?
Video schema markup is a small piece of code that tells search engines exactly what your video content is about. It’s like adding a detailed label to your video that includes information like the title, description, duration, upload date, and thumbnail image.
The code uses a format called JSON-LD, which might sound technical, but it’s really just a structured way of organizing information that search engines can easily read.
What makes this so powerful is that search engines use this information to create rich snippets. These are the enhanced search results that show video thumbnails and extra details, making your content much more likely to get clicked.
Let’s see why you need to add a video schema to your website.
Why You Need Video Schema Markup?
When I first started embedding videos on my WordPress site, I made the mistake of thinking that simply uploading great content would be enough. My videos would sit there, looking professional on my pages, but barely getting any organic traffic from search engines.
The problem wasn’t my video quality or even my SEO basics. Search engines simply couldn’t understand what my videos were about beyond the surrounding text on the page.
Without proper video schema markup, your videos become invisible to search engines in many ways. They might index your page, but they won’t display those rich video snippets that catch people’s attention in search results.
For example, Google shows a ‘Videos’ section in the search results. It displays the title, thumbnail, description, upload date, video duration, and more. Besides that, it also shows videos in the AI Overview section along with written text.
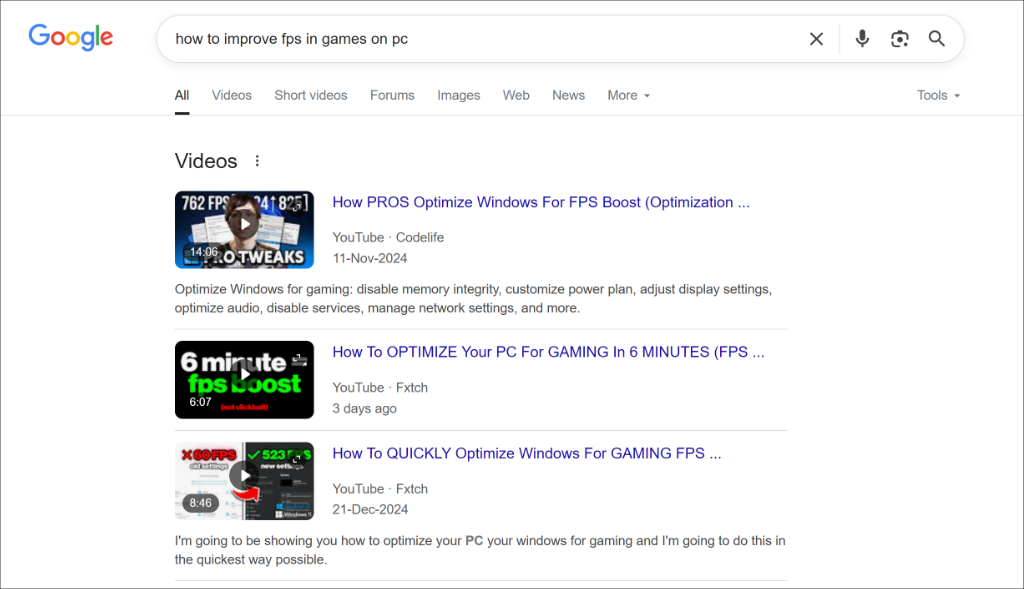
This means you’re missing out on a huge opportunity. Video results often get higher click-through rates than regular text results because they stand out visually and provide more information upfront.
Video schema markup solves this problem by providing search engines with structured data about your videos. It tells Google exactly what type of content you have, how long it is, who created it, and when it was published. This information helps search engines display your videos more prominently and with more detail.
That said, let’s look at an easy way of adding video schema in WordPress.
Adding Video Schema Markup in WordPress
Setting up video schema markup in WordPress is easier than you might think. With WPCode, you can generate proper structured data for your videos without writing a single line of code.
What makes WPCode perfect for schema markup is its ability to insert code snippets in specific locations and conditions without modifying your theme files. Plus, it helps in managing, adding, and editing custom snippets in WordPress.
You can use it to add custom PHP, JavaScript, HTML, CSS, and other snippets. WPCode also comes with a built-in snippet library that’s verified by experts. You can use it to add new features and functionalities to your site.
Note: For this tutorial, I’ll use the WPCode Pro version because it includes Smart Tags for dynamic values when generating the schema, Page Scripts for inserting the schema markup on specific pages, and more. But there is also a WPCode Lite version to create schema markup for WordPress.
With that, let’s look at the steps for generating a video schema markup.
Step 1: Install and Activate WPCode
First, you’ll need to visit the WPCode website and signup for a new account.
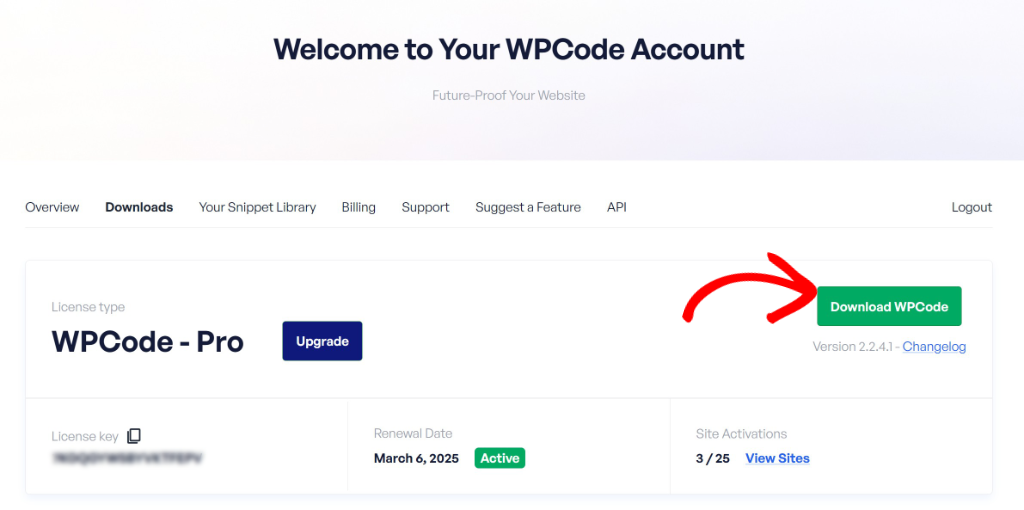
Once that’s done, you’ll need to go to your WPCode account area and find the plugin file in your account area under the ‘Downloads’ tab.
Simply click the Download WPCode button and save the plugin file on your computer.
Next, you can install and activate the plugin in WordPress. If you need help, then please see this guide on how to install a WordPress plugin.
From here, simply go to Code Snippets » Settings in your WordPress dashboard and enter your license key. You can find this key in your WPCode account area.
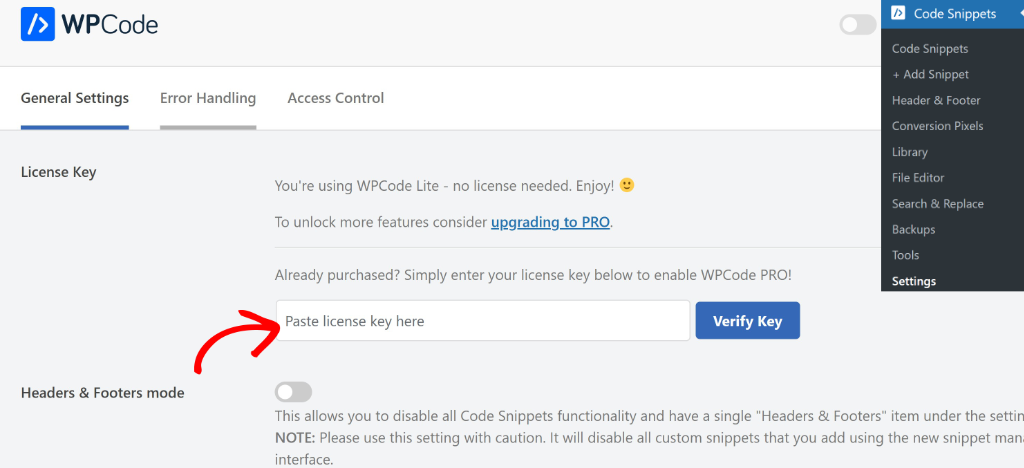
Now, you’re ready to create video schema markup using WPCode.
Step 2: Generate a Video Schema Markup
Next, you’ll need to head to Code Snippets » Add Snippet from your WordPress admin panel and then switch to the ‘Snippet Generators’ tab at the top.
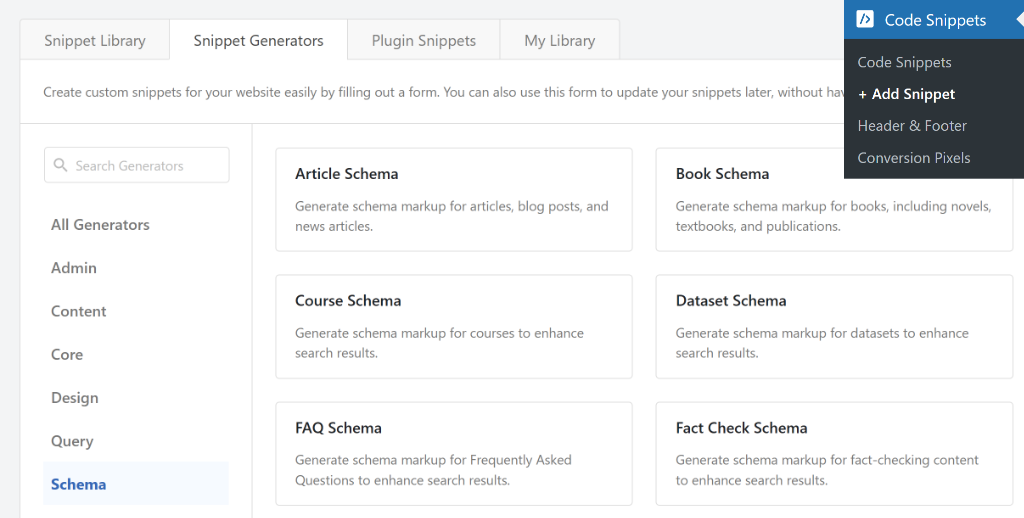
WPCode also lets you filter snippet generators from the menu on the left. For instance, you can head to the ‘Schema’ tab and view all the options, such as a FAQ schema, product review schema, recipie schema, and more.
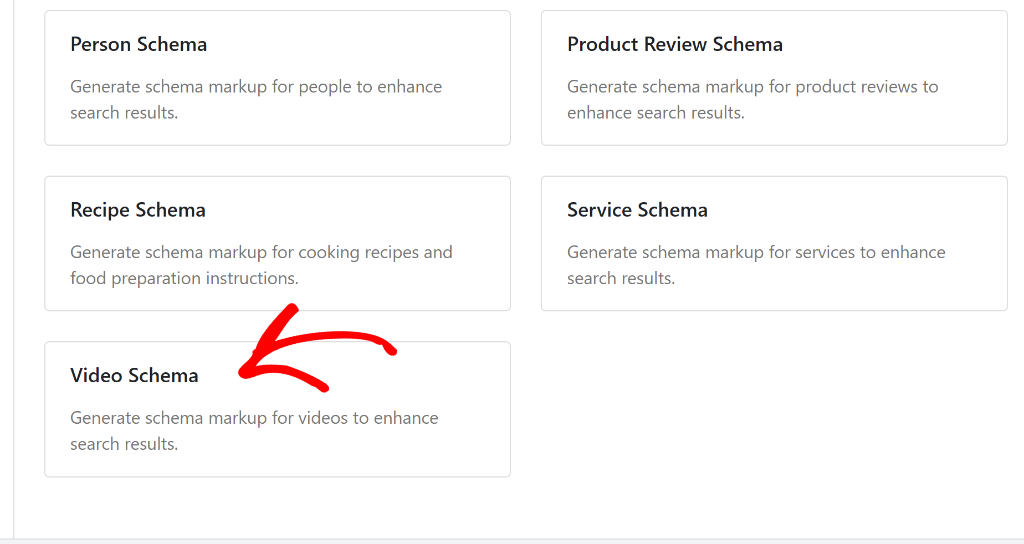
Next, go ahead and select Video Schema.
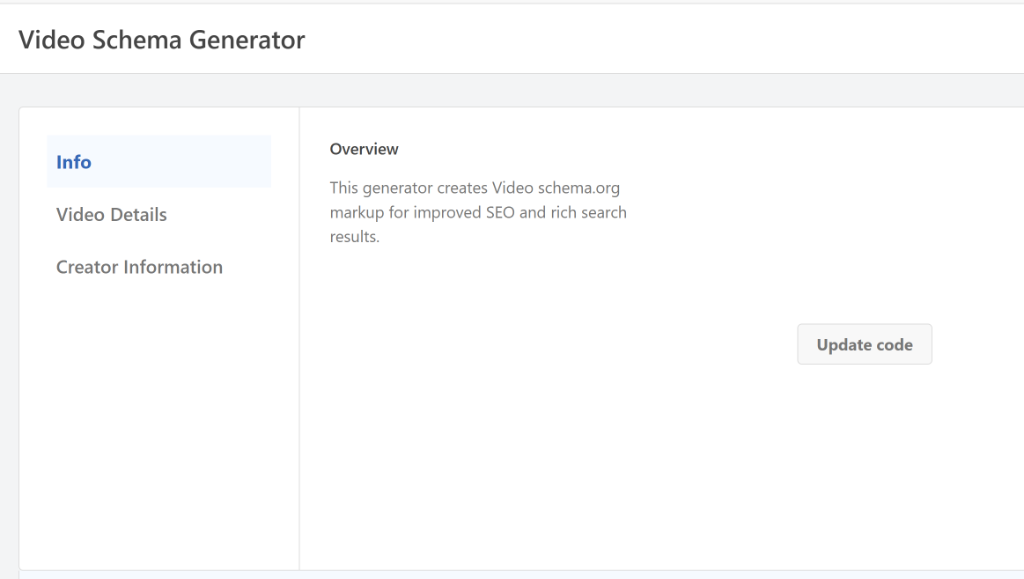
On the next screen, you will see the ‘Info’ for the Video Schema Generator.
After that, simply switch to the Video Details tab.
On the Video Details tab, you will need to enter information about your video.
For instance, enter the video title, description, embed URL, video duration, thumbnail, upload date, and video URL.
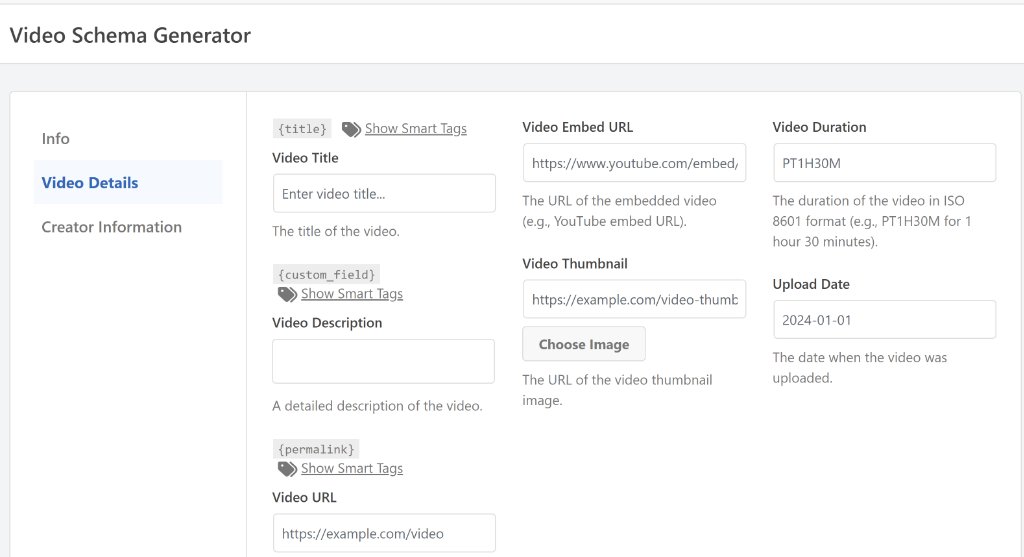
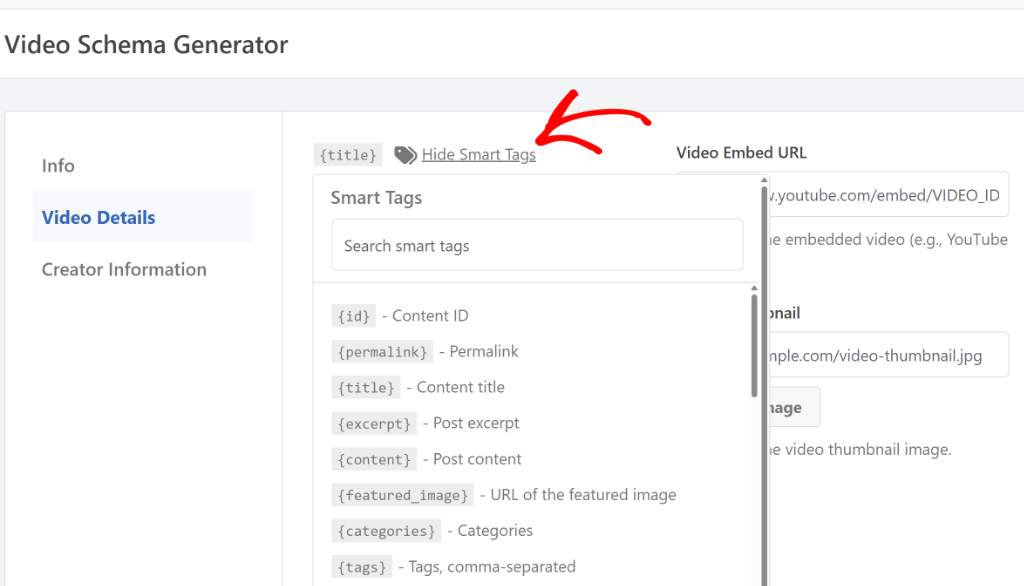
WPCode also lets you use smart tags to dynamically enter the values.
For example, let’s say the video title is the same as the blog post on your site. Using the {title} tag will automatically fetch the content title and use it for the video schema.
To get started, simply click the Show Smart Tags option and select a tag from the dropdown menu.
Next, you can switch to the Creator Information tab.
Here, you’ll need to enter the creator name and URL.
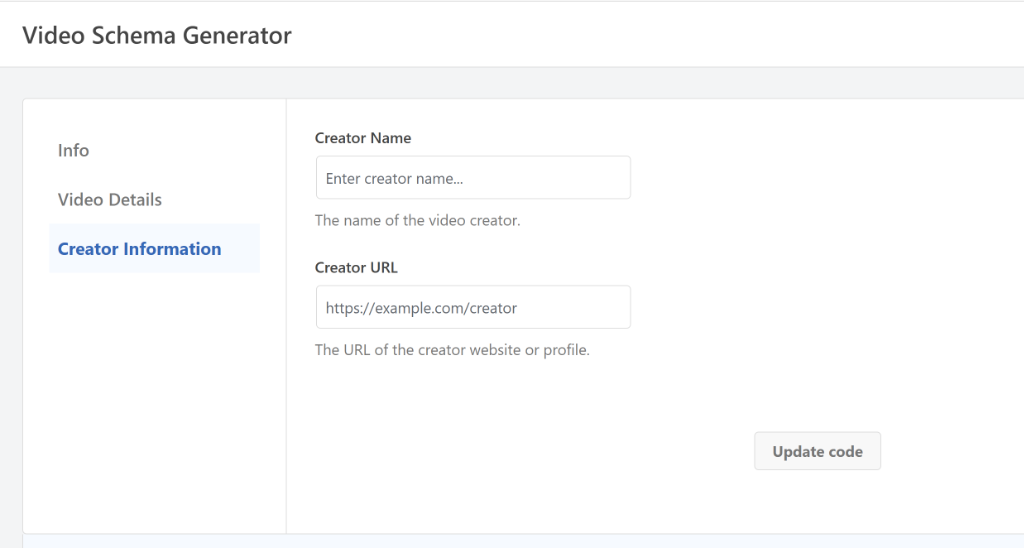
Once you’re done, simply click the Update code button.
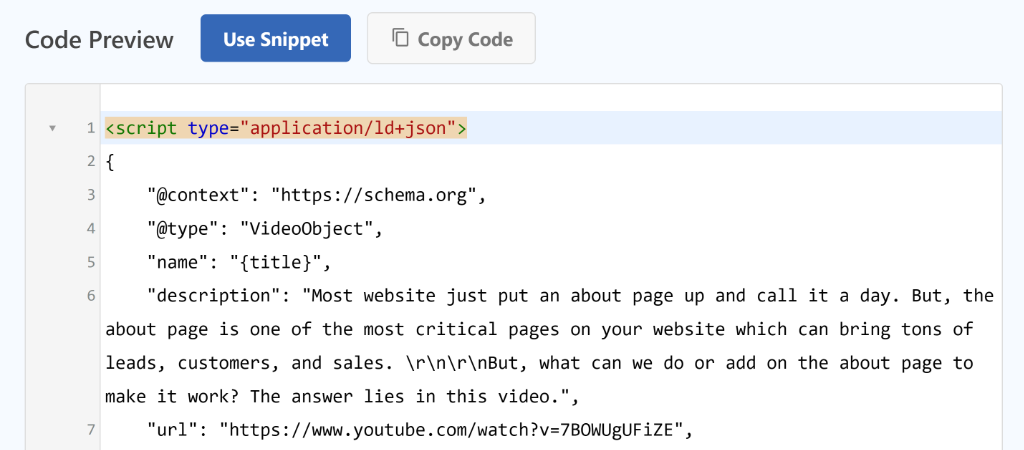
From here, you can scroll down and view the video schema markup under the ‘Code Preview’ section. Next, simply click the Use Snippet button.
On the next screen, you will see the video schema snippet preloaded in the code editor.
Here, you can edit the code, make adjustments, or add smart tags to your schema markup.
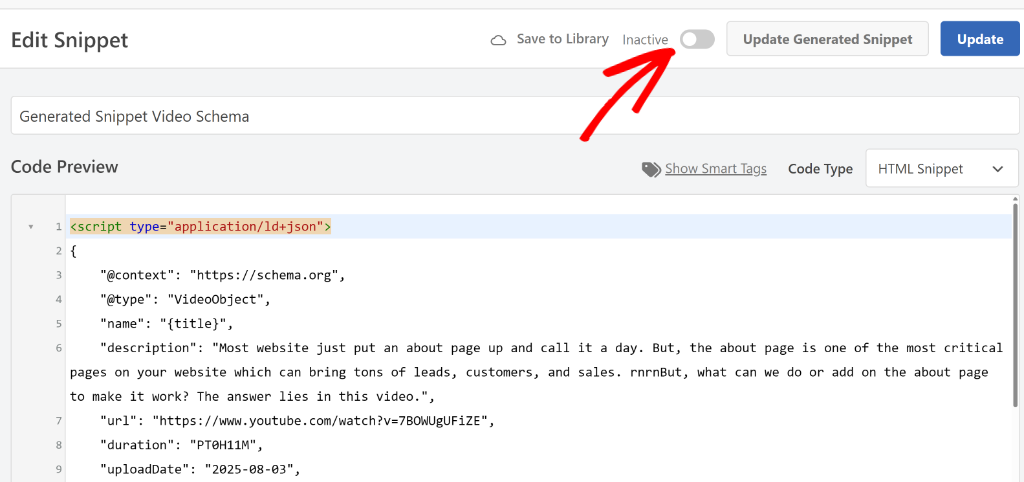
WPCode also provides the option to make changes to the schema snippet. If you click the Update Generated Snippet button, then you’ll be taken back to the schema generator page, where you can add more details and update schema code.
Lastly, you can click the toggle next to Inactive and make your schema Active. Once that’s done, click the ‘Update’ button.
Now, you’re ready to add the video schema to a particular page or post on your site.
Step 3: Adding Video Schema to a Post or Page
Next, you’ll need to add the video schema to the blog post or landing page where you’ve embedded the video.
There are 2 ways you can go about this using WPCode. With WPCode Pro, you can use the Page Scripts feature directly in the WordPress content editor. On the other hand, you can also use conditional logic in WPCode to specify the posts or pages to add to play the schema.
Let’s look at both the methods.
1. Add Video Schema Using WPCode Page Scripts
WPCode offers a Page Scripts feature that lets you insert custom snippets to any blog post or landing page inside the block editor.
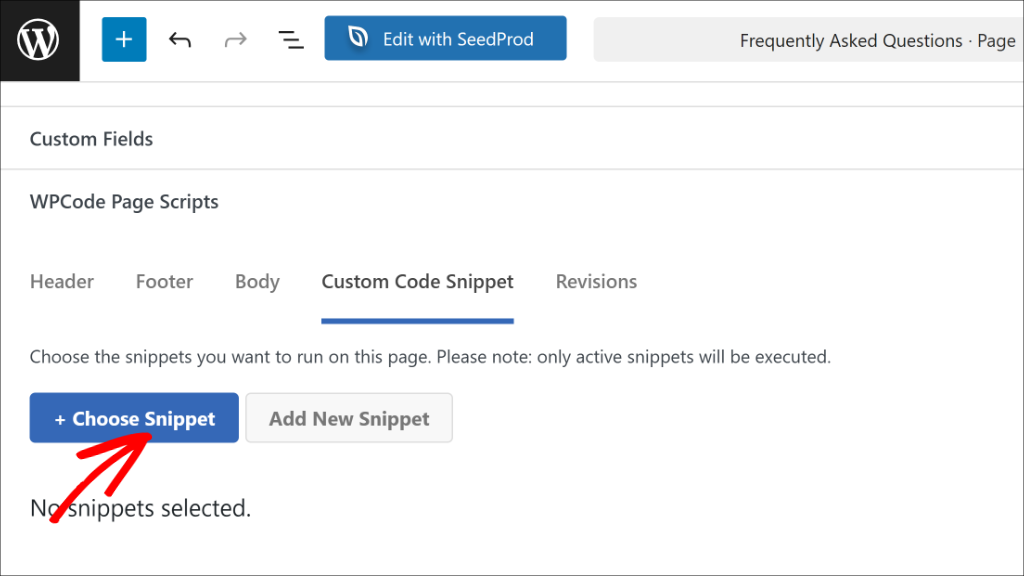
To start, you’ll need to go to the post or page where you want to add the video schema. When you’re in the WordPress content editor, simply scroll down to find the WPCode Page Scripts section below your content area.
From here, you’ll need to switch to the ‘Custom Code Snippet’ tab and click the Choose Snippet button.
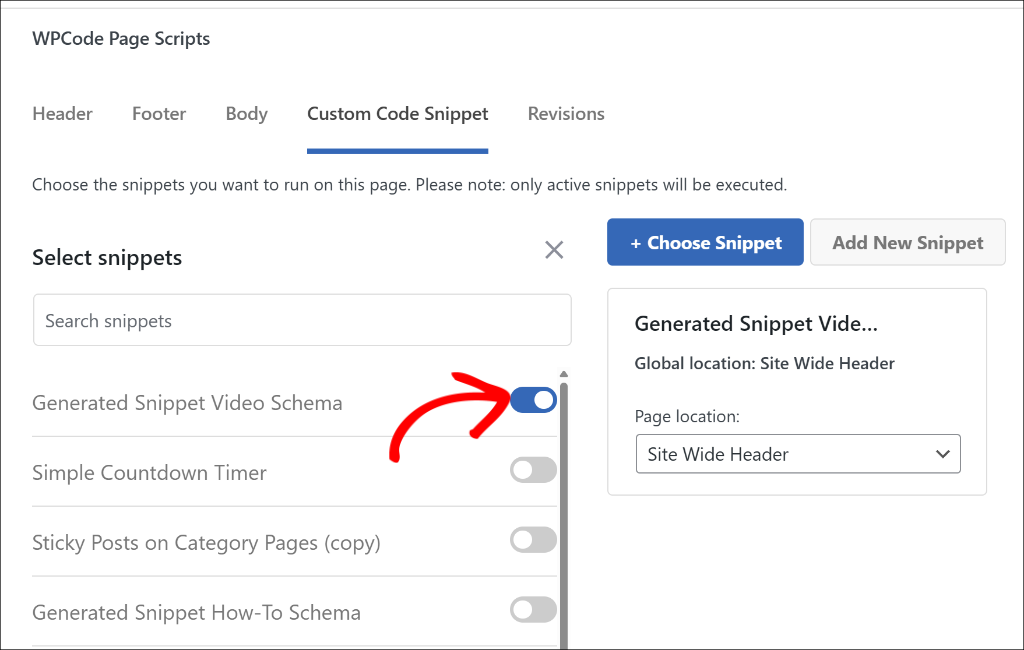
After that, you will see a list of all the code snippets you’ve created in WPCode.
Simply navigate to the video schema snippet and click the toggle next to it to activate it for your post or page.
Next, you can simply publish or update your blog post or landing page.
2. Add Video Schema Using Conditional Logic
Another way to add the video schema snippet to your content is by using the conditional logic rules in WPCode.
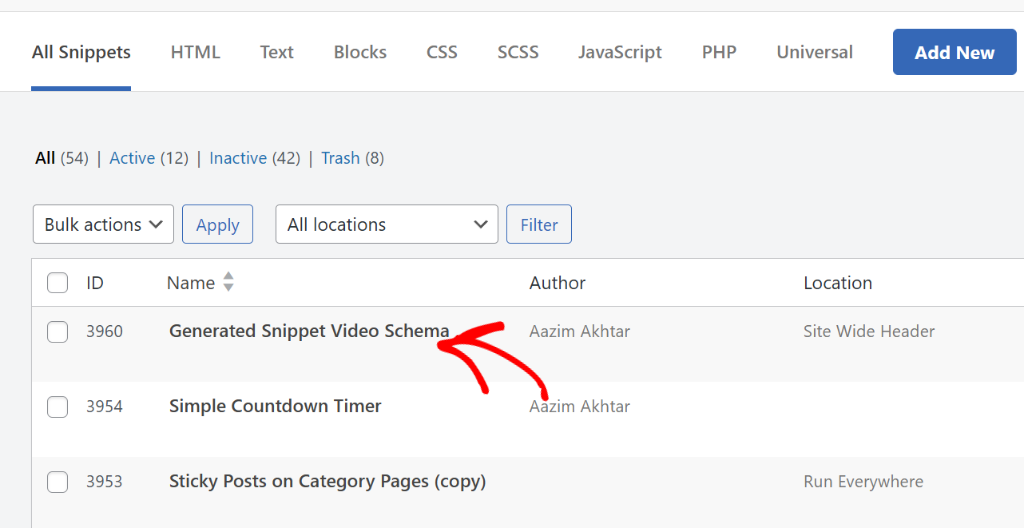
First, you’ll need to head back to Code Snippets from your WordPress dashboard and select your Video schema code snippet.
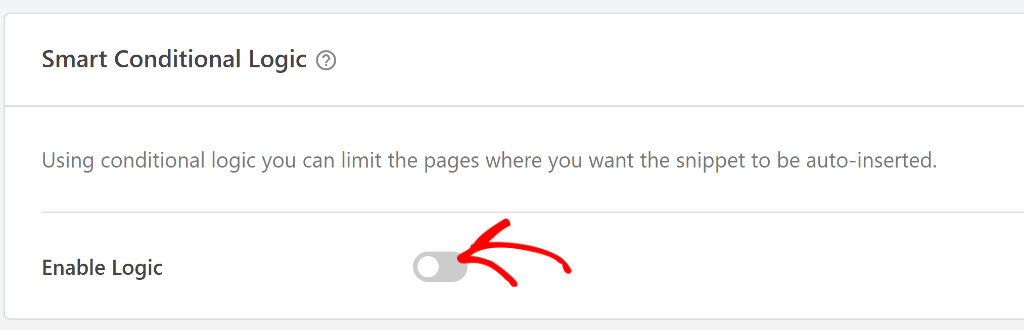
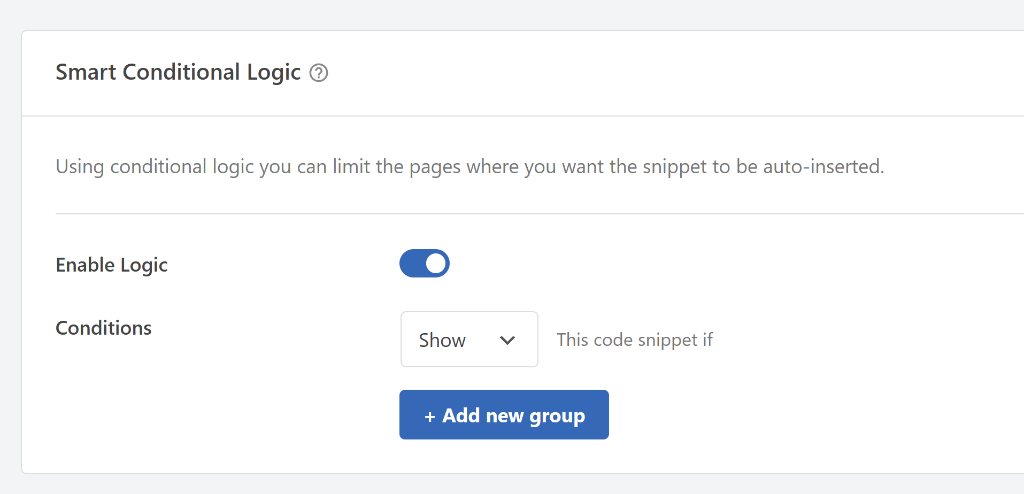
Once you’re in the code editor, simply scroll down to the ‘Smart Conditional Logic’ section.
Next, click the toggle for Enable Logic.
After that, you can pick whether you’d like to Hide or Show the snippet.
Go ahead and choose the ‘Show’ option and click the Add new group button.
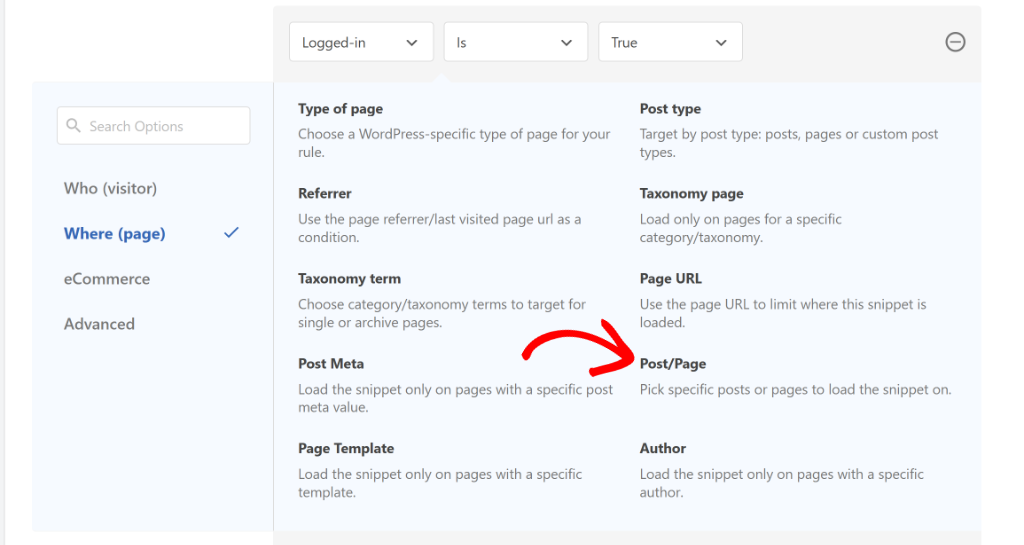
WPCode will set the condition for logged-in users by default, but you need to change this.
Go ahead and click on the condition dropdown to open the menu, then switch to the Where (page) tab on the left and then select Post/Page.
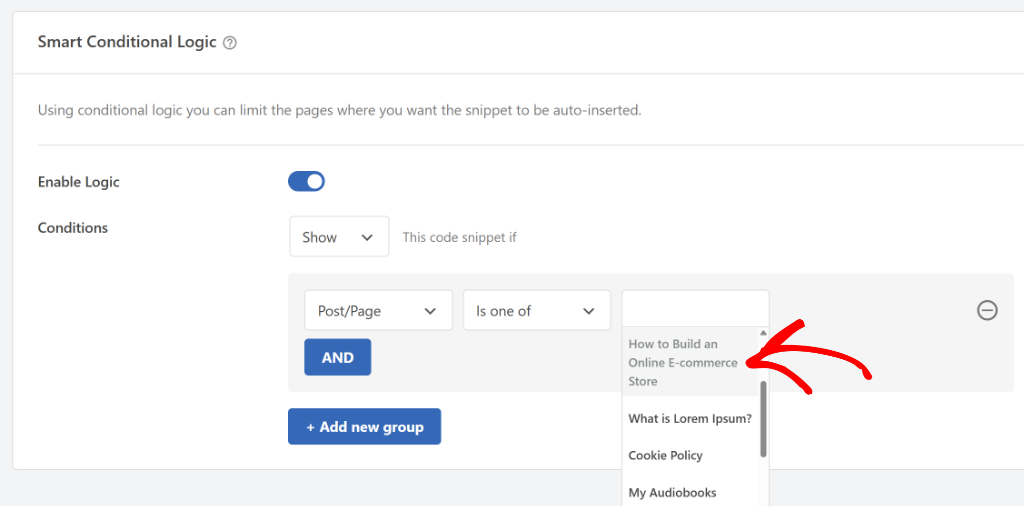
After that, you can change the condition to ‘Is one of’ and then select the page/post where you want to add the video schema markup.
Lastly, click on the last field and choose your content from the dropdown menu.
When you’re finished, simply scroll to the top and update your code snippet to save the conditional logic settings.
If you need help or more details, then please see our guide on how to add scripts to specific pages in WordPress.
That’s it, you’ve successfully added the video schema to your WordPress site.
Step 4: Test Your Video Schema Markup
Now that you’ve added the video schema to your site, you can also check if it’s working properly or you need to make changes to the schema details.
The easiest way to do that is by using the Google’s Rick Results Test tool.
First, you’ll need to visit the tool and enter the URL of the page where you added your video schema markup. Then, click the ‘Test URL’ button and wait for Google to analyze your page.

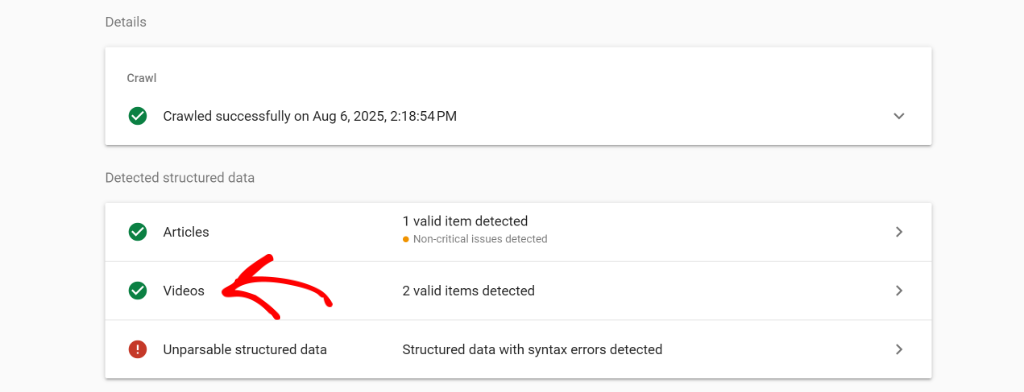
Once the scan completes, you will see the schema markups added your page under the ‘Detected structured data’ section along with any errors that you need to address.
Go ahead and look for ‘Video’ under this section. If it appears there without any errors, then it means you’ve successfully added the video schema on your WordPress site.
FAQs about Video Schema Markup
Here are some common questions users have about adding a video schema markup in WordPress.
1. What is video schema markup and why is it important?
Video schema markup is a structured data format using JSON-LD that provides search engines with detailed information about a video. This includes metadata like the title, description, duration, publication date, and thumbnail. It’s important because it helps search engines display your video content as rich snippets in search results, potentially increasing visibility and click-through rates.
2. How can I add video schema markup to my WordPress?
You can add video schema markup to your WordPress site using WPCode by installing the WPCode plugin, creating a video schema snippet through its built-in snippet generator, and applying that schema to the relevant posts or pages using either the Page Scripts feature or conditional logic.
3. How do I test if the video schema markup is working on my site?
You can test your video schema markup using Google’s Rich Results Test tool. Simply enter the URL of the page where you added the schema and click ‘Test URL’. This tool analyzes the page for structured data and highlights any errors to address, confirming whether the schema is correctly implemented.
I hope this article helped you learn how to add video schema markup in WordPress. You may also want to see our guide on how to track code changes in WordPress and how to add SEO friendly how-to schema in WordPress.
If you need help, then feel free to leave a comment below. And don’t forget to follow us on X (formerly known as Twitter) and subscribe to our newsletter for all the latest updates.

