
Documentation, Reference Materials, and Tutorials for WPCode
Would you like a snippet to run only for certain visitors, or only on certain pages of your site? All you need is a WPCode snippet and a few rules to decide when it loads.
In this guide, we’ll walk you through building Smart Conditional Logic rules for a WPCode snippet.
Requirements: These rules need a paid WPCode license:
Location rules also need the WPCode Location addon, which comes with the Pro license level or higher.
Before you get started, make sure WPCode is installed and activated on your WordPress site.
To get started, we’ll open a snippet and switch on its conditional logic. Each snippet keeps its own set of rules. You set them up once per snippet.
From your WordPress admin sidebar, go to Code Snippets » Code Snippets. Then click the title of the snippet you want to limit.
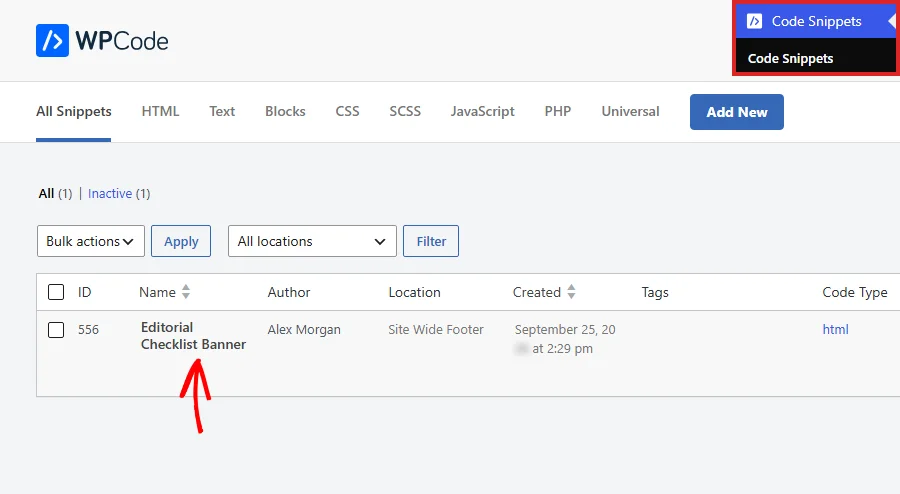
The snippet editor opens. Next, scroll down to the Smart Conditional Logic box and turn on the Enable Logic toggle.
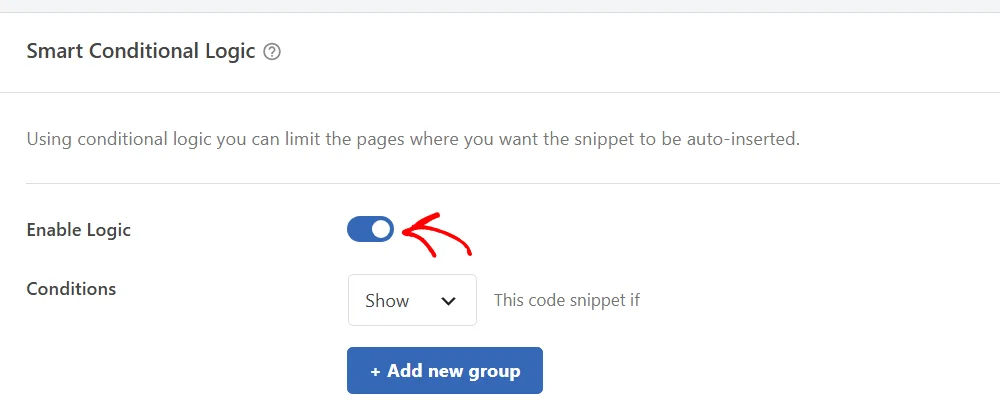
A new Conditions row appears under the toggle. This is where you’ll build your rules.
While the toggle is off, WPCode skips the rules entirely and runs the snippet wherever its location places it.
Note: Using a PHP snippet? Rules that check the page need the snippet’s location set to Frontend Conditional Logic. Our guide on conditional logic for PHP snippets explains why.
The first setting in the Conditions row decides what your rules do. The dropdown reads Show by default, followed by the words “This code snippet if.”
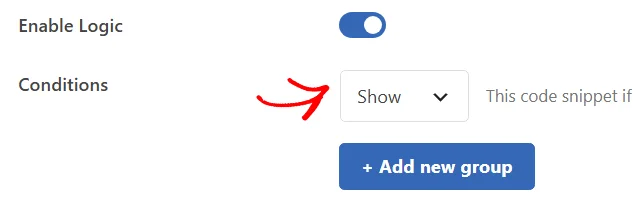
With Show selected, the snippet runs only when your rules match. If you choose Hide instead, the snippet runs everywhere except where your rules match. Hide is handy when it’s easier to describe the few places a snippet shouldn’t run, such as one page out of hundreds.
For this example, we’ll leave the dropdown on Show.
Rules live inside groups. The next step is to create your first group. Under the Show dropdown, click + Add new group.

WPCode adds a group with one rule already in it. Every rule has three parts: the rule type on the left, the comparison in the middle, and the value on the right. A new rule starts out as Logged-in, Is, True. The minus icon at the end of the row removes that rule.
To pick a different rule type, click the Logged-in field.
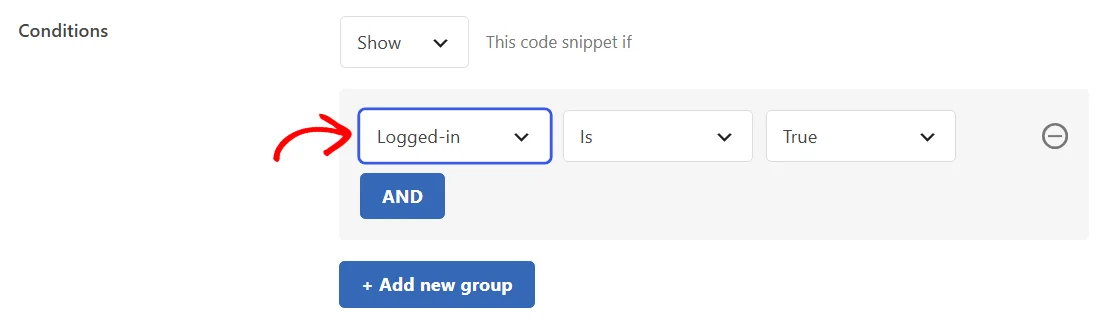
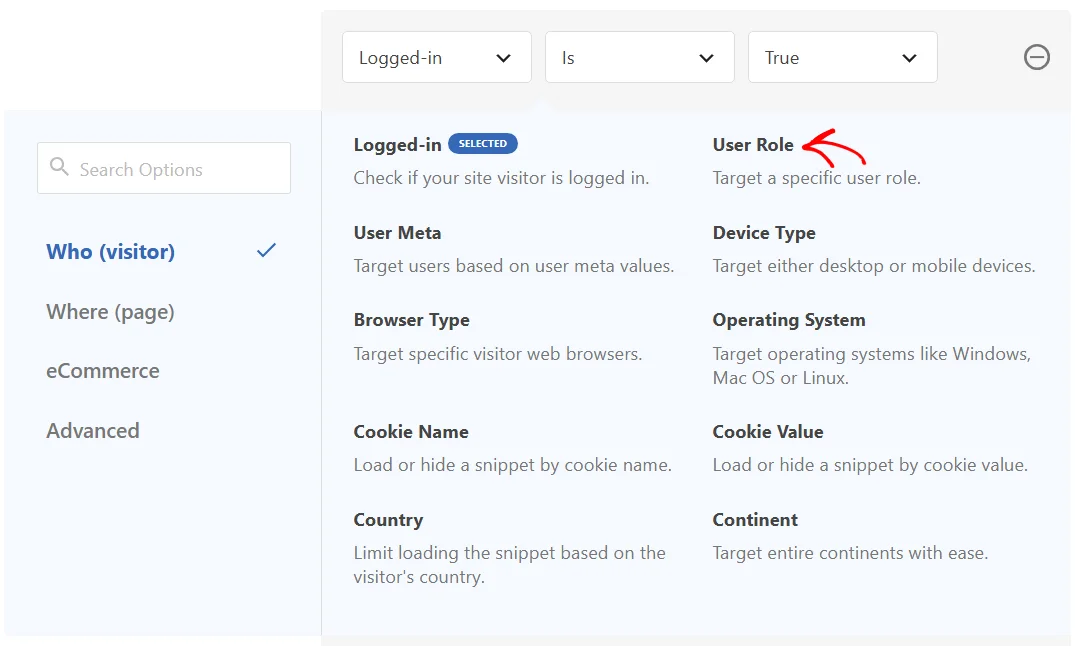
The rule picker opens below the rule. It sorts every rule type into four categories in the sidebar. A search box at the top finds a rule by name.
We want this snippet to show only for editors. In the Who (visitor) category, click User Role.
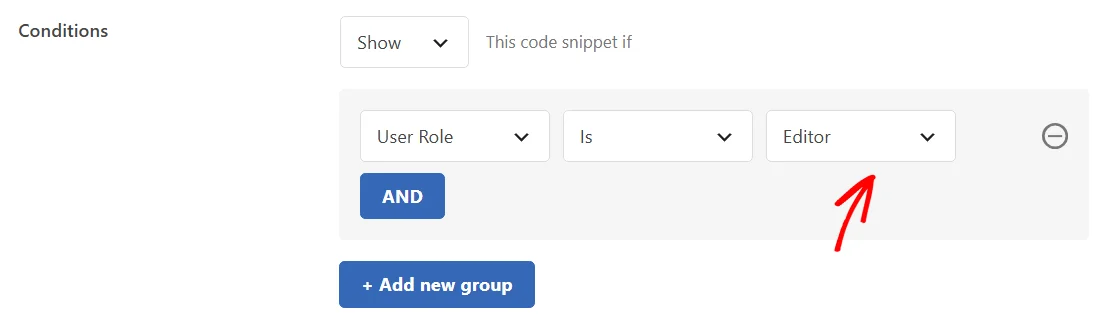
The picker closes. The value dropdown now lists the user roles on your site. From that dropdown, select Editor.
The comparison dropdown in the middle changes to suit each rule type. Most rules offer Is and Is not. Rules that accept several values use Is one of and Is not one of, and text rules add Contains and Doesn’t Contain.
Rules in the same group work together. The snippet runs only when every rule in the group is true. Each rule you add narrows things down further.
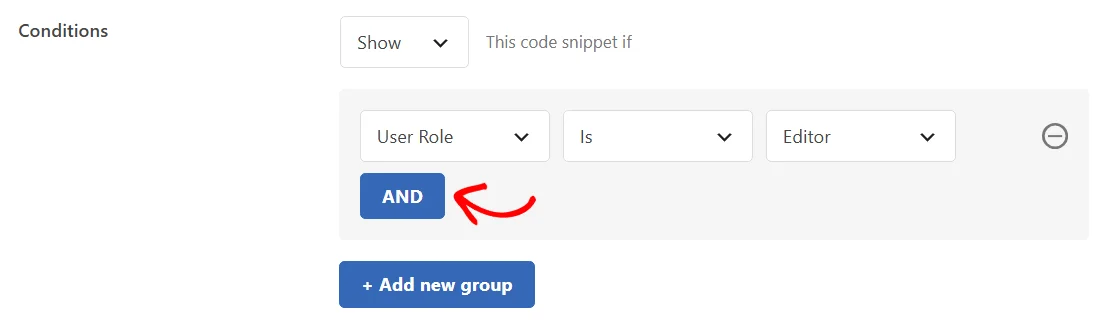
We’ll limit our snippet to blog posts as well. Inside the group, click AND.
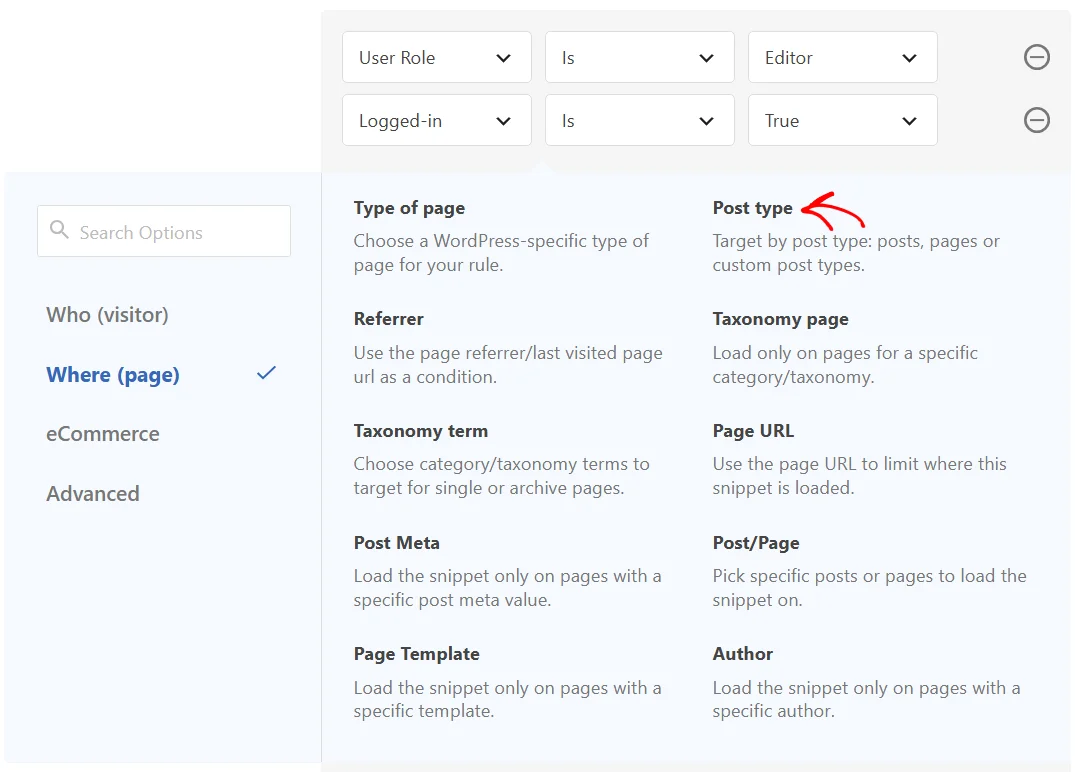
A second rule appears in the group. Next, click its rule type field to open the picker.
In the picker’s sidebar, click Where (page). Then choose Post type.
Then, from the new rule’s value dropdown, select Posts.
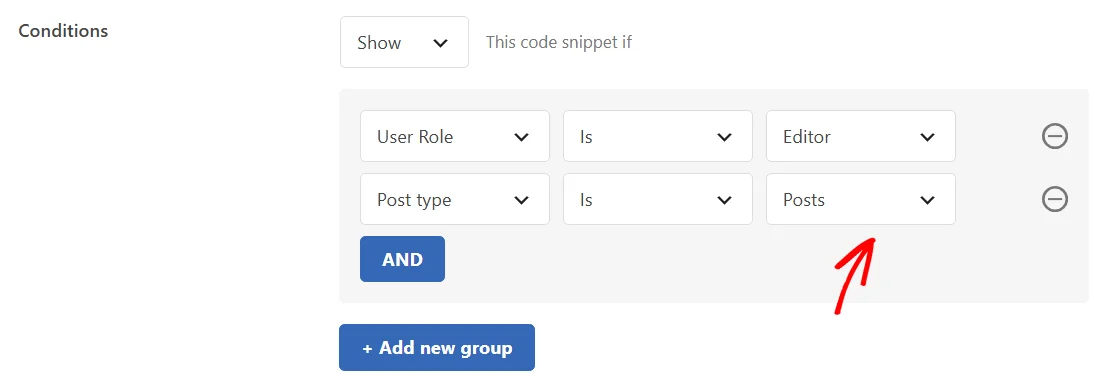
The group now reads User Role Is Editor AND Post type Is Posts. The snippet now runs only when an editor views a blog post.
A group matches when all of its rules are true. The snippet runs when any one of its groups matches. Adding a second group lets you cover a different situation without loosening the first.
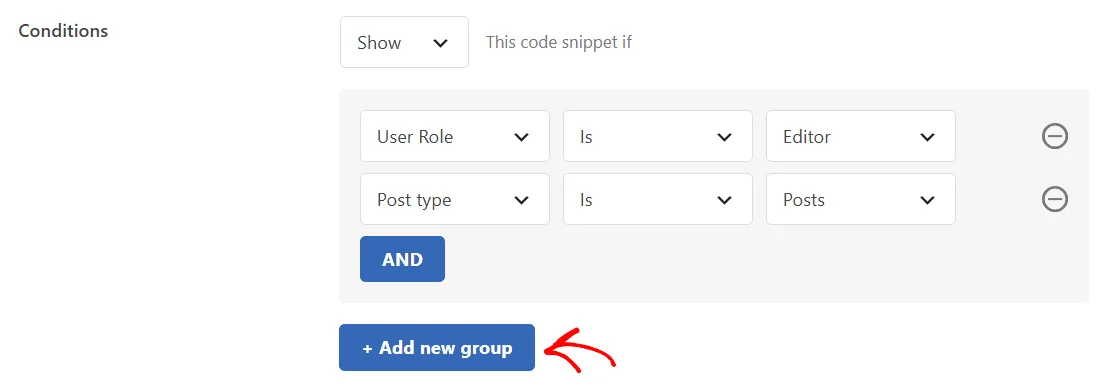
The User Role rule holds only one role at a time. To show our snippet to authors too, we’ll add a second group for them. Below the first group, click + Add new group.
Next, set up the new group the same way, with User Role Is Author and Post type Is Posts. WPCode places an OR divider between the two groups.
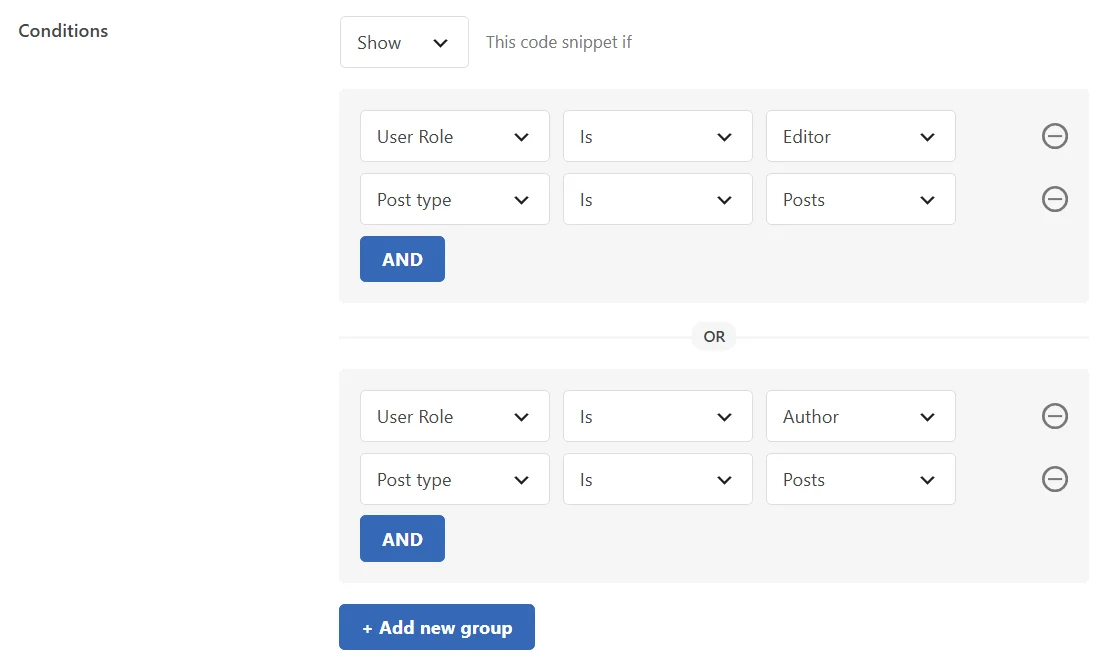
The snippet now runs when an editor or an author views a blog post, and nowhere else.
When your rules are ready, click Update at the top of the snippet editor. On a snippet you haven’t saved yet, this button reads Save Snippet instead.
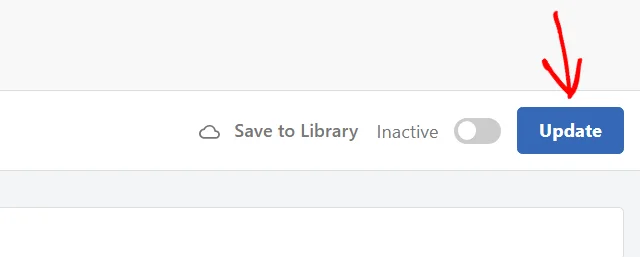
Your rules take effect once the snippet is saved and its status toggle, just left of the Update button, reads Active.
The rule picker groups every rule type into four categories. Here’s what each rule checks.
The Who (visitor) category holds rules about the person viewing the page:
The Where (page) category holds rules about the page being viewed:
The eCommerce category holds rules for store and membership plugins. You’ll find WooCommerce Page and WooCommerce Cart, EDD Page for Easy Digital Downloads, and MemberPress Page and MemberPress User. Each one becomes available once its plugin is installed and active on your site.
The Advanced category holds scheduling rules and a rule that links snippets together:
The scheduling rules have more comparison options than the rest, such as Is Before and Is on or After. Our guide on creating advanced scheduling rules covers them in detail.
That’s it! You now know how to use Smart Conditional Logic to control exactly who sees a WPCode snippet and where it runs. Next, take a look at our complete guide to snippet locations to choose where on the page your snippet appears.
Below, we’ve answered some of the most common questions about Smart Conditional Logic in WPCode.
Yes. WPCode checks a snippet’s rules wherever it inserts the snippet automatically, and also whenever the snippet’s shortcode runs. A shortcode outputs the snippet only when its rules match, whichever option the Show dropdown is set to. So for a snippet you place with a shortcode, write rules that describe where it should appear.
Yes, for rules whose value field accepts several entries. Post/Page, Page Template, Author, Taxonomy term, Browser Type, Operating System, Day of the Week, Country, and Continent all let you pick more than one value. The rule matches when any of the values you picked applies. For rules that hold a single value, such as User Role, add a separate group for each value instead.
Each eCommerce rule depends on its plugin. The WooCommerce rules need WooCommerce, EDD Page needs Easy Digital Downloads, and the MemberPress rules need MemberPress. Once that plugin is installed and active, its rules become selectable in the picker.
The Country and Continent rules in the Who (visitor) category handle this. Both rules need the WPCode Location addon. If the addon isn’t active on your site yet, the picker prompts you to activate it when you choose one of these rules.
If your homepage is set to a static page, WPCode treats it as the Homepage page type rather than a single page. To target it, use Type of page Is Homepage. If you also set a separate page to list your latest posts, that page counts as Blog home.
WPCode compares against the full address of the page, including the trailing slash and any query string. Because of that, the Contains comparison with part of the address is the most reliable choice, such as Page URL Contains /pricing/. The match is case-sensitive. Type the address exactly as it appears in your browser.
Yes. When you turn on conditional logic for a PHP snippet set to Run Everywhere, WPCode switches its location to Frontend Conditional Logic automatically. That location runs later in the page load. By then, every rule type has the information it needs. Our guide on conditional logic for PHP snippets explains the difference.
Future-proof your website with WPCode Snippets and improve the way you manage code across all your websites.
Copyright © 2026 WPCode. WPCode® is a registered trademark of WPCode, LLC


The WordPress® trademark is the intellectual property of the WordPress Foundation. Uses of the WordPress®, names in this website are for identification purposes only and do not imply an endorsement by WordPress Foundation. WPCode is not endorsed or owned by, or affiliated with, the WordPress Foundation.