Copyright © 2026 WPCode. WPCode® is a registered trademark of WPCode, LLC

Documentation, Reference Materials, and Tutorials for WPCode
Would you like to limit where WPCode snippets are automatically inserted on your website? The Smart Conditional Logic options allow you to create specific rules for each snippet changing the way they get executed. Let’s get started.
The first step in creating a set of rules is to enable the conditional logic using the toggle at the top:
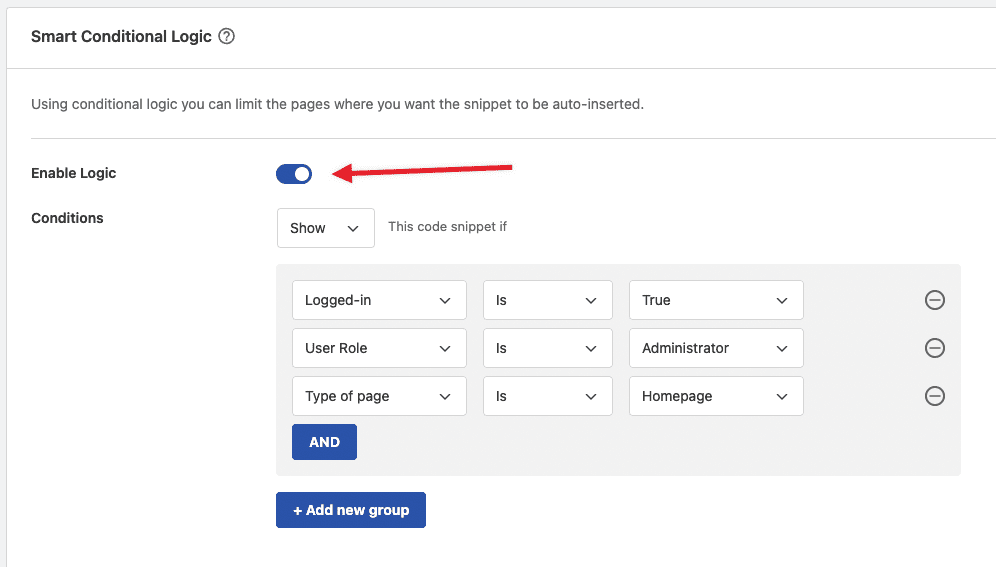
The second option you have is whether the rules you create below will either Show or Hide the snippet. Sometimes you want to limit the snippet from being executed for very specific set of rules and it might be easier to define where it should not execute instead of having to define all the other scenarios where it should, that’s why, using this field, you can turn things around.
The rules you can create using the Conditional Logic fields are split up in the following main categories:
The User category, as the name suggests, allows you to add restrictions based on your website visitor and includes the following options:
The Page rules are used in relation to the page that the visitor is seeing and where the snippet is executed.
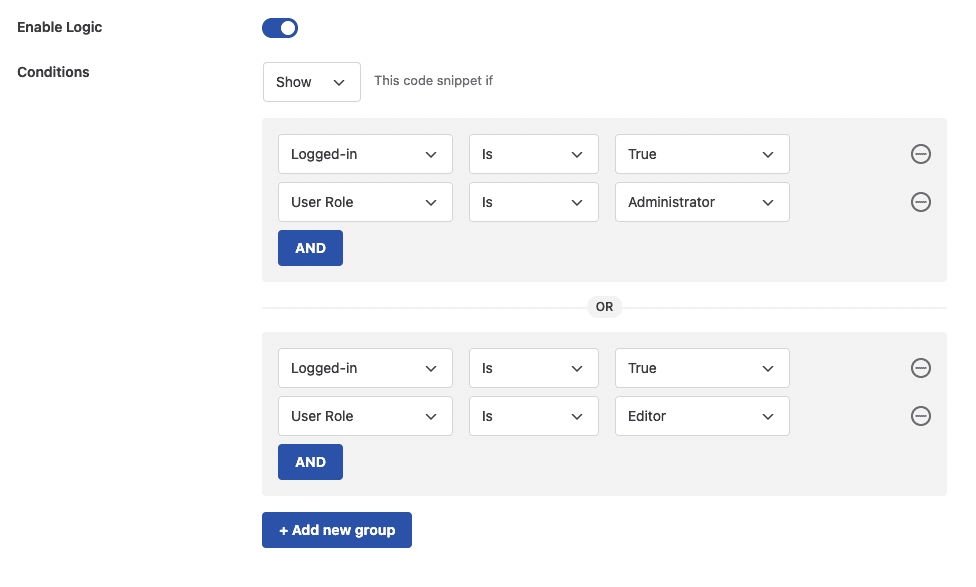
You may be asking: What if I want to use multiple rules from the same option?
As you may have noticed, in a group of rules the relation between the rules is “AND” which means all the rules in a group have to be true in order to have the conditional logic apply to the snippet. You can make things more flexible by adding multiple groups:

This allows you to use the same rule multiple times. For example, if you want your snippet to be shown only to logged-in users that have the role of Administrator and the role of Editor your rules will look like this:
That’s it! Now you know how to use Smart Conditional Logic to create powerful rules for your snippets.
Future-proof your website with WPCode Snippets and improve the way you manage code across all your websites.
Copyright © 2026 WPCode. WPCode® is a registered trademark of WPCode, LLC

The WordPress® trademark is the intellectual property of the WordPress Foundation. Uses of the WordPress®, names in this website are for identification purposes only and do not imply an endorsement by WordPress Foundation. WPCode is not endorsed or owned by, or affiliated with, the WordPress Foundation.