
Cascading Style Sheets, or CSS, is the language that helps you control how your website looks. It’s responsible for everything from the colors and fonts to the layout and spacing of your content.
When you use a WordPress theme, it comes with a default CSS stylesheet. But you might find that you want to change things up, like tweak the header, change button colors, or add unique design elements that aren’t part of your theme. That’s where custom CSS comes in.
However, editing CSS can be tricky for beginners. If you don’t know what you’re doing, then it can end messing up your site’s appearance and layout. But there are simple ways to edit the CSS stylesheets and customize your site.
In this article, I’ll show you how to add custom CSS to your WordPress site.
Why Add Custom CSS to WordPress?
Before jumping into how to add custom CSS, here are some common reasons for using it in WordPress:
- Unique Branding: Out-of-the-box themes may not perfectly match your branding. Custom CSS allows you to make your website stand out and truly reflect your brand identity by adjusting colors, fonts, and other visual elements.
- Theme Limitations: Even well-designed themes can have limitations. You might want to tweak something that isn’t customizable through the WordPress admin, or add a feature like a unique animation, or a custom layout of elements.
- Personalized Styling: You can tailor the look and feel to your specific taste. For example, you might prefer a different button style or want to adjust the spacing around images.
- Advanced Design Elements: You can implement advanced design elements, which may not be possible through the usual admin tools. For example, a custom gradient, a unique drop shadow, or a custom animation.
- Improved User Experience: Sometimes, a small CSS adjustment can greatly enhance the user experience. For example, increasing the readability of the text, or making call-to-action buttons stand out more.
That said, let’s look at different ways to add custom CSS to your WordPress website. You can use a plugin to insert and manage code, or use the full site editor or theme customizer in WordPress. Simply click the links below to jump ahead to your preferred method.
Method 1: Add Custom CSS Using WPCode
The best way to add custom CSS in WordPress is by using WPCode. It is the best WordPress code snippet plugin that helps you manage custom code on your site with ease.
The best part about using WPCode is that your custom CSS will remain intact even if you update or change your WordPress theme in the future. This way, all your theme customizations will remain in one place, and you can easily modify them according to the new theme.
Besides that, WPCode comes with a built-in library of code snippets, which you can add with a 1-click. It also offers conditional logic, conversion pixels, error handling and more.
To get started, you can use the free WPCode Lite version and insert custom CSS to your site. However, there is also a WPCode Pro version that offers advanced features like AI snippet generator, code revisions, choose device type, unlock more code insertion locations, and more.
Simply head to Plugins » Add New Plugin from your WordPress dashboard and search ‘WPCode’ in the search bar.
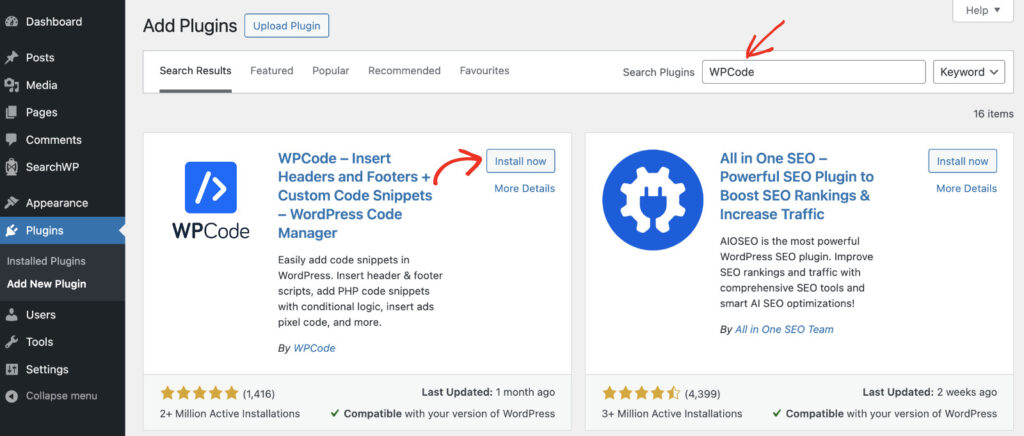
Next, you can click the ‘Install now’ button and then activate the plugin. If you need help, then please see this guide on how to install a WordPress plugin.
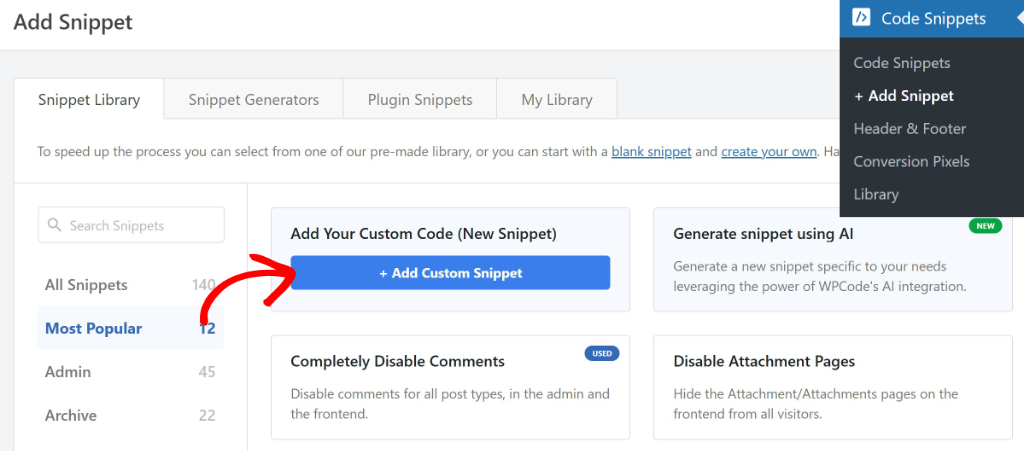
Once the plugin is active, you can add custom CSS to your website. To do that, you’ll need to go to Code Snippets » Add Snippet from the WordPress admin panel and click the ‘Add Your Custom Code (New Snippet)’ option.
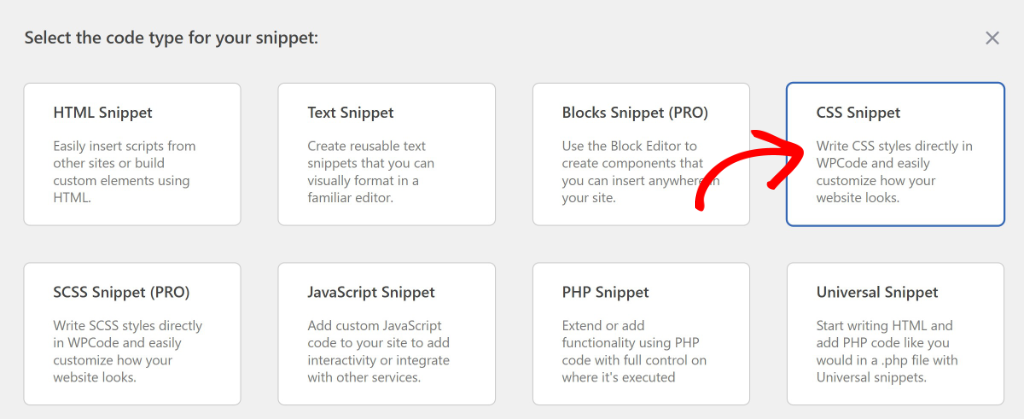
After that, you’ll need to select a code type for your snippet.
Simply click the ‘CSS Snippet’ option.
Next, you can enter a name for your custom CSS code snippet at the top.
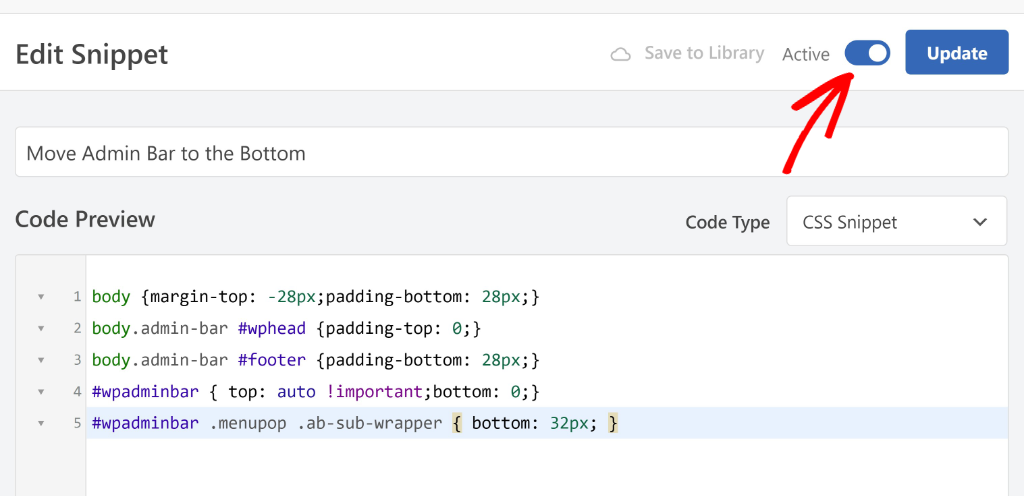
Once that’s done, go ahead and enter your CSS snippet in the code editor.
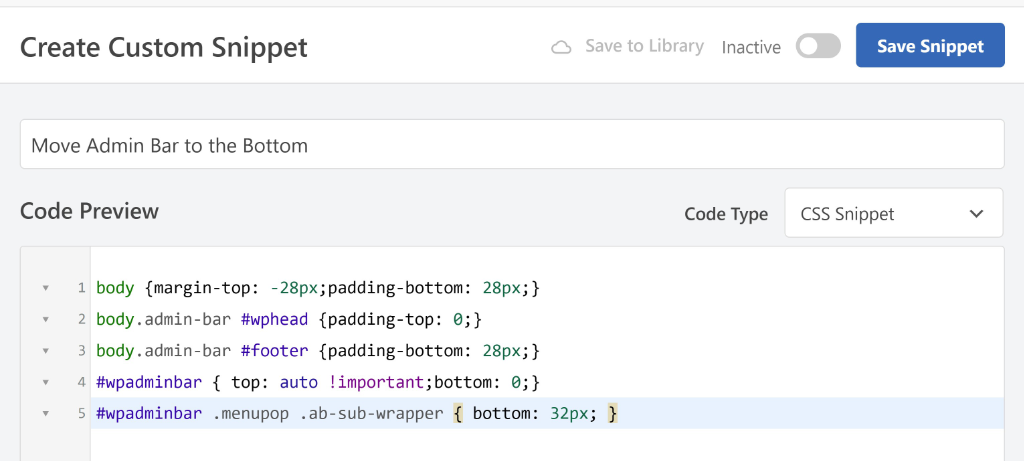
Don’t forget to click the ‘Save Snippet’ button before moving ahead.
Next, you can scroll down to the ‘Insertion’ section and select where you’d like the custom CSS code to run. By default, WPCode will ‘Auto Insert’ the CSS snippet in the Side Wide Header of your site. But there is also an option to insert the code as ‘Shortcode’ on your site.
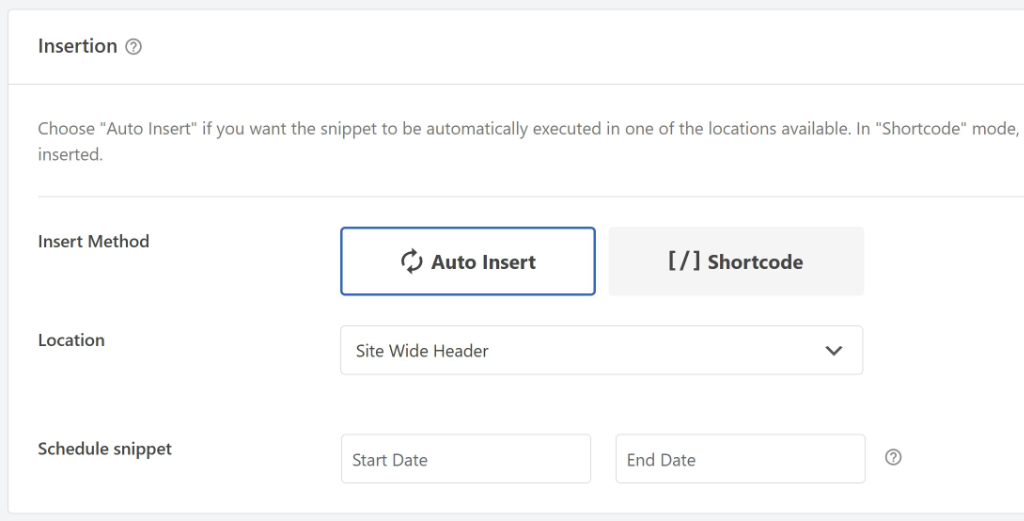
If you select the ‘Auto Insert’ method, then you can click the ‘Location’ dropdown menu and choose a specific place to insert your custom CSS.
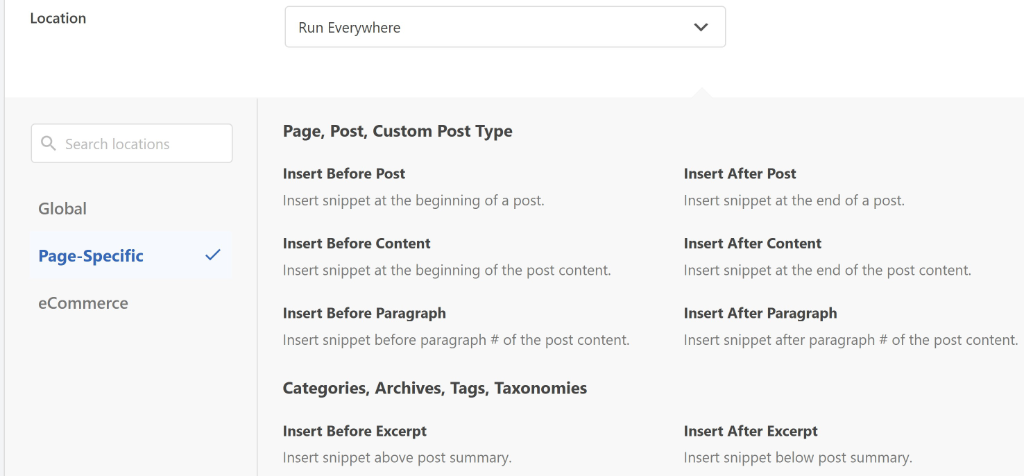
For example, you can insert the code before or after content, tags, excerpt, and more.
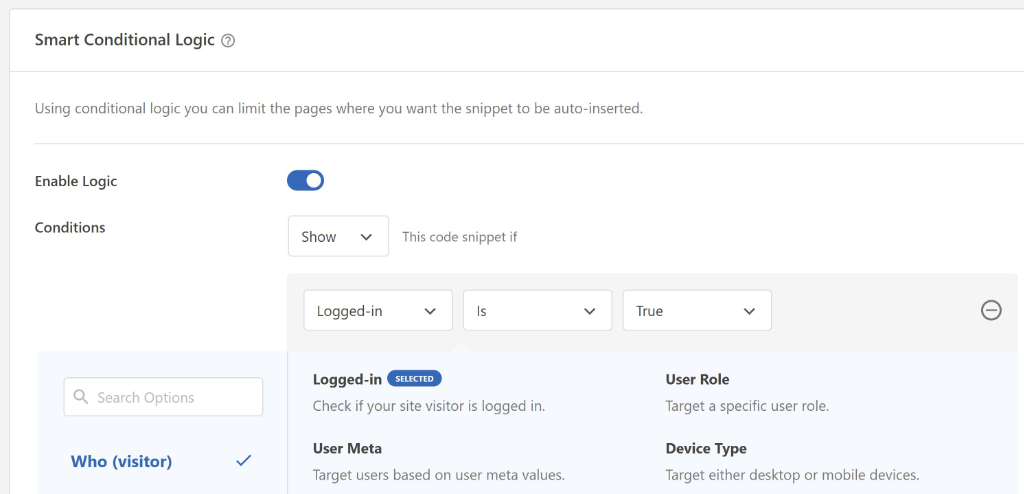
If you scroll down further, then you can also set up Smart Conditional Logic for your custom CSS.
This allows you to hide or show the snippet for logged-in users, specific user roles, post type, particular pages, or taxonomy term.
When you’re done, simply scroll back to the top and click the toggle to make the custom CSS snippet Active.
Next, you’ll need to click the ‘Update’ button.
That’s it! You’ve successfully added custom CSS to your WordPress site.
Method 2: Add Custom CSS Using Full Site Editor
The next method for adding custom CSS is by using the Full Site Editor (FSE) in WordPress.
FSE is just like the WordPress block editor that you use to edit blog posts and pages. You can customize your theme’s design and layout by using different blocks.
With this method, your customizations will be removed if you update or change your theme. But if you want your custom CSS to remain intact, then it’s better to use a plugin, like WPCode.
Note: The Full Site Editor is only available for selected WordPress block-based themes.
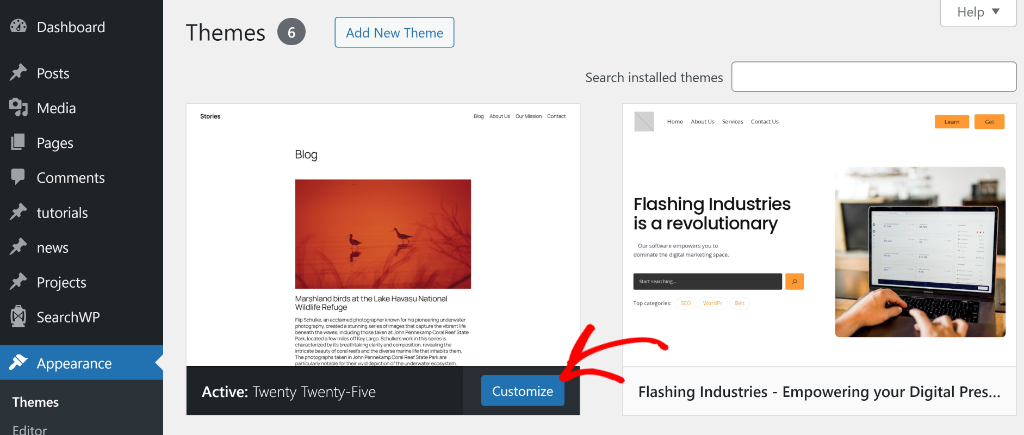
To start, you can go to Appearance » Themes from the WordPress dashboard and then click the ‘Customize’ button.
After that, you’ll see the Full Site Editor where you can edit your theme.
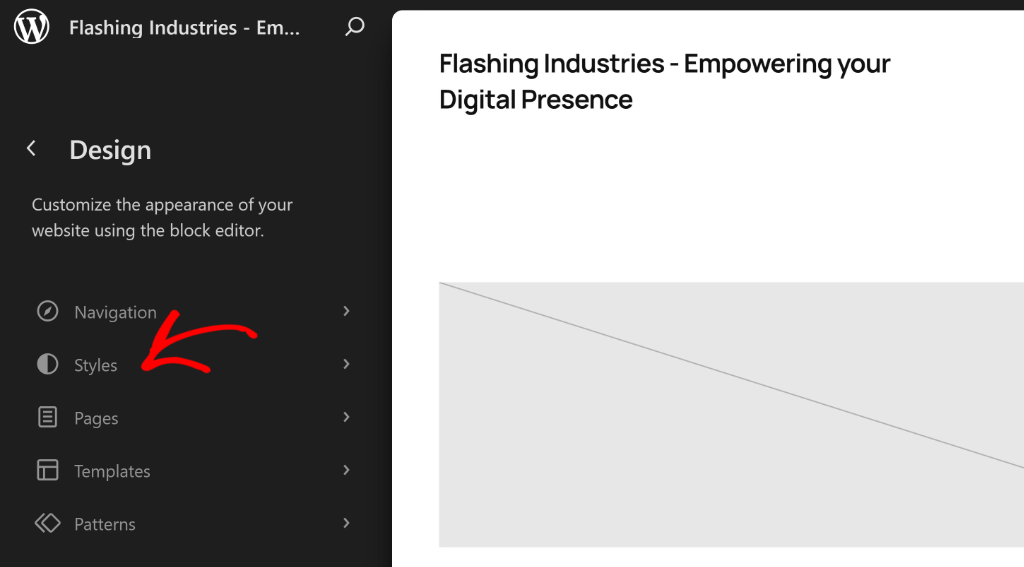
Go ahead and click the ‘Styles’ tab from the menu on the left.
Next, you’ll see different styles your theme has to offer.
Go ahead and click the ‘Edit Styles’ option, which should be a pencil icon.
After that, you will see more Style options in the settings panel on the right-hand side.
From here, you can click the 3-dots icon to view more options and then select Additional CSS.
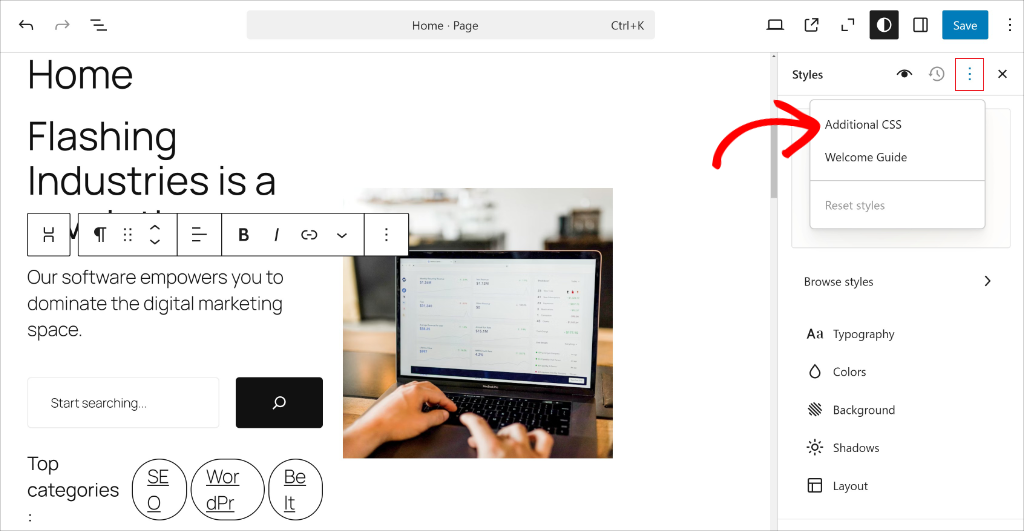
Next, you will see an ‘Additional CSS’ box where you can add your custom CSS code.
Once you’re done, simply click the ‘Save’ button at the top.

You can now close the Full Site Editor and visit your site to see the new CSS style.
Method 3: Add Custom CSS Using Theme Customizer
If you’re using a WordPress theme that uses the Theme Customizer, then you can easily add custom CSS by accessing it.
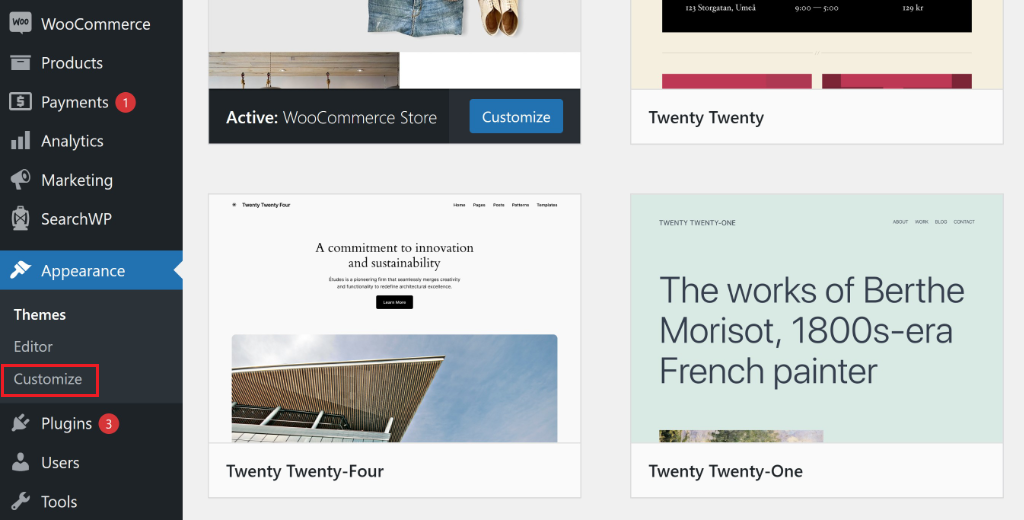
To start, you’ll need to go to Appearance » Customize from the WordPress dashboard.
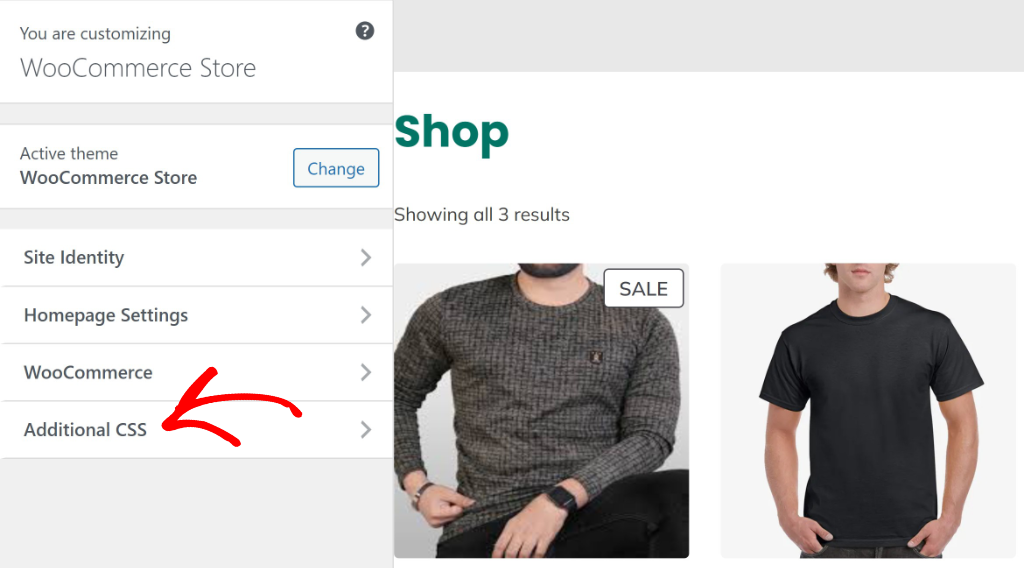
On the next screen, you’ll see the WordPress Theme Customizer.
From here, you can click the ‘Additional CSS’ option.
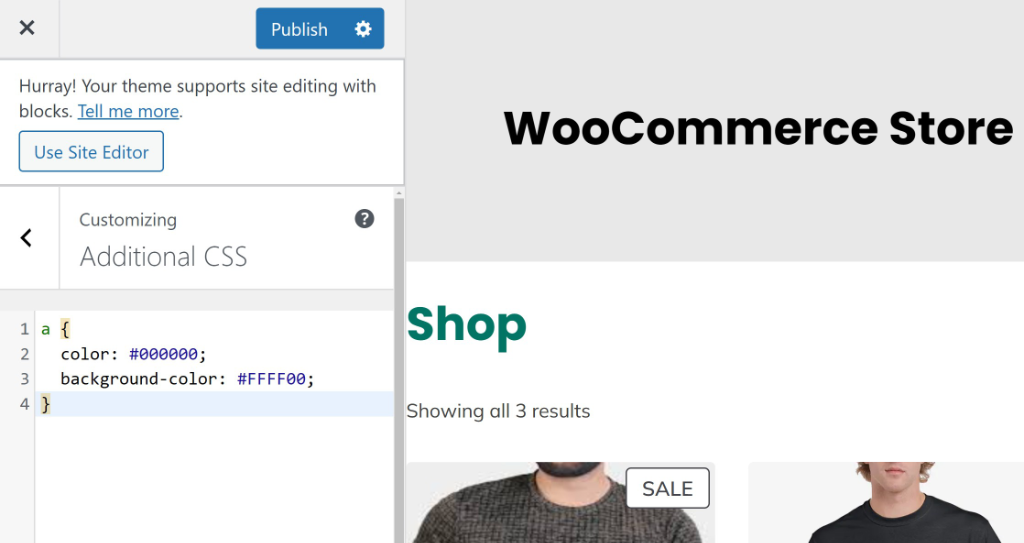
After that, you can enter your custom CSS code under the Additional CSS area.
When you’re done, go ahead and click the ‘Publish’ button.
That’s it, you’ve added custom CSS using the WordPress theme customizer.
Method 4: Adding Custom CSS Using Theme File Editor
You can also add custom CSS to the stylesheets of your theme from the WordPress dashboard. However, this method is recommended for advanced users who have technical knowledge. That’s because directly editing the stylesheets can be risky, and any mistake can break your website.
As a precaution, it is better to create a backup of your WordPress site, so you don’t lose any valuable data when adding custom CSS. Plus, you can easily restore your site to a previous version in case anything goes wrong.
Besides that, it is recommended to create a child theme instead of making changes to your live website. This way, you can easily customize your theme and apply the changes when they’re ready.
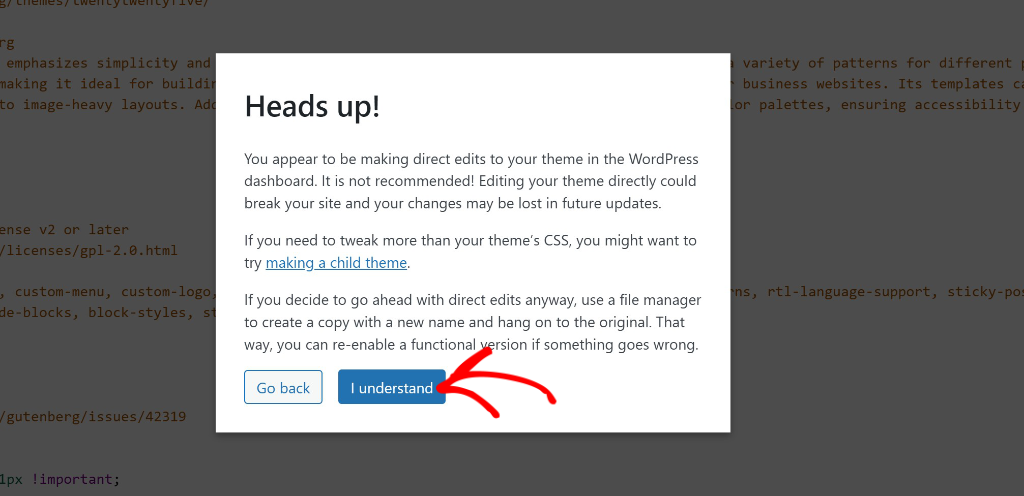
Once you’ve backed up your site and set up a child theme, you can head to Tools » Theme File Editor from the WordPress dashboard. Next, you’ll see a warning message about directly editing theme files. You can simply click the ‘I understand’ button to continue.
Next, you should be in the ‘style.css’ file (stylesheet) by default. However, if you’re not, then you can check the menu on the right and head to the style.css file.
From here, you can enter your custom CSS at the bottom of the file.
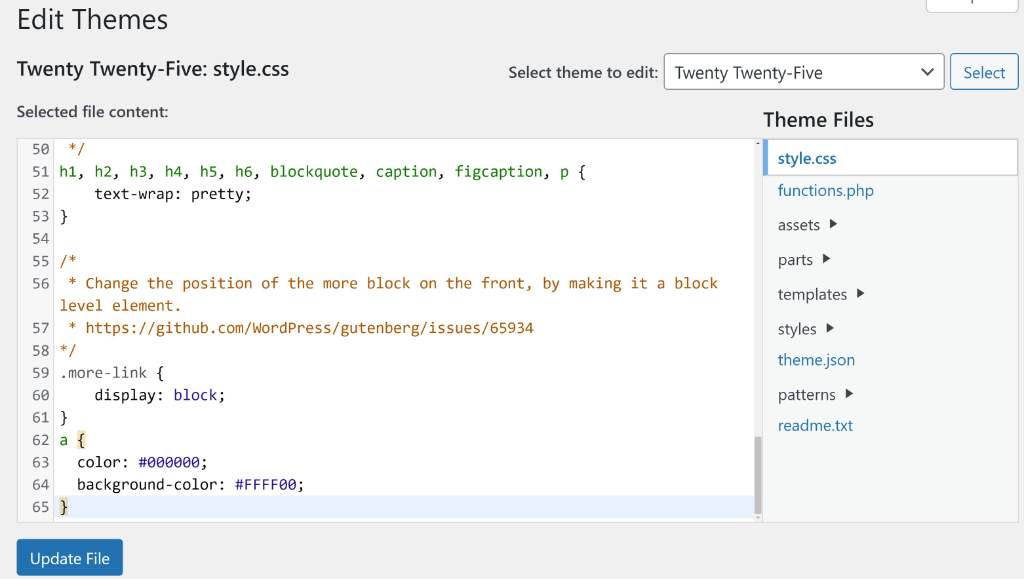
When you’re done, simply click the ‘Update File’ button.
Note: If you’re not comfortable creating a child theme and directly editing the theme files, then it’s better to use any of the three methods mentioned in this article. The simplest way is by using a plugin like WPCode, but you can also use the Full Site Editor or Theme Customizer to add custom CSS.
I hope this article helped you learn how to add custom CSS to WordPress. You may also want to see our guides on
- How to add header and footer code in WordPress
- Best way to add code to the functions.php file safely
- How to use developer tools (inspect element)
If you need help, then feel free to leave a comment below. And don’t forget to follow us on X (formerly known as Twitter) and subscribe to our newsletter for all the latest updates.

