
Documentation, Reference Materials, and Tutorials for WPCode
Would you like to manage code snippets for every site in your WordPress multisite network from one place? The WPCode Multisite addon gives your network admin its own Code Snippets menu, so one snippet can run across the whole network.
In this guide, we’ll walk you through adding network snippets, choosing which sites they run on, and controlling WPCode for the whole network.
All you need is a WordPress multisite network with WPCode network activated.
Requirements: The Multisite addon requires a Bundle license level of WPCode.
Before you get started, make sure WPCode is installed and network activated on your multisite network.
Everything in this guide happens in your network admin, not in a single site’s dashboard. You’ll need to be logged in as a super admin, the role that can reach the network admin.
If you haven’t created your network yet, see How to Install and Set Up a WordPress Multisite Network for a step-by-step guide.
To get started, we’ll add your license key at the network level and install the addon from there.
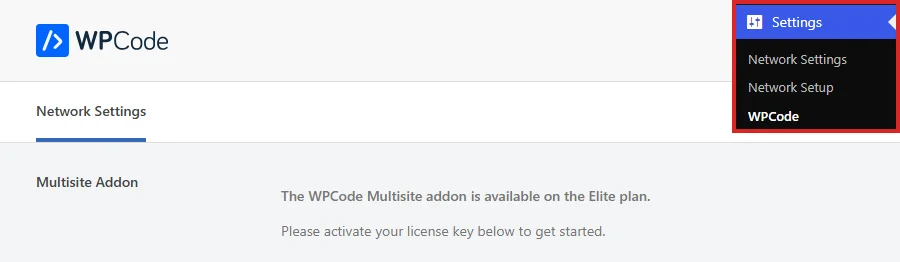
From your network admin, go to Settings » WPCode. Until a license key is verified, the Multisite Addon row at the top asks you to activate your license key.
Next, paste your license key into the License Key field. You’ll find your key in your WPCode account or in your purchase receipt email.

With your key in place, click Verify Key.

WPCode confirms that your license is activated and then reloads the page. Your license level now shows under the License Key field, and the Multisite Addon row has a button to add the addon.
In the Multisite Addon row, click Install Addon Now. If the addon files are already on your site, the button reads Activate Addon instead.
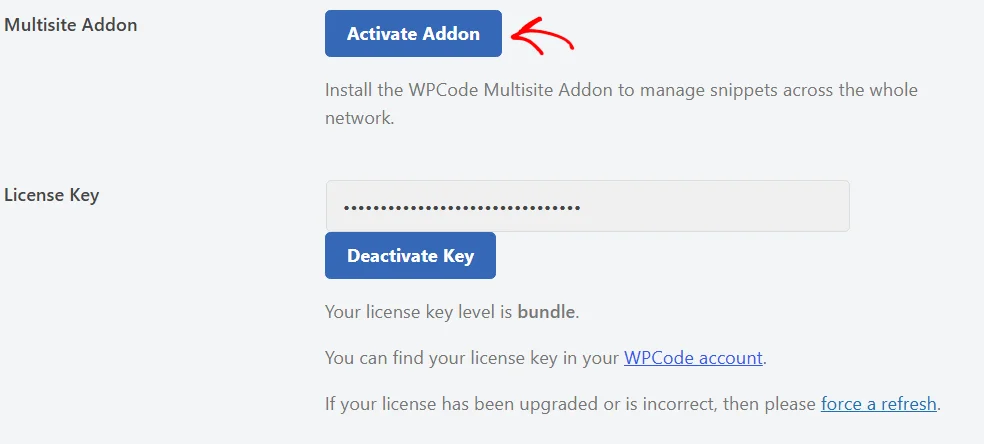
WPCode installs the addon, activates it for the whole network, and reloads the page. If you’d rather install it by hand, download the addon from your WPCode account and network activate it from the Plugins screen.
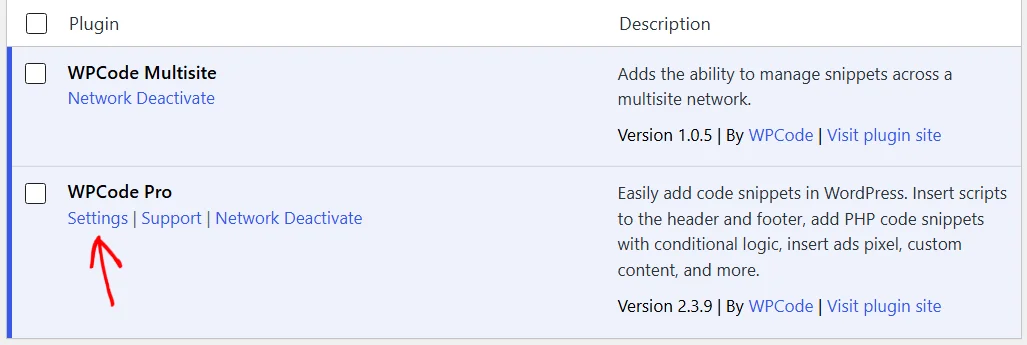
Once the addon is active, the Plugins screen in your network admin lists WPCode Pro and WPCode Multisite as network active. Under WPCode Pro, click Settings to open the network settings.
The Settings link opens Code Snippets » Settings, a menu the addon adds to your network admin. Your network license now lives on the General Settings tab here, and this is where you manage it from now on.
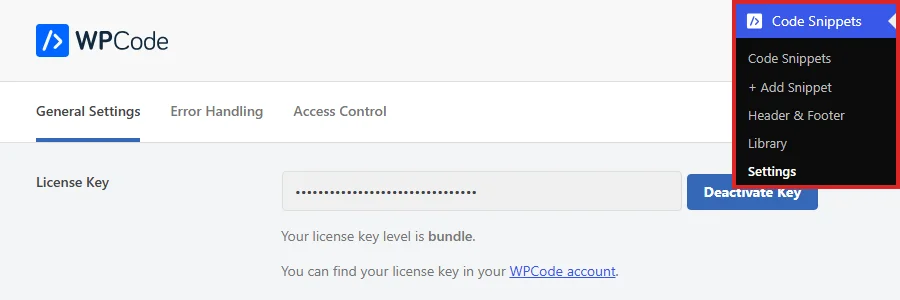
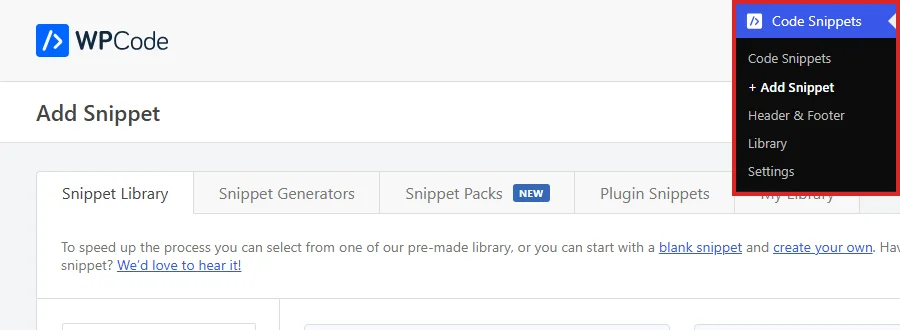
The network Code Snippets menu holds five items: Code Snippets, + Add Snippet, Header & Footer, Library, and Settings. Each site in your network keeps its own Code Snippets menu as well.
A snippet you add in the network admin runs on every site in your network. You’ll build it the same way you build a snippet on a single site.
To get started, go to Code Snippets » + Add Snippet in your network admin.
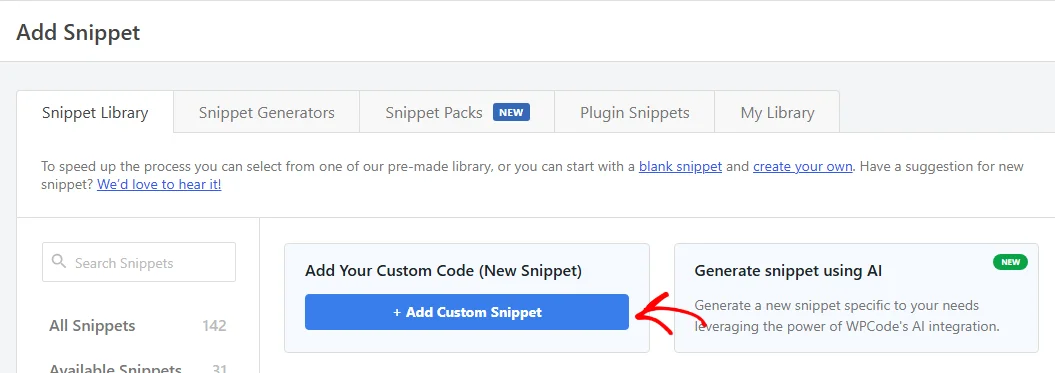
On the Snippet Library tab, hover over the Add Your Custom Code card. Then click + Add Custom Snippet.
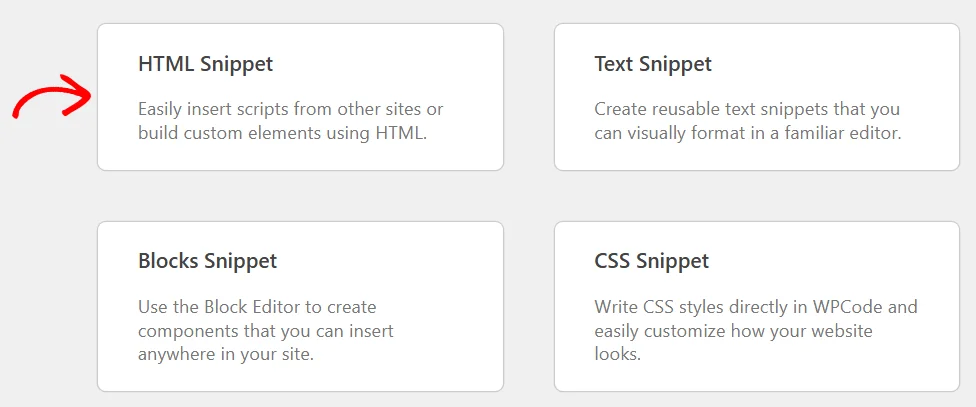
WPCode asks which type of snippet you’re building. Our example is a short shipping banner, so we’ll click HTML Snippet.
Next, give your snippet a title and add your code to the Code Preview box.
If this is your first snippet, our guide on creating your first snippet walks through the editor in detail.
Below the code editor, scroll down to the Insertion box. Then click the Location field to open the list of locations. Our banner belongs at the bottom of each page, so we’ll choose Site Wide Footer.
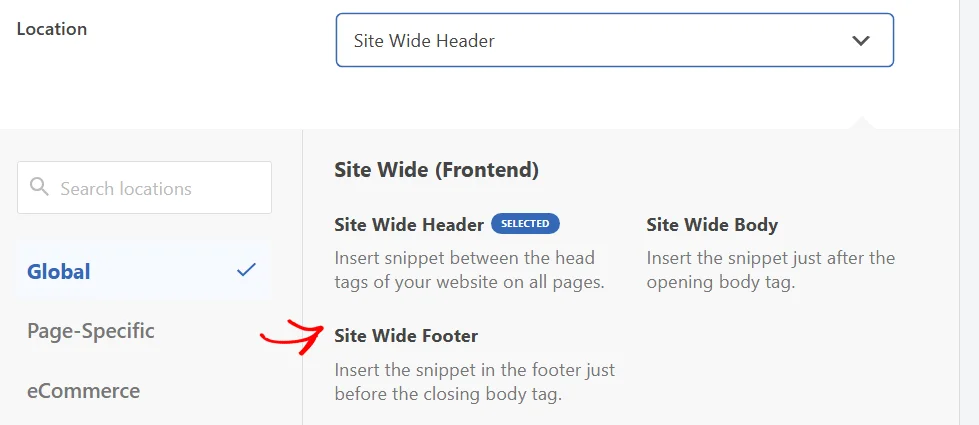
Every location you can use on a single site is available here too.
To learn what each one does, see our complete guide to snippet locations.
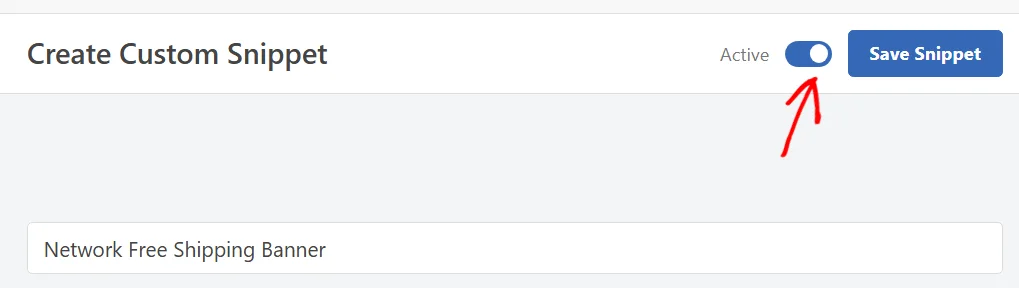
At the top of the screen, switch the status toggle so it reads Active.
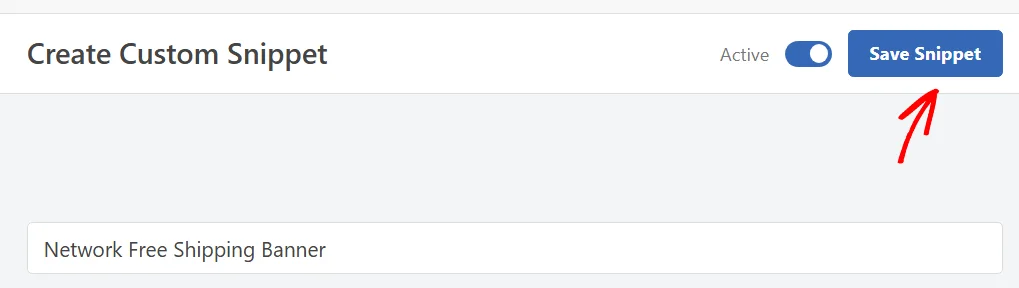
When you’re ready, click Save Snippet.
Your snippet now runs on every site in your network. To see it alongside your other network snippets, go to Code Snippets » Code Snippets in your network admin.
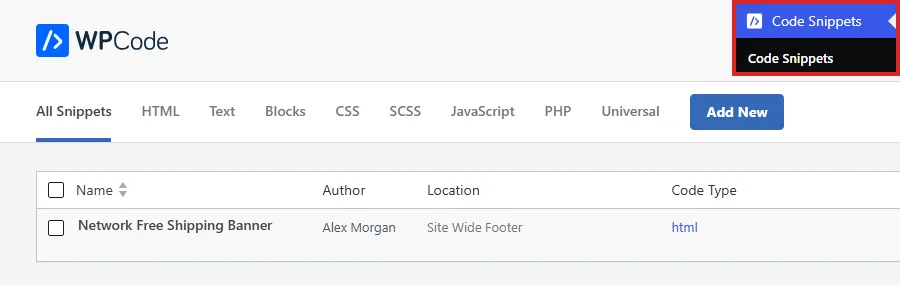
Network snippets stay in the network admin. They don’t appear in the Code Snippets list of any individual site, so site admins can’t edit or switch them off.
Sometimes a snippet only belongs on a few of your sites. The addon adds a Site rule to smart conditional logic. With it, you can pick those sites without copying the snippet to each one.
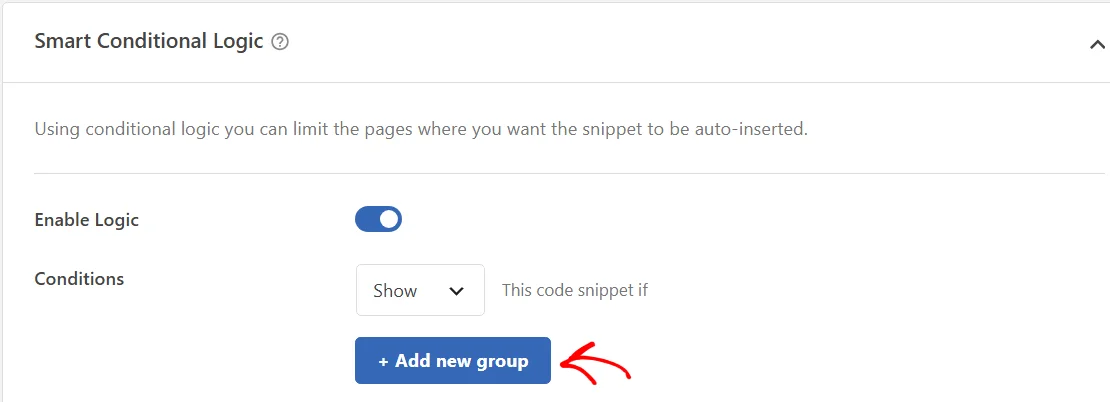
To begin, open your network snippet from that list for editing. Inside the editor, scroll down to the Smart Conditional Logic box. Then turn on the Enable Logic toggle.
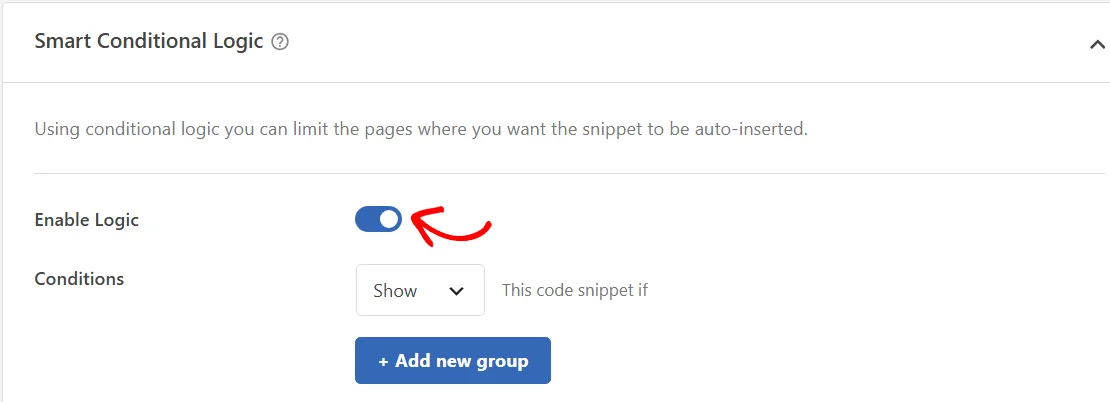
Below the Show dropdown, click + Add new group.
In the network admin, a new group starts with the Site rule already chosen. If you open the rule field, you’ll see Site at the top of the Where (page) list.
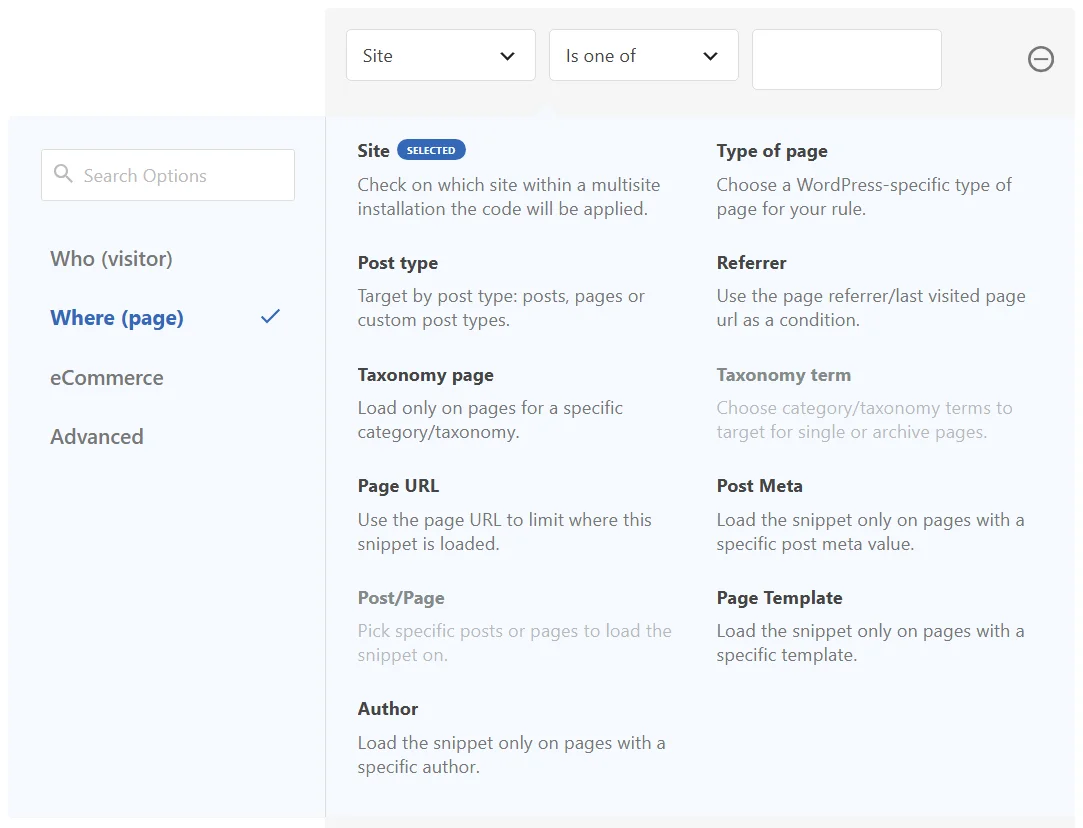
Some rules are greyed out in this list. Taxonomy term and Post/Page depend on content that belongs to one site, so WPCode keeps them for snippets you create on that site.
The same goes for the WPCode Snippet rule under Advanced, plus the WooCommerce Cart and MemberPress User rules under eCommerce. If you need one of those, create the snippet on that site instead.
With Is one of selected, click the value field. Then choose the sites you want from the list. You can start typing a site’s name to find it quickly.
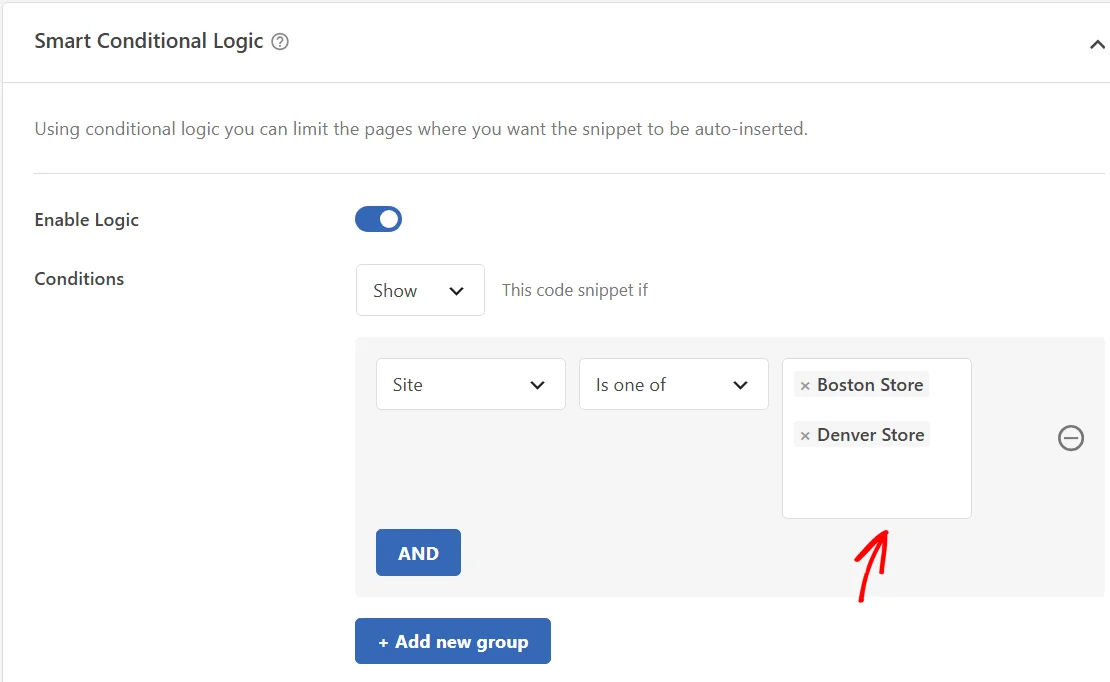
To run the snippet everywhere except a few sites, switch the middle dropdown to Is not one of instead.
You can also add more rules to the group, such as Type of page or Logged-in. WPCode checks them on each site as visitors load it.
When you’re done, click Update at the top of the screen.
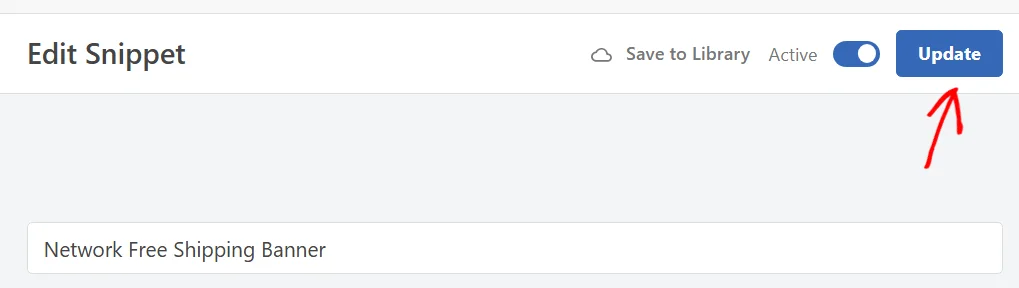
From now on, the snippet only runs on the sites you picked. On each of those sites, visitors see the banner at the end of every page, just after the theme’s footer.
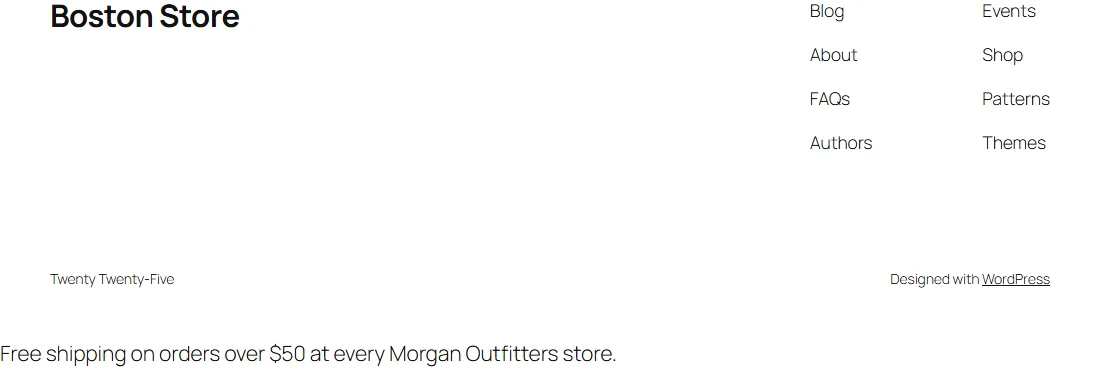
Your other sites don’t load the snippet at all.
For scripts like a tracking code or a chat widget, you might not need a full snippet. The network admin has its own Header & Footer page that works like the global header and footer settings on a single site.
To open it, go to Code Snippets » Header & Footer in your network admin.
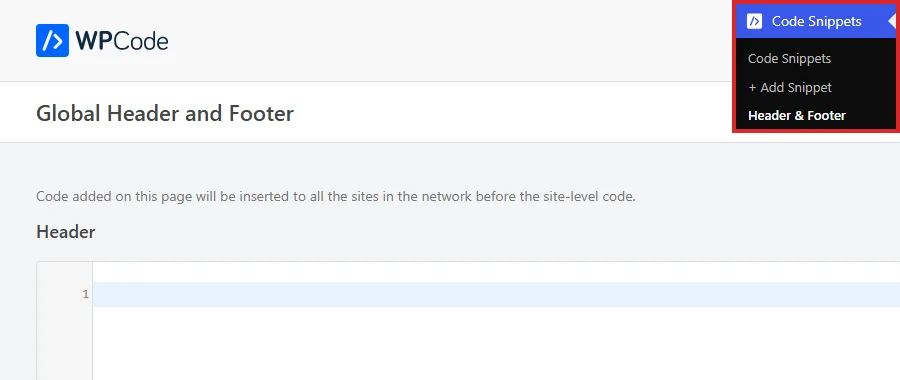
Code you add here goes onto every site in your network. WPCode prints it before each site’s own header and footer code.
Next, paste your code into the Header, Body, or Footer box, depending on where your script needs to load. In our example, we’ve added a chat widget script to the Footer box.
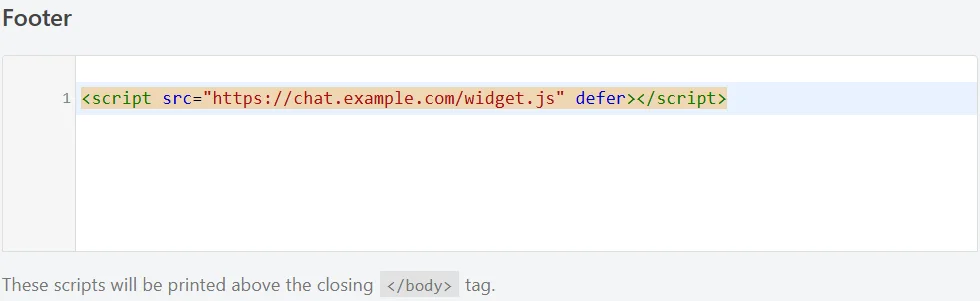
When you’re finished, scroll back to the top of the page. Then click Save Changes.

Note: If you use a caching plugin, clear the cache on your sites so visitors get the new code.
Your network scripts now load on every site.
The network settings decide who can manage WPCode across your sites.
From your network admin, go to Code Snippets » Settings. Then click the Access Control tab.
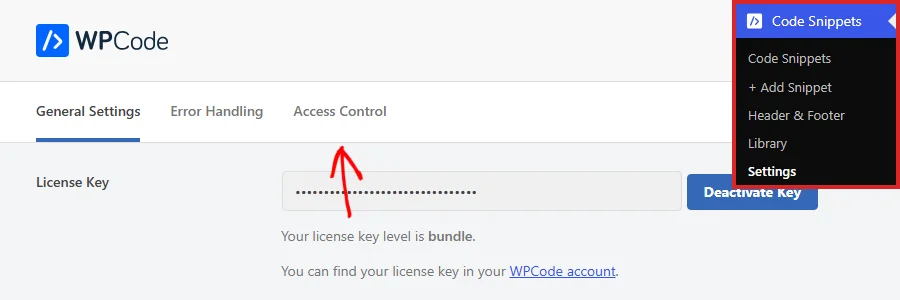
With the addon active, Access Control lives only in the network admin. Your sites’ own Settings pages no longer show this tab, and the roles you choose here apply on every site.
Each permission has its own role field. When you click a role field, the list of roles you can choose from opens.
Unlike on a single site, Administrator is one of the choices. That’s because super admins always keep full access, so you decide here how much of WPCode site administrators can use.
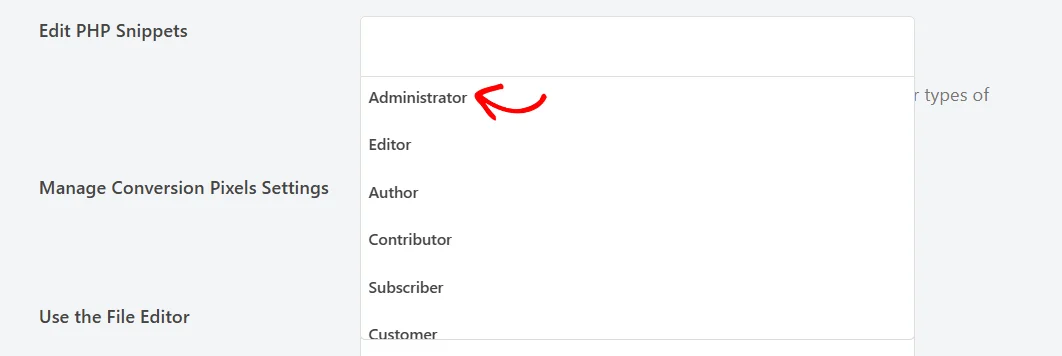
For more on each permission and the PHP snippet setting below them, see our guide to access control.
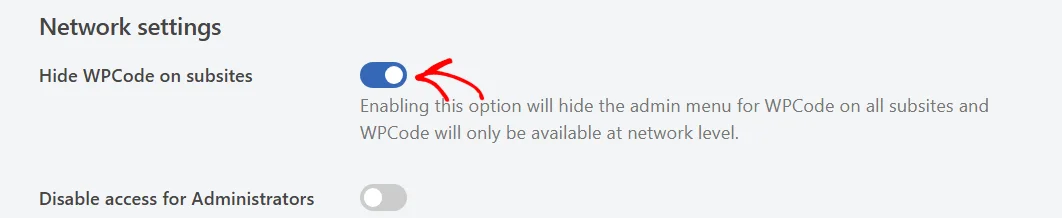
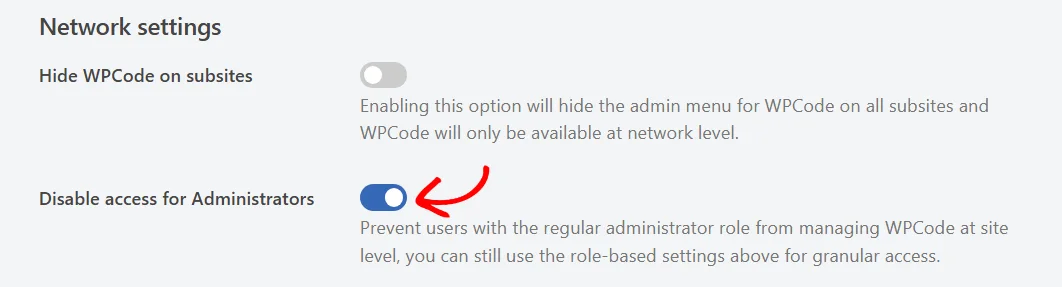
Under the Network settings heading, you’ll find two options that only exist on a multisite network.
If you’d like to manage WPCode only from the network admin, turn on Hide WPCode on subsites. This takes the Code Snippets menu away from every site in your network. WPCode leaves this off by default, so each site keeps its own menu until you decide otherwise.
To stop site administrators from managing WPCode on their own sites, turn on Disable access for Administrators. This is also off by default, which lets site administrators keep managing WPCode on their own sites. Once it’s on, you can still give them specific permissions with the role fields above.
At the bottom of the tab, click Save Changes.

That’s it! You now know how to manage snippets, scripts, and permissions for your whole multisite network with the WPCode Multisite addon. Next, take a look at our guide to finding which scripts WPCode loads on a page to check what runs on each of your sites.
Below, we’ve answered some of the most common questions about using the WPCode Multisite addon.
Yes. Each site keeps its own Code Snippets menu and its own snippets, separate from your network snippets. If you’d rather manage everything centrally, turn on Hide WPCode on subsites or Disable access for Administrators in the network Access Control settings.
For snippets, WPCode sorts network snippets and the site’s own snippets together by their Priority number, lowest first. To make a network snippet load earlier, give it a lower priority. Code on the network Header & Footer page always prints before the site’s own Header & Footer code.
Visit the site while you’re logged in and open the WPCode menu in the admin bar. That menu appears when Admin Bar Info is on in the site’s own Code Snippets settings, which it is by default. Under Global Scripts, you’ll see the network header, body, and footer entries alongside the site’s own. A network snippet listed there links straight to its editor in the network admin. Our guide to finding which scripts WPCode loads explains the menu in full.
Those features stay with each site. The network Code Snippets menu covers snippets, the Header & Footer page, the Library, and Settings. Conversion Pixels, the File Editor, and Tools are set up separately on each site from that site’s own Code Snippets menu.
A network snippet without a Site rule runs on every site in the network, including sites you add later. If you’ve limited a snippet with Is one of, add the new site to that rule when you want the snippet to run there.
Future-proof your website with WPCode Snippets and improve the way you manage code across all your websites.
Copyright © 2026 WPCode. WPCode® is a registered trademark of WPCode, LLC


The WordPress® trademark is the intellectual property of the WordPress Foundation. Uses of the WordPress®, names in this website are for identification purposes only and do not imply an endorsement by WordPress Foundation. WPCode is not endorsed or owned by, or affiliated with, the WordPress Foundation.