
I’ve been updating my WordPress content regularly, but readers couldn’t tell when I made improvements. They only saw the original publish date, which made my posts look outdated even after I added fresh information.
WordPress doesn’t show last updated dates by default. This means your carefully refreshed content appears stale to visitors and search engines.
I solved this by adding last updated dates to my posts. It is a simple solution that has a huge impact. Now readers can see exactly when I’ve made improvements, and my content feels more current and trustworthy.
In this tutorial, I’ll show you how to display last updated dates on your WordPress posts.
Why Show a Last Updated Date in WordPress Posts?
Your WordPress posts face a credibility problem when they only show publish dates. I’ve tested this on multiple sites and found that visitors often assume older content is outdated, even when it’s been recently updated with fresh information.
Search engines also prefer content that appears current and maintained. When Google sees regular updates to your posts, it signals that you’re actively maintaining your site and keeping information accurate.
The last updated date solves both problems at once. Readers can immediately see that your content is fresh, and search engines recognize your commitment to keeping information current.
Your most valuable posts deserve to show their true freshness. Instead of letting great content appear stale, you can highlight exactly when you’ve made it better.
That said, let’s look at how to display the last updated date in your blog posts.
Displaying Last Updated Date in WordPress Posts
If you manually try setting up last updated dates in WordPress posts, then you’ll need to edit the theme files or writing custom functions.
However, the easiest way to go about it is by using WPCode. It is the best code snippet plugin for WordPress and comes with a built-in snippet library. You can add a snippet to show the last updated date with a click of a button.
That’s not all. There are over 140 verified snippets that help you add custom features to your site. Besides that, WPCode also makes it very easy to manage code snippets on your site, organize them, track changes and revisions, and more.
To get started, simply follow these steps.
Step 1: Install and Activate WPCode
First, you’ll need to add the WPCode plugin to your WordPress site.
Do note that I’ll be using the WPCode lite version for this tutorial. However, there is also a WPCode Pro version that offers advanced features like Page Scripts, AI code generator, Conversion Pixel addon, tracking code revisions and changes, and more.
Next, you can go to Plugins » Add New Plugin from the WordPress admin panel and search for ‘WPCode’ in the search bar.
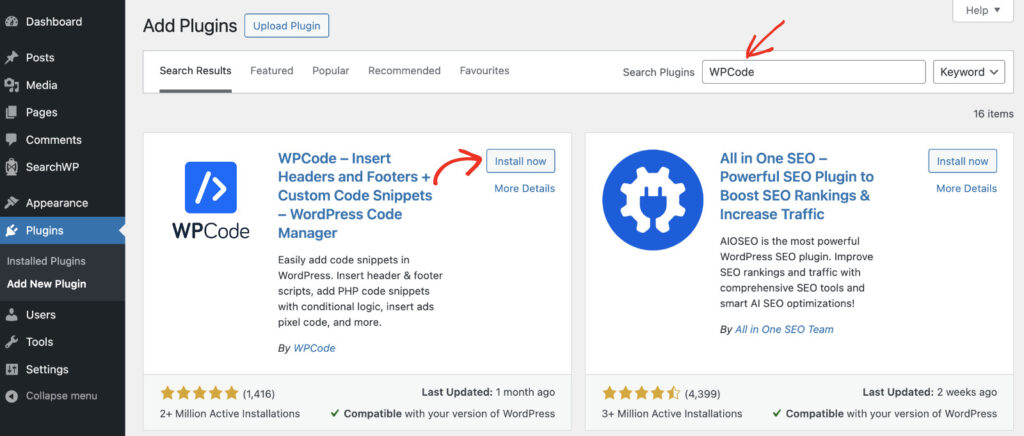
From here, click the ‘Install Now’ button and activate the plugin. If you need help, then please see this guide on how to install a WordPress plugin.
Step 2: Insert Last Updated Date Snippet
Next, you will need to go to Code Snippets » Add Snippet page from the WordPress dashboard.
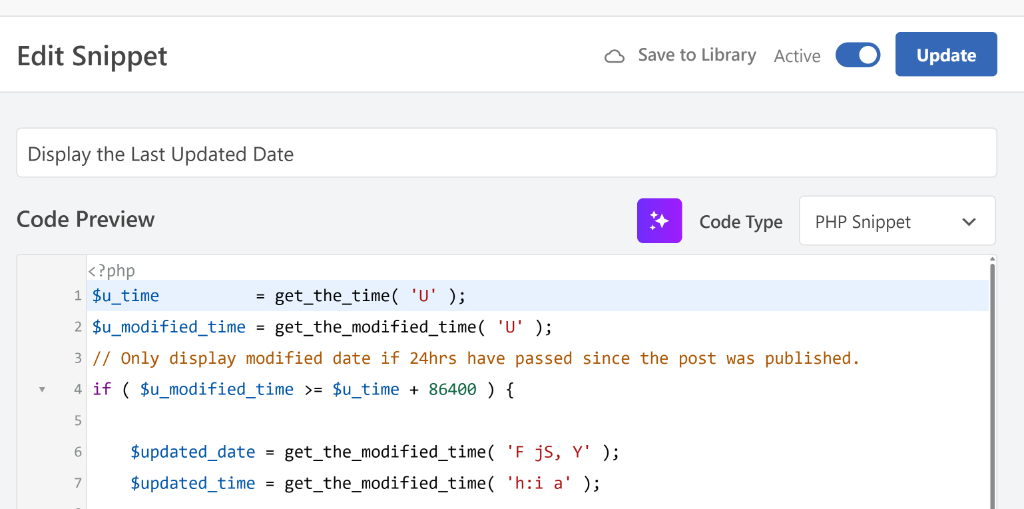
Here, you can select code snippets from WPCode’s snippet library. Go ahead and navigate to the Display the Last Updated Date snippet and click the ‘Use snippet’ button.
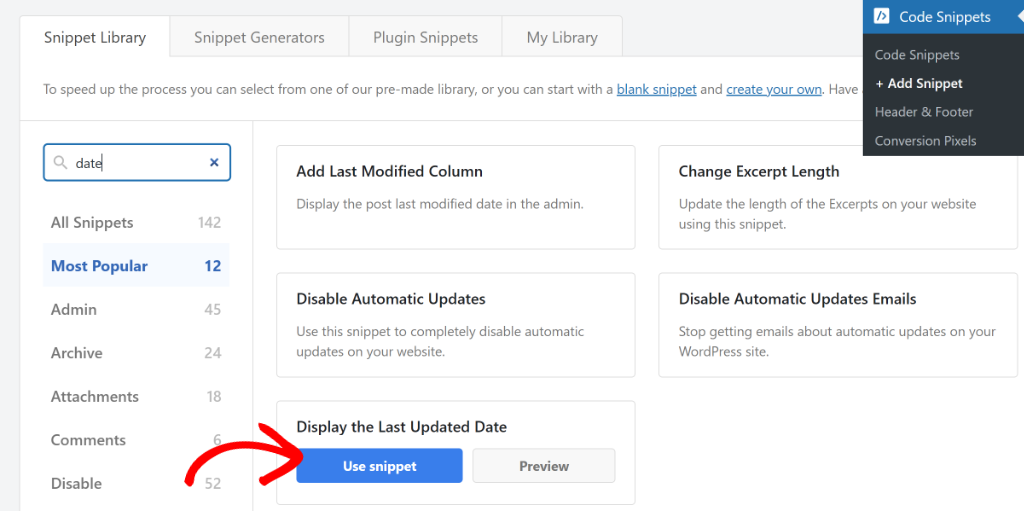
You can also use the search bar in the left panel to quickly find the code snippet.
After that, you will see the snippet already loaded in the code editor. Here you can make changes to the code.
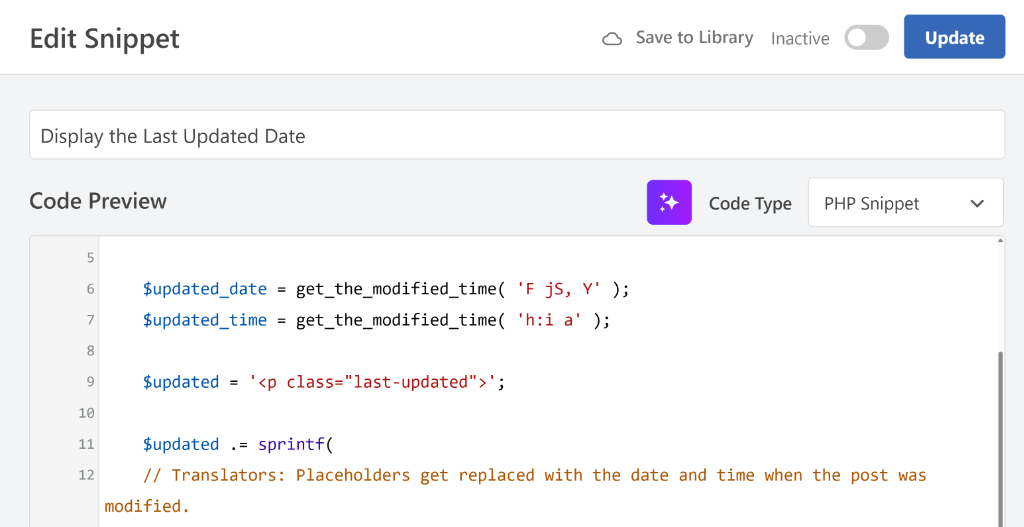
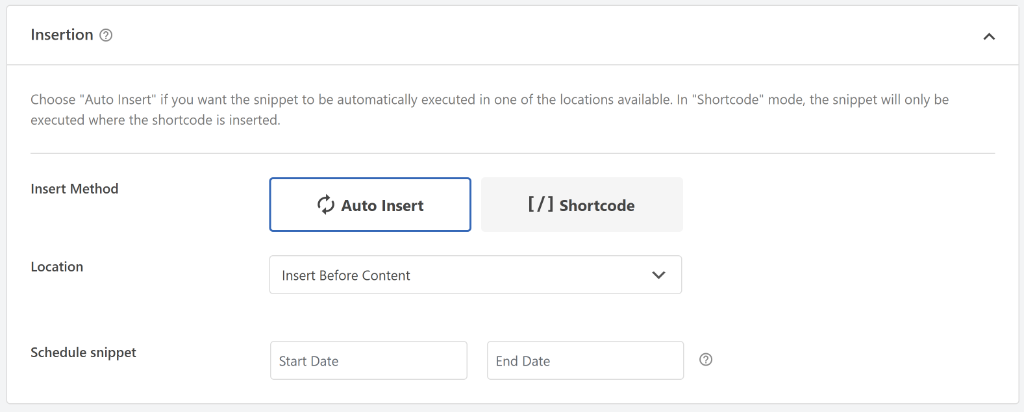
Next, you can scroll down to the Insertion section and see where the code will be added.
By default, WPCode will auto insert the code before content on your site.
Now, you can scroll to the top and click the toggle to make the snippet from Inactive to Active.
Once that’s done, go ahead and click the Update button.
Step 3: View Last Updated Date in Blog Posts
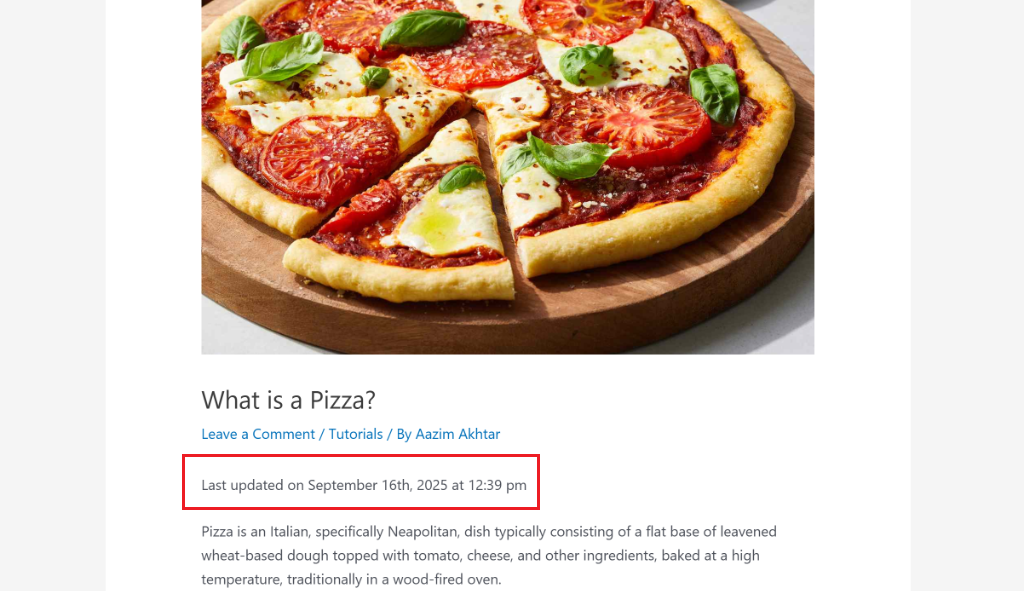
Now that the custom snippet is active, you can visit your site to see if it is working properly.
For example, here’s how the last updated date appears on our demo site. It shows up just before the content on a blog post.
I hope this article helped you learn how to show the last updated date in WordPress posts. You may also want to see our guide on how to replace the WordPress login logo and how to add custom code in WordPress.
If you need help, then feel free to leave a comment below. And don’t forget to follow us on X (formerly known as Twitter) and subscribe to our newsletter for all the latest updates.

