WordPress is incredibly flexible, but sometimes you need to go beyond the basics. That’s where the magic of HTML comes in.
HyperText Markup Language or HTML tells a web browser how to show the contents of your website. It lets you perform advanced customization, add new functionality, connect different tools, and troubleshoot issues.
However, adding custom HTML code can be tricky for beginners. Plus, there’s always a risk of breaking your WordPress site if you try to edit it in the source code. This is where WPCode comes in handy, making it very easy to add HTML code snippets to your site.
In this article, we will show how to add custom HTML code to your WordPress website.
Why Add Custom HTML to WordPress?
HTML allows you to supercharge your site and do some really cool things. Think of HTML as a building block. You can use it to add features that aren’t normally there with WordPress or your theme.
For instance, you could use HTML to embed a custom form, add a price calculator, or implement a signup box that’s tailored to your brand. It enables you to add unique elements, such as an interactive infographic or a custom registration system. This helps you stand out and engage your visitors.
With HTML, you can also add unique styling touches, like adjust the placement of elements, add visual effects, and really bring your design ideas to life.
Besides that, ever wanted to show a YouTube video, a social media feed like Facebook pixel, or a Google Map on your site? Most of the time, you’ll need to use HTML embed codes to make that happen.
HTML also makes it possible to insert tracking scripts and analytics codes, like the Google Analytics tag, directly into your website. This way you get accurate data without any hassle.
That said, let’s look at how you can easily add custom HTML code to your WordPress website. We’ll cover 2 ways where you can insert the code on the entire site using a plugin and also add specific HTML codes in the content editor.
Method 1: Adding Custom HTML Code in WordPress Using WPCode
If you want to add HTML code in multiple places on your site and control it from a single place, then the best way to do this is by using WPCode. It is the best code snippet plugin for WordPress that helps you to edit, insert, and manage custom code.
Besides HTML, it also supports PHP, CSS, JavaScript, and plain text, so you can customize any part of your site. It comes with built-in error prevention tools to ensure that even if something goes wrong, you can quickly recover and troubleshoot issues.
Plus, you get a built-in library of over 140+ expert-written snippets. This way, you can add new functionality and features to your site in just a few clicks.
For this tutorial, we will be using the WPCode Pro version because it offers more features like smart conditional logic, auto-insert snippets, private cloud snippet library, eCommerce integrations, and more. However, you can also use the WPCode Lite version to add HTML code.
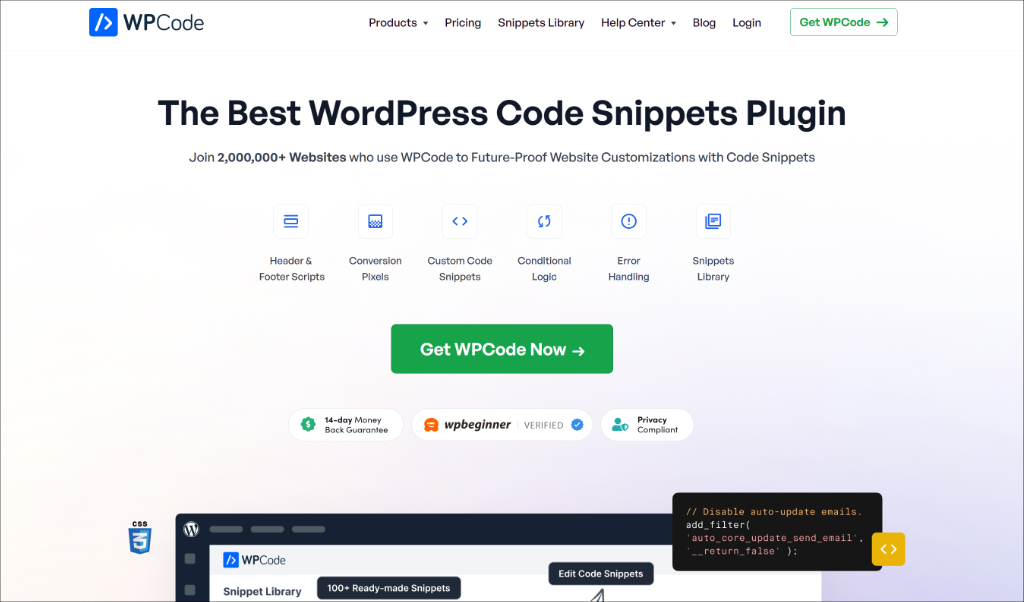
First, you will need to visit the WPCode website and click the ‘Get WPCode Now’ button to get started.
After that, you can download the WPCode plugin.
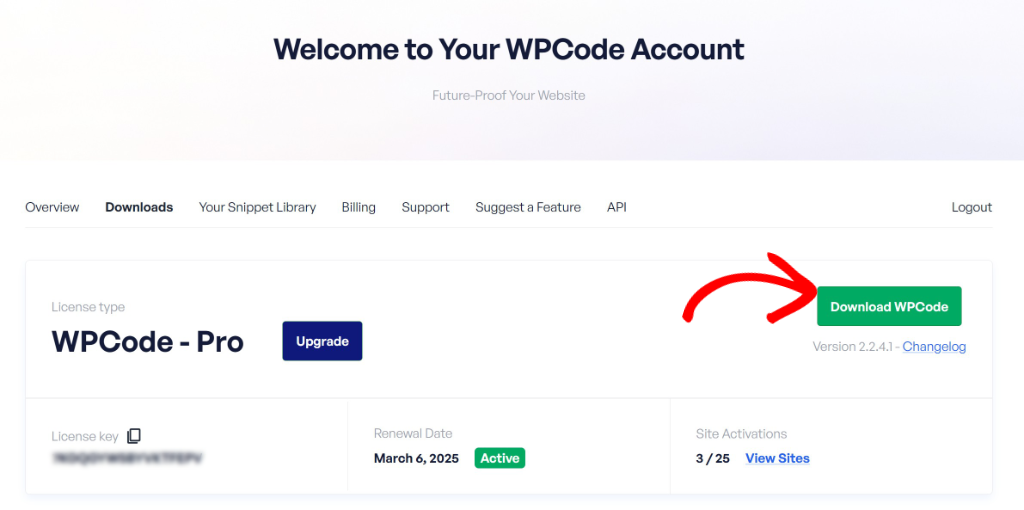
You can find the plugin in your account area under the ‘Downloads’ tab. Simply click the ‘Download WPCode’ button and save the file on your computer.
Next, you can install and activate the plugin in WordPress. If you need help, then please see this guide on how to install a WordPress plugin.
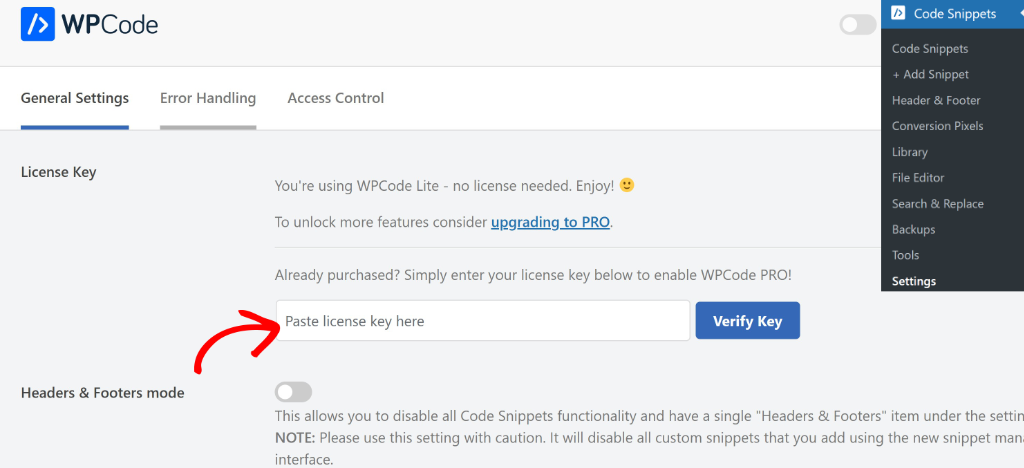
Once activated, you can go to Code Snippets » Settings from the WordPress admin panel and enter the license key. You can find the license key in your account area.
Now the next step is to add the custom HTML snippet to WordPress.
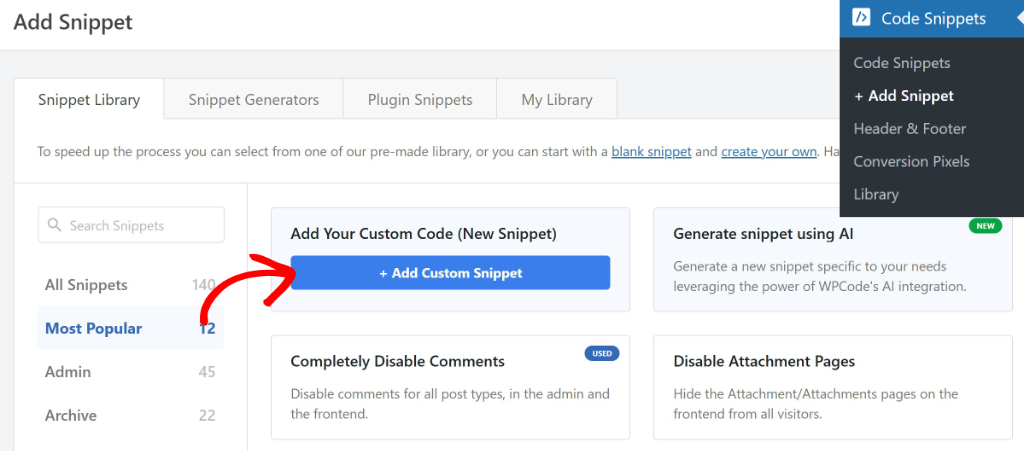
To start, simply go to Code Snippets » Add Snippet from the WordPress admin panel and then click the ‘Add Your Custom Code (New Snippet)’ option.
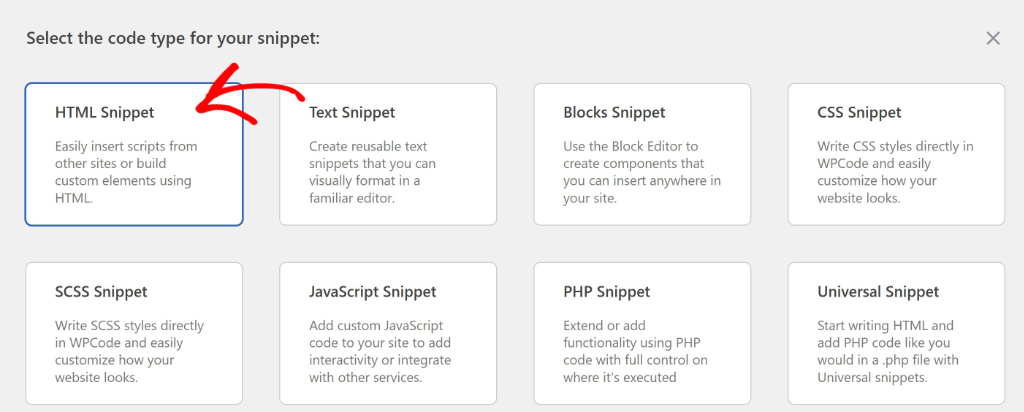
After that, WPCode will ask you to select a code type for your snippet.
You can click on the ‘HTML Snippet’ option.
From here, you will need to enter a title for your custom code snippet.
Once that’s done, simply enter your HTML code in the code editor. For example, we want to show a table that appears on multiple pages.
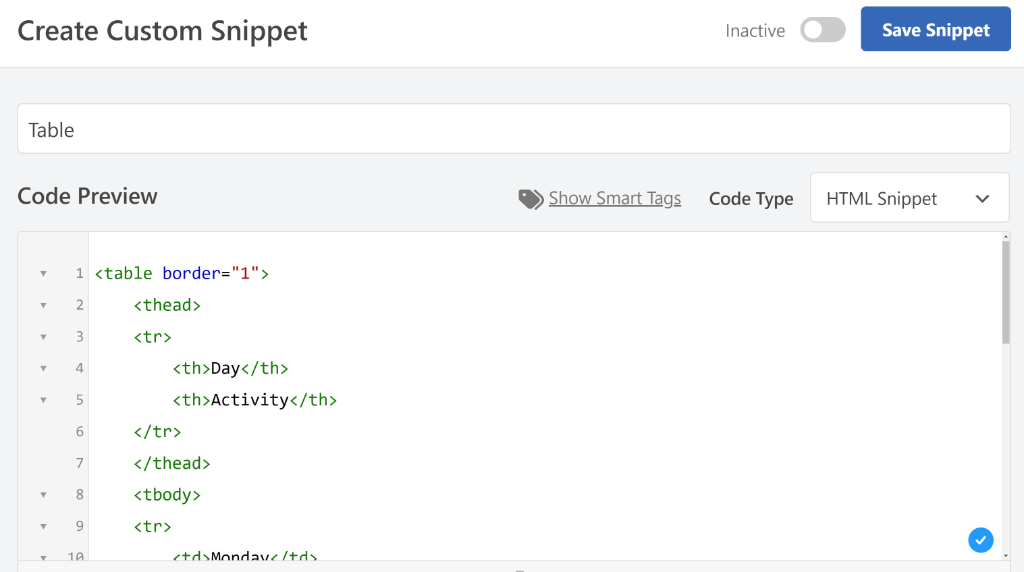
When you’re done, don’t forget to click the ‘Save Snippet’ button.
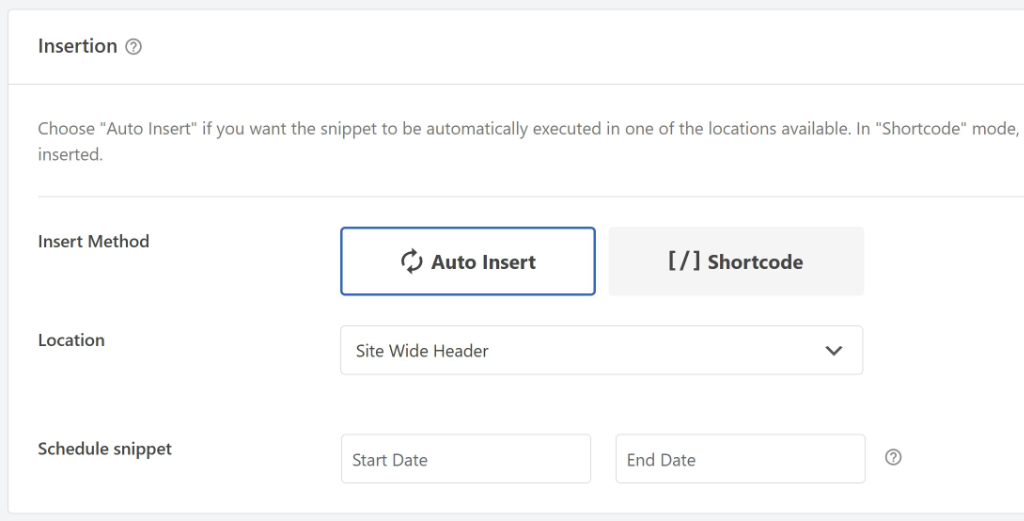
After that, you can scroll down to the ‘Insertion’ section and select where the custom HTML code will be inserted.
By default, WPCode will Auto Insert the code in the Side Wide Header of your site.
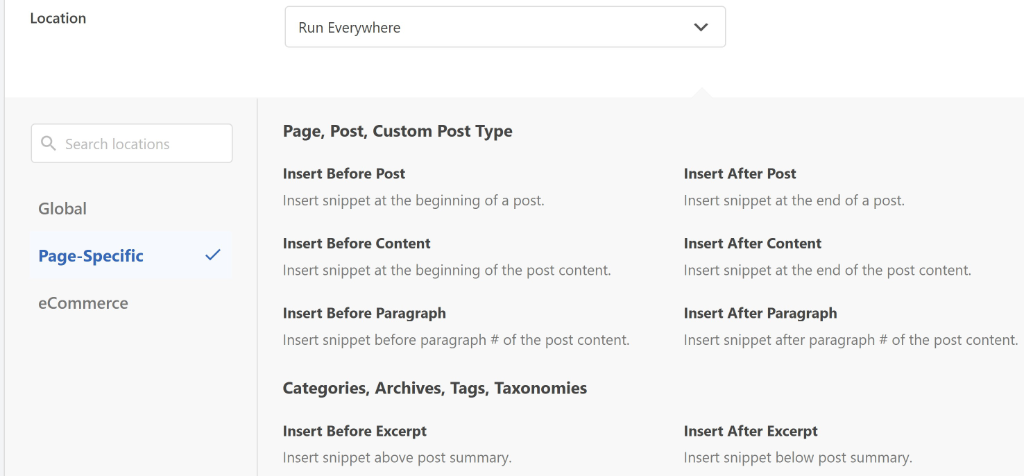
However, you can click the ‘Location’ dropdown menu and choose where you want the custom HTML element to appear.
For example, there are options to insert it before or after a post, paragraph, content, or specific categories and tags.
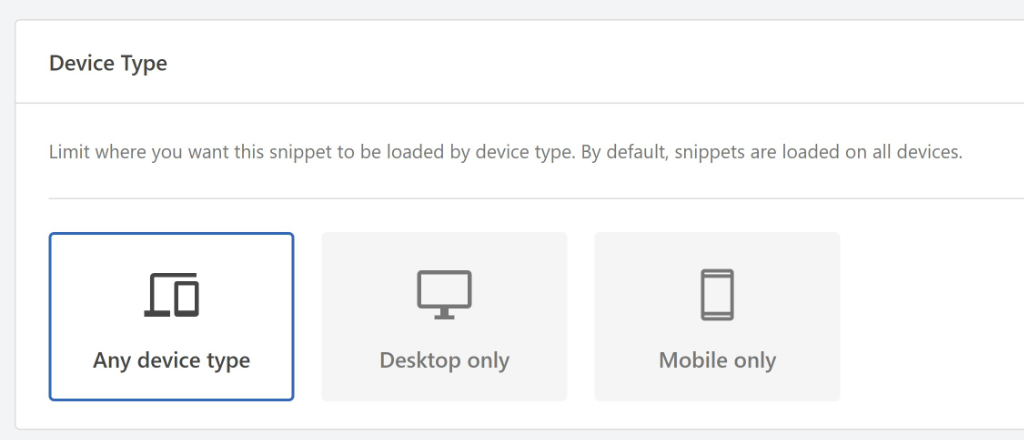
You can also pick which devices your HTML code will run on.
By default, it will load on all types of devices. But you can decide whether to run the code on a desktop or mobile.
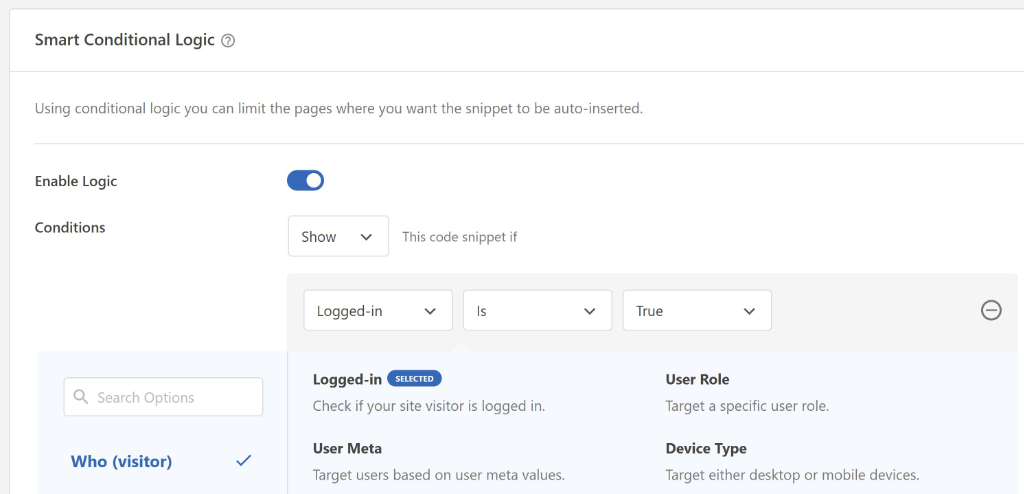
Besides that, there is also an option to set up conditional logic and control where your custom HTML code will run.
You can scroll down to the ‘Smart Conditional Logic’ section and click the ‘Enable Logic’ toggle. After that, simply configure the conditional logic and select whether to hide or show code snippets for a type of page, specific user role, post type, device type, and more.
When you’re done, you can scroll back to the top and activate the HTML code.
Simply click the toggle button and change it from Inactive to Active. Don’t forget to click the ‘Update’ button.
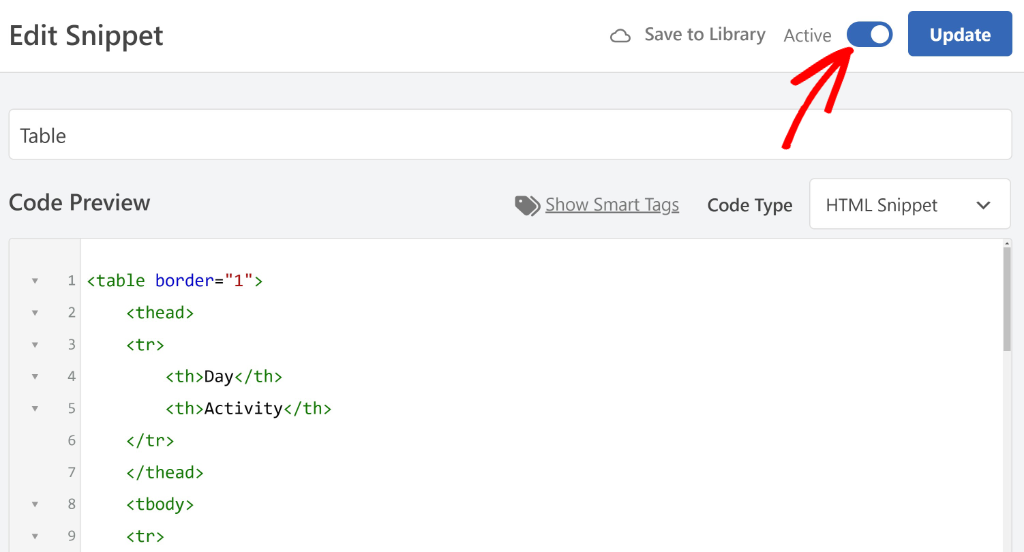
That’s it! Your custom HTML code will now be active on your website.
Method 2: Adding Custom HTML in WordPress Block Editor
There are multiple ways to add custom HTML code to your site’s posts and pages using the WordPress block editor. This method is great if you want to embed specific HTML elements on individual content, like a YouTube video, Google Form, or Google Maps location.
First, you can add a new page or edit an existing one. Once you are in the content editor, simply click the ‘+’ sign in the top right corner and add a ‘Custom HTML’ block.
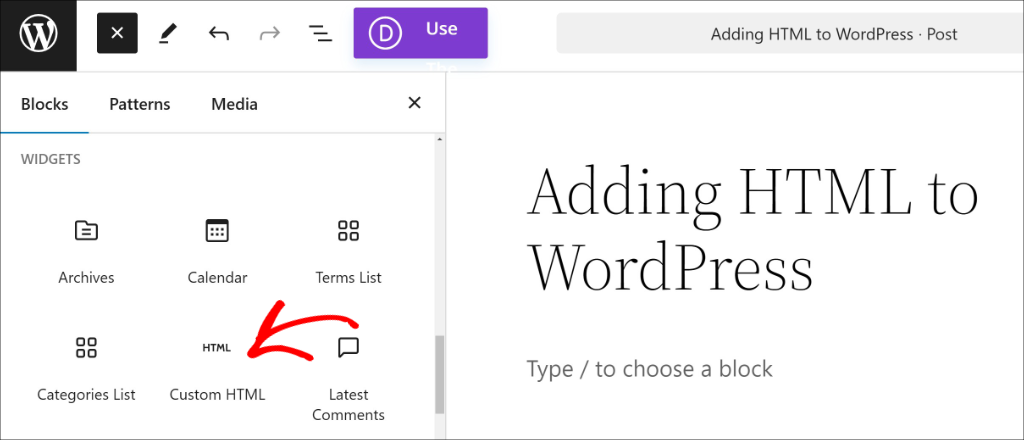
After that, you will see the Custom HTML block in the content editor.
Go ahead and paste your HTML code in the block.
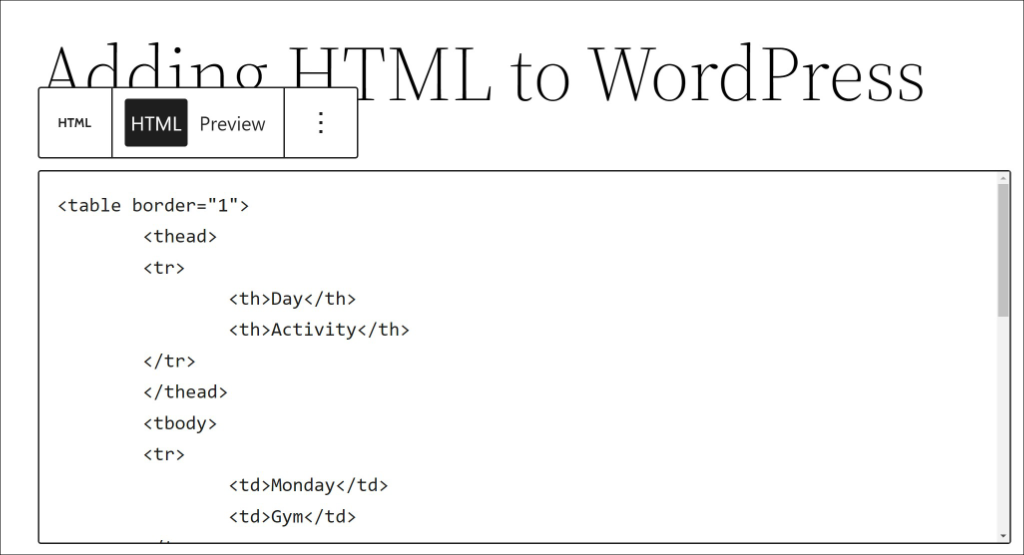
You can also click the ‘Preview’ option to see the appearance of your HTML element. This helps in quickly making changes and adjusting the code.
Besides that, there is another way to add or edit HTML code in the block editor.
Simply select an existing block in the content and then click the three-dots menu to view more options. From here, simply click the ‘Edit as HTML’ option.
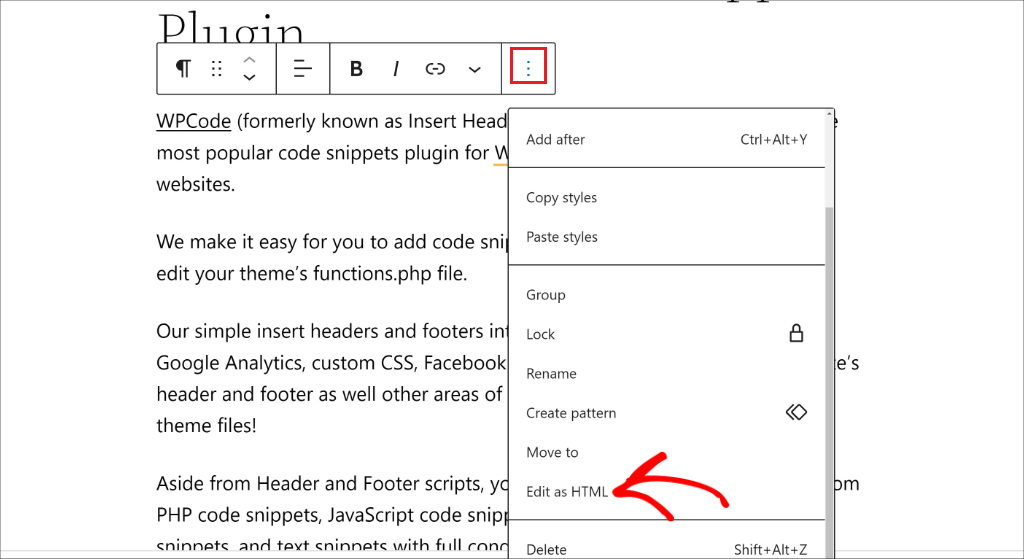
You will now see the HTML of the selected block.
Go ahead and add or edit the HTML code of the content.

If you want to add custom HTML to the entire page, then you can switch to Code Editor in the WordPress block editor.
Simply click the three-dots options in the top right corner to open more options, and then select the ‘Code editor’ option.
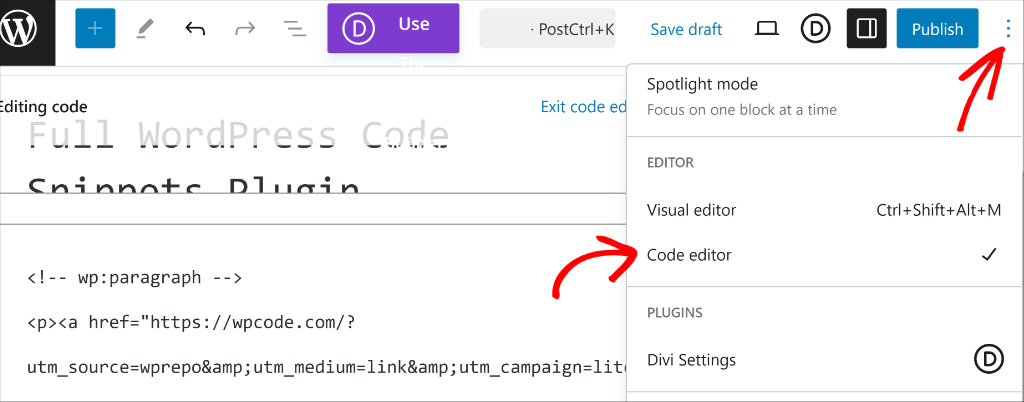
After that, you will the HTML code of the whole page or post.
Simply add custom HTML or edit existing code.
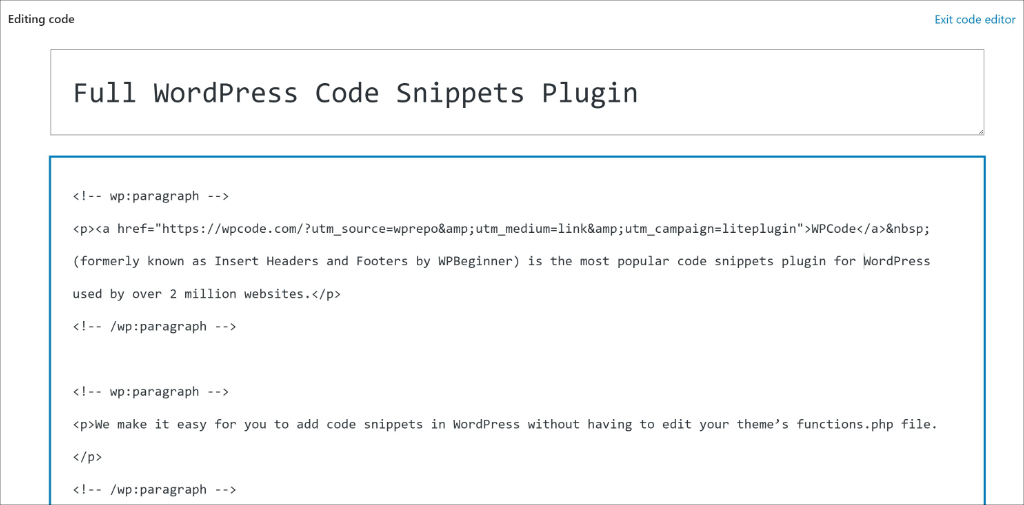
When you are done, simply Publish or Update the post or page.
While this method is great for adding HTML snippets to specific content on your site, you will need to manually edit each page or post if something needs to be updated in the future. If you want to add custom HTML on multiple locations, then we recommend using WPCode and following the steps described in the first method.
Get WPCode Pro now to manage, automate, and enhance your WordPress site effortlessly with custom HTML!
We hope this article helped you learn how to add custom HTML to your WordPress site. You may also want to see our guide on how to check page source in WordPress and how to disable comments on WordPress.
If you need help, then feel free to contact us or leave a comment below. And don’t forget to follow us on X (formerly known as Twitter) and subscribe to our newsletter for all the latest updates.



very useful thanks i just tried it on my website https://axatours.com/ and it worked fine