
When I first started my WordPress blog, I noticed something was missing from my posts. Readers would finish an article and have no idea who wrote it or how to connect with me.
I realized this was a problem when someone left a comment asking if I had social media accounts they could follow. That’s when it hit me, I needed author bios on my posts.
The default WordPress setup doesn’t give you much control over author information. Sure, it might show your name, but that’s not enough to build real connections with your audience.
In this guide, I’ll show you exactly how to add professional author bios to your WordPress posts.
Why Add Author Bios on Your WordPress Posts
Author bios do more than just tell readers your name. They’re like a handshake at the end of each article, creating a personal connection that turns casual visitors into loyal followers.
I’ve seen firsthand how author bios change the way people interact with content. After adding them to my posts, I noticed more social media followers, more email subscribers, and more comments from engaged readers.
Google also pays attention to who writes your content. Their E-E-A-T guidelines (Experience, Expertise, Authoritativeness, and Trustworthiness) mean that showing author credentials can actually help your search rankings.
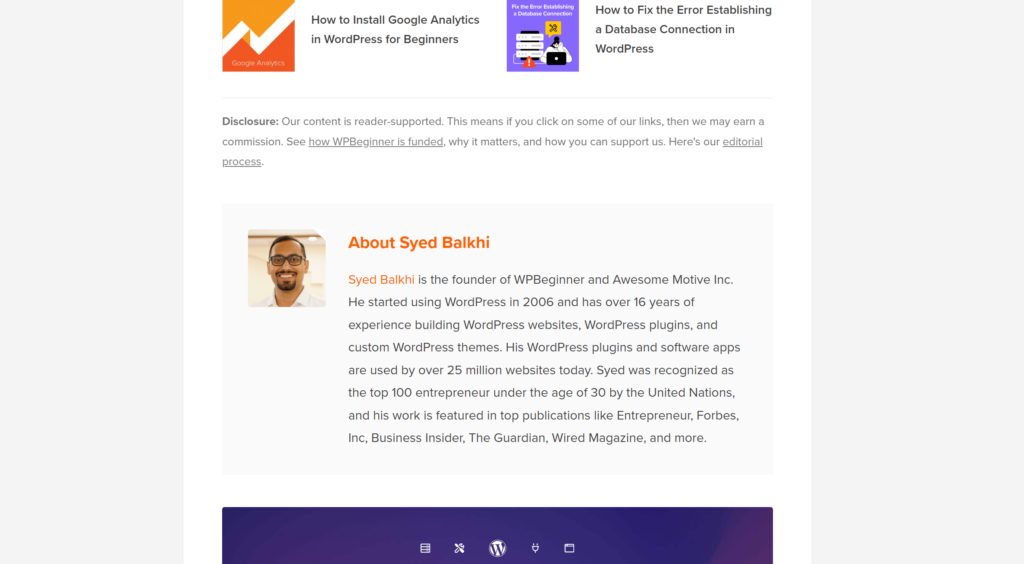
For multi-author blogs, author bios are even more important. They help readers distinguish between different writers and find more content from their favorite authors. For example, here’s a preview of an author bio on WPBeginner that has multiple authors:
Plus, author bios give you a chance to showcase your expertise. You can mention credentials, link to your portfolio, or direct readers to your social media profiles, all without cluttering up the main content.
The bottom line is simple: author bios make your blog look more professional and help you build relationships with your audience.
That said, let’s look at a very easy way of adding an author bio to your blog posts in WordPress.
Adding Author Bio to WordPress Posts
Adding author bios to WordPress used to mean either editing WordPress theme files or wrestling with complicated code. I’ve tried both approaches, and neither one felt right for someone without development skills.
That’s why I use WPCode for adding custom functionality to WordPress. It’s the best WordPress code snippets plugin that lets you add features to your site without touching theme files or hiring a developer.
WPCode comes with a library of over 140 verified code snippets that you can add to your site with just a few clicks. These snippets are tested and ready to use, so you don’t have to worry about breaking your site.
The plugin also includes features like error detection, smart tags, page scripts, an AI code generator, and the ability to control exactly where your code runs. You can choose to run snippets on specific pages, for certain user roles, or across your entire site.
Now, let’s look at the steps you can follow to add an author bio to your site.
Step 1: Install and Activate WPCode
First, you’ll need to add the WPCode plugin to your WordPress site.
Do note that I’ll be using the WPCode Lite version for this tutorial. However, there is also a WPCode Pro version that offers advanced features like conversion pixels, cloud storage for code snippets, smart conditional logic, and more.
Next, you can go to Plugins » Add New Plugin from the WordPress admin panel and search for ‘WPCode’ in the search bar.
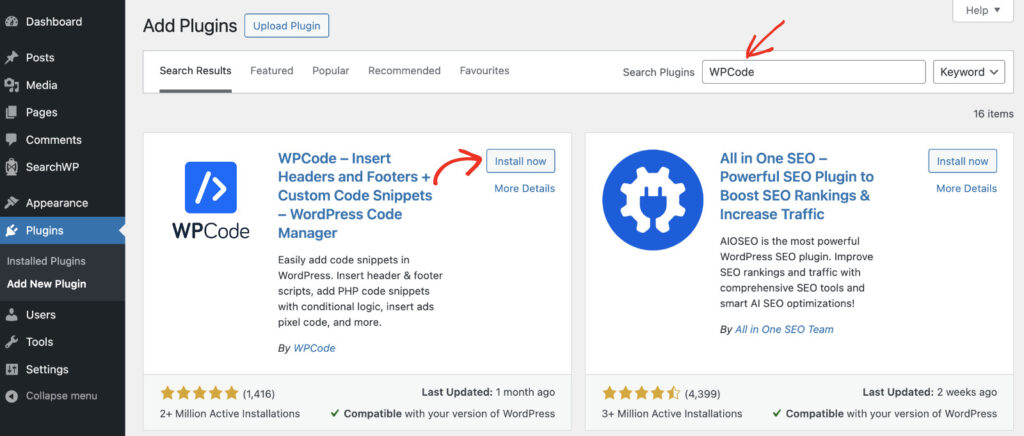
From here, click the ‘Install Now’ button next to WPCode and activate the plugin. If you need help, then please see this guide on how to install a WordPress plugin.
Once the plugin is activated, you’re ready to add author bios to your posts.
Step 2: Insert the Author Bio Snippet
Next, you will need to go to the Code Snippets » Add Snippet page from the WordPress dashboard.
Here, you can select code snippets from WPCode’s snippet library. Go ahead and navigate to the ‘Author Bio After Post’ snippet and click the ‘Use snippet’ button.
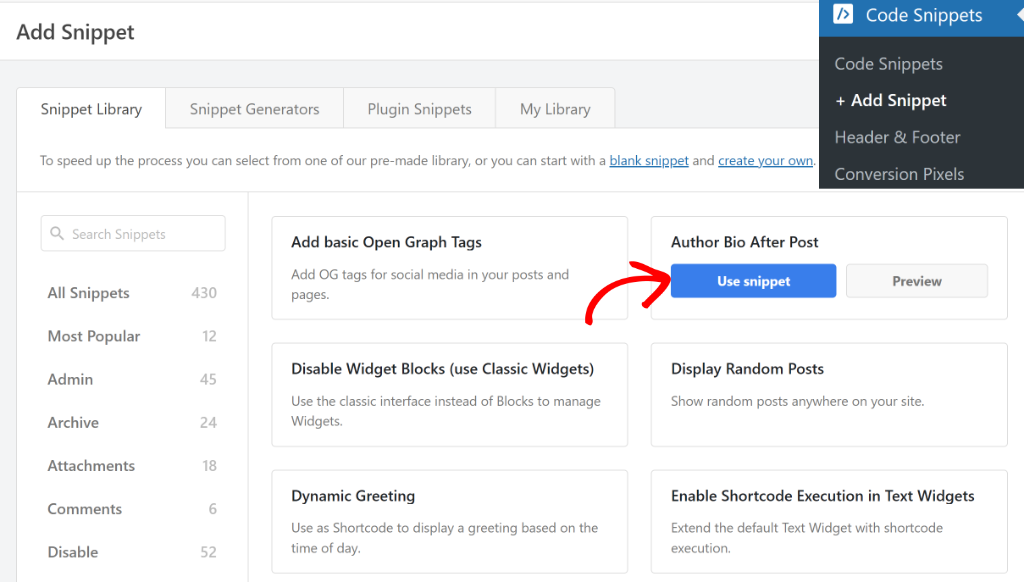
You can also use the search bar in the left panel to quickly find the code snippet by typing ‘author bio’.
After that, you will see the snippet already loaded in the code editor. This snippet automatically pulls author information from WordPress user profiles and displays it after your post content.
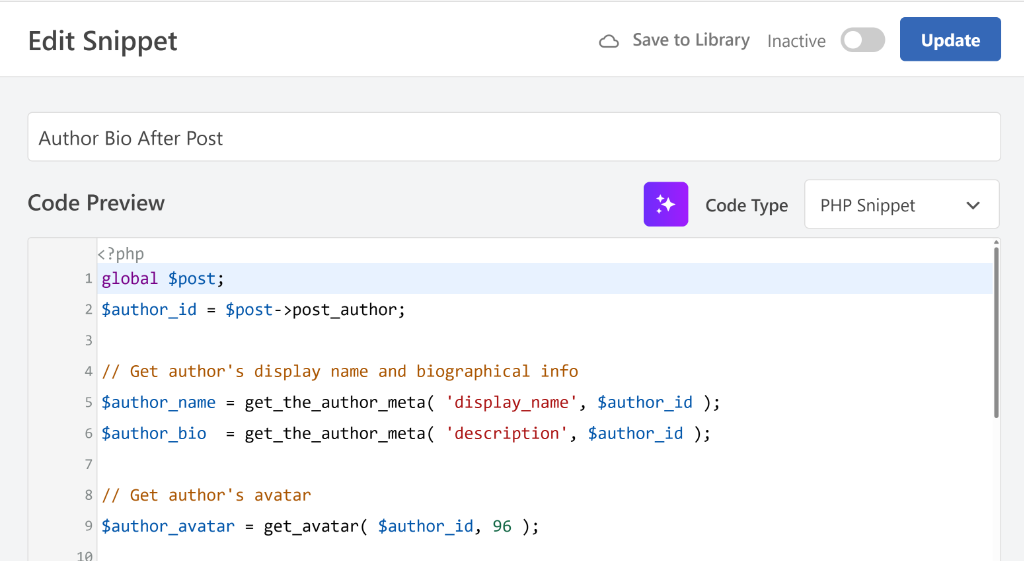
The code is pre-configured to work right out of the box, so you don’t need to modify anything.
Next, you can scroll down to the Insertion section and see where the code will be added.
By default, WPCode will auto-insert the author bio after the content on your blog posts. This means it will appear right after your article ends, which is the perfect spot for readers who just finished reading.
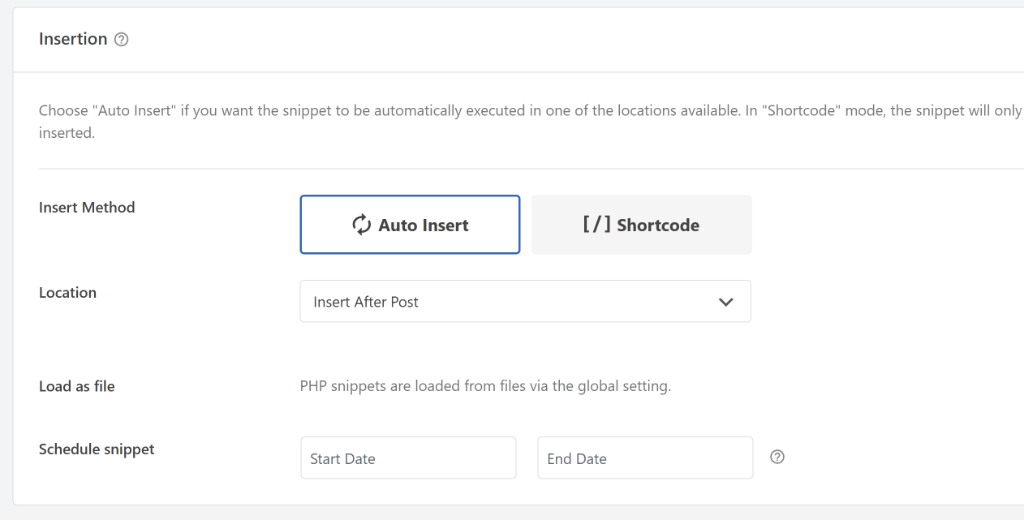
If you want the author bio to appear in a different location, you can change the Insert Method. WPCode gives you options like before content, after content, or using a shortcode for manual placement.
For now, I recommend keeping the default ‘Auto Insert’ setting with ‘Insert After Post’ selected. This gives readers the author information right when they’re most interested in learning more about who wrote the article.
Step 3: Activate and Test Your Author Bio
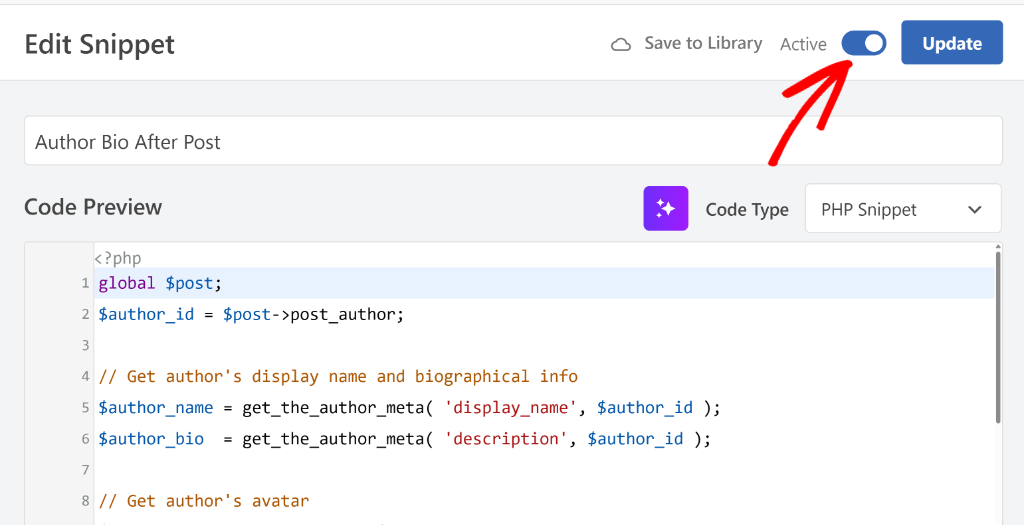
Now, you can scroll to the top and click the toggle to make the snippet from Inactive to Active.
Once that’s done, go ahead and click the ‘Update’ button to store your changes.
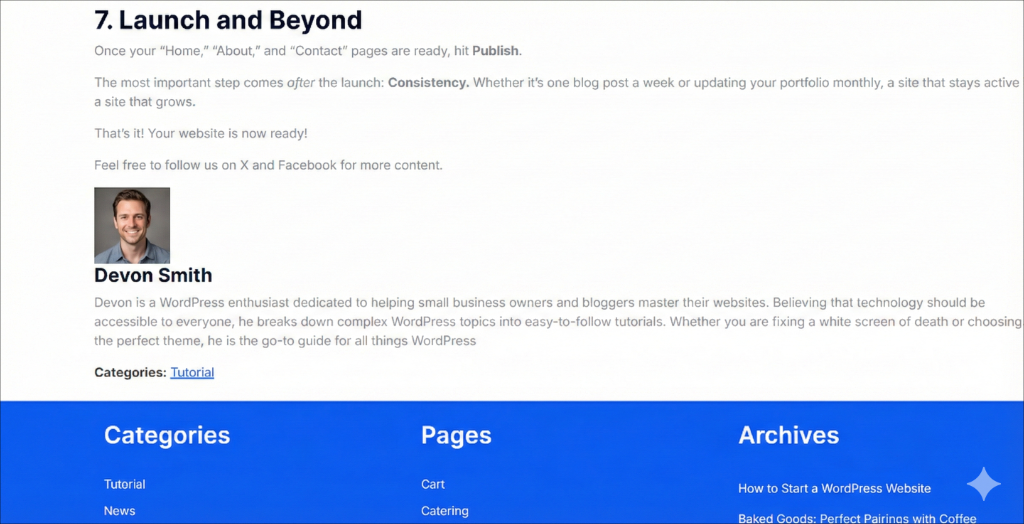
With the snippet activated, it’s time to see your author bio in action. Simply visit any published post on your WordPress site to check if the author bio is displaying correctly.
The author bio should appear right after your post content. It will show the author’s display name, image, and biographical information from their WordPress user profile.
If you don’t see any biographical text, that’s because WordPress user profiles are empty by default. You’ll need to add author information to your profile.
Bonus: Add Author Information to Your WordPress Profile
After activating the author bio snippet, you might notice that it’s not showing much information. That’s because WordPress doesn’t automatically fill in author details, you need to add them manually.
To add your biographical information, go to Users » Profile from your WordPress dashboard.
From here, scroll down to the ‘About Yourself’ section. This is where you can write a short description about yourself that will appear in the author bio.
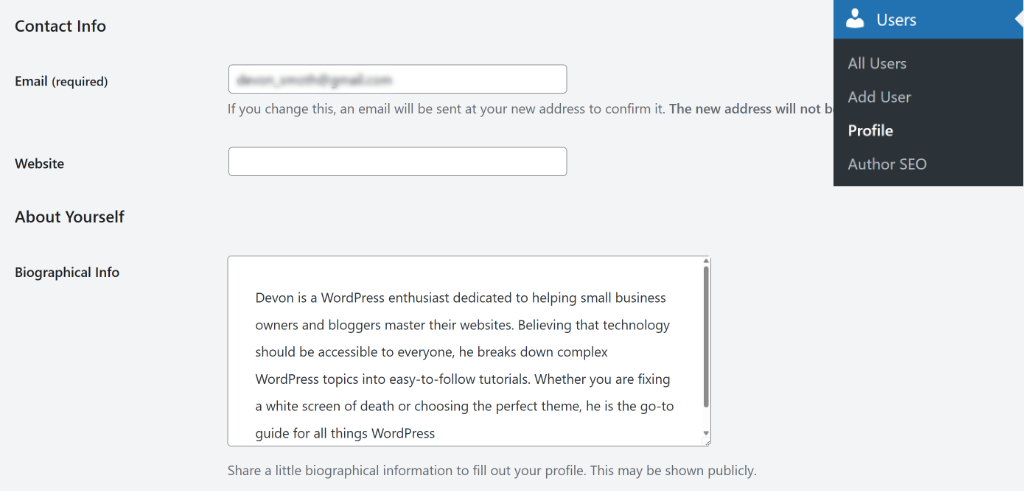
I recommend keeping your bio between 2-3 sentences. Mention your expertise, what you write about, or what readers can expect from your content.
Don’t forget to upload a profile picture by setting up a Gravatar. Your Gravatar is tied to your email address and will automatically appear next to your author bio across WordPress sites. To learn more, you can see this guide on how to change the default Gravatar in WordPress.
Once you’ve filled out your profile, click the ‘Update Profile’ button at the bottom. Now, when you visit your posts, you’ll see a complete author bio with your picture, description, and contact information.
FAQs About Author Bio in WordPress
1. Can I add different author bios for different authors?
Yes, each author on your WordPress site can have their own unique bio. When you add the author bio snippet with WPCode, it automatically pulls information from each user’s profile. So if you have multiple writers, each person just needs to fill out their own profile under Users » Profile, and their individual bio will appear on their posts.
2. Will this work with multiple authors on my blog?
Absolutely. The author bio snippet works perfectly for multi-author blogs. Each author’s bio will automatically display on their respective posts. This is actually one of the biggest benefits of using this method. You don’t have to manually add author information to each post.
3. Can I show author bios only on certain categories?
You can use WPCode’s smart conditional logic to control where author bios appear. In the snippet settings, you can add conditions based on post categories, tags, or custom post types. This feature is available in WPCode Pro and gives you complete control over author bio placement.
4. What if my author bio doesn’t show up?
If your author bio isn’t displaying, first make sure you’ve added biographical information to your WordPress profile under Users » Profile. The bio won’t appear if that field is empty.
I hope this article helped you learn how to add an author bio to your WordPress post. You may also want to see our guide on how to replace the WordPress login logo and how to display last updated dates on your WordPress posts.
If you need help, then feel free to leave a comment below. And don’t forget to follow us on X (formerly known as Twitter) and subscribe to our newsletter for all the latest updates.

