

Recently, I visited a website and noticed that the copyright date was from several years ago in the footer. It immediately made me wonder if the site is still maintained or if the content is outdated.
As a website owner, keeping your copyright date current is a small but significant detail that makes your site look professional and credible. It tells people when the website’s content was trademarked and also makes it clear that the site is still active.
To ensure that your site’s footer shows the latest year, you can use dynamic copyright date. The best part is that it automatically updates itself every year once you set it up, always showing the current year.
In this article, I’ll show you how to add a dynamic copyright date in WordPress footer.
Why Use a Dynamic Copyright Date in WordPress?
Imagine you visit two websites. One website’s footer says “Copyright 2020” and the other says “Copyright 2025”.
Which website feels more current? The one with the fresh date, right? That’s the power of a dynamic copyright date.
A static copyright date is stuck in time. You have to remember to change it every January 1st, which can be difficult if you’re managing multiple things and growing your business. It’s a small thing, but it can make a website look like it’s not being looked after.
Dynamic dates are automatic. They update themselves without you lifting a finger each year. It is like having a clock that always shows the right time.
Your website will always look current, and it gives visitors a better feeling about your site. It also shows that you are paying attention to details, making your site look professional and up-to-date. Plus, it saves you time and effort in the long run.
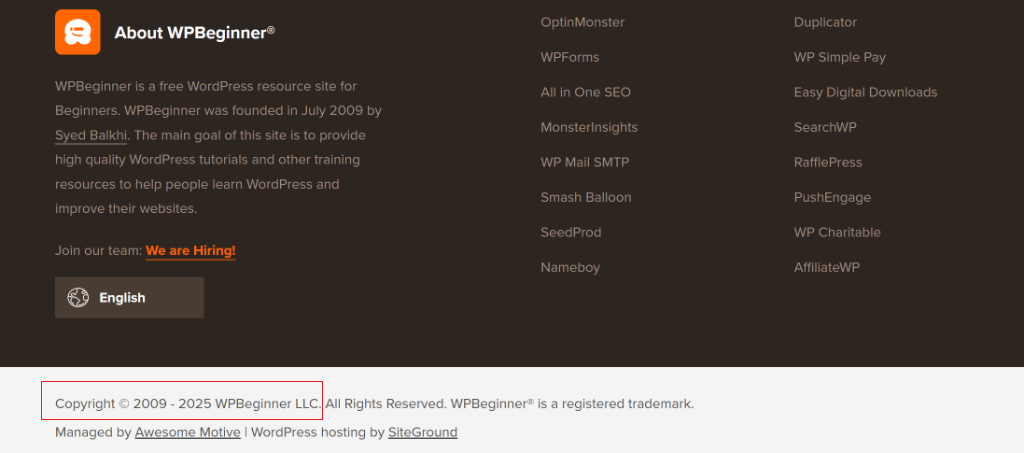
For example, here’s how a dynamic copyright date looks like in WPBeginner’s footer area.
That said, let’s look at how you can easily add a dynamic copyright year in WordPress footer.
Adding a Dynamic Copyright Date in WordPress
The easiest way to add a copyright date that automatically updates every year is by using WPCode. It is the best code snippet plugin for WordPress and offers custom snippet for dynamic copyright date that you can add to your site in just a few clicks.
The best part about using WPCode is that you don’t have to manually edit your site’s functions.php files to insert the code. The plugin will do that automatically for you. This will prevent any errors that can break your WordPress site.
Besides that, WPCode offers a code snippet library for adding more new features and functionality to your site, a beginner-friendly interface to manage code snippets, smart conditional logic, and more.
For this tutorial, we’ll use the WPCode Lite version that’s available for free and includes the dynamic copyright date snippet. However, there is also a WPCode Pro version which offers addition features like code revisions, AI snippet generator, eCommerce integration, and more.
First, you’ll need to go to Plugins » Add New Plugin from the WordPress dashboard and search for ‘WPCode’ in the search bar.
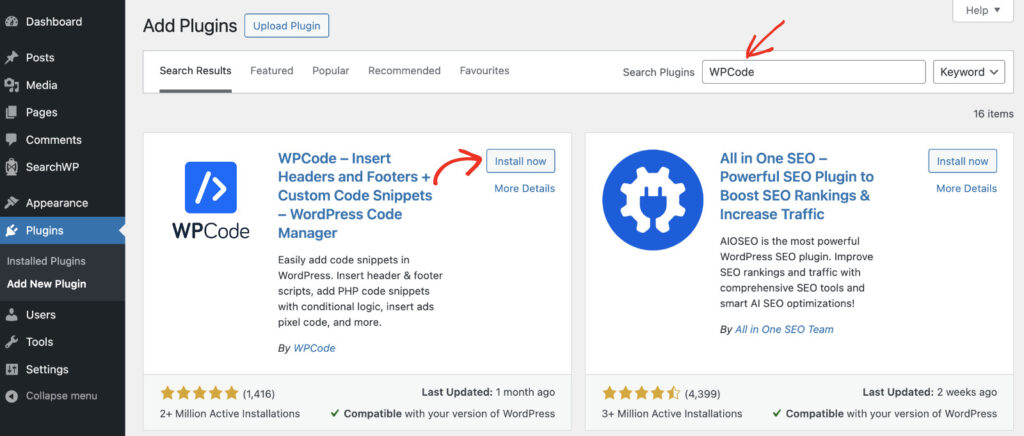
Next, you’ll need to install and activate the plugin. For more details, please see this guide on how to install a WordPress plugin.
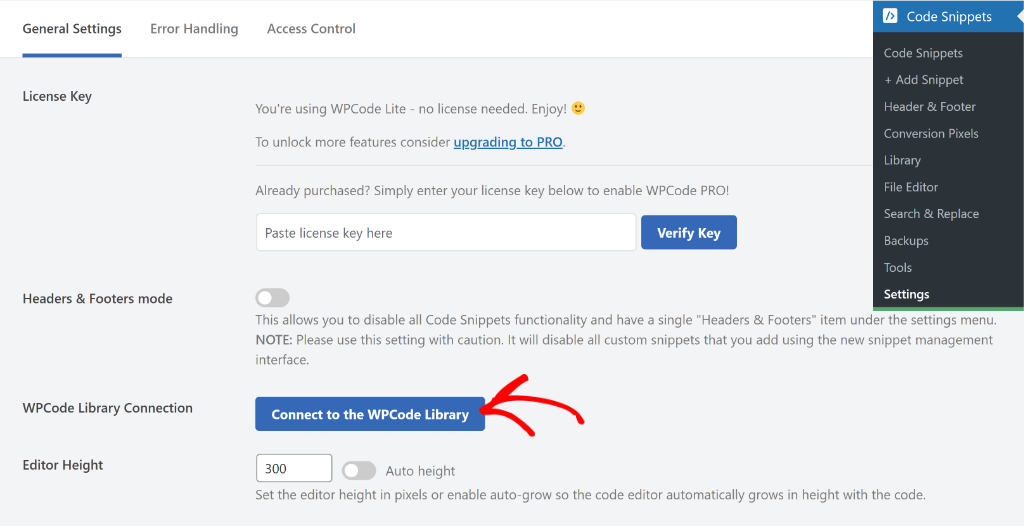
Once the plugin is active, you can connect the WPCode Library with your WordPress site. WPCode offers a library of over 140 free snippets written by our experts. You can connect the library and install snippets with just 1-click from inside the plugin.
Simply head to Code Snippets » Settings from the admin panel. Then, under the ‘General Settings’ tab, you can click the ‘Connect to the WPCode Library’ button.
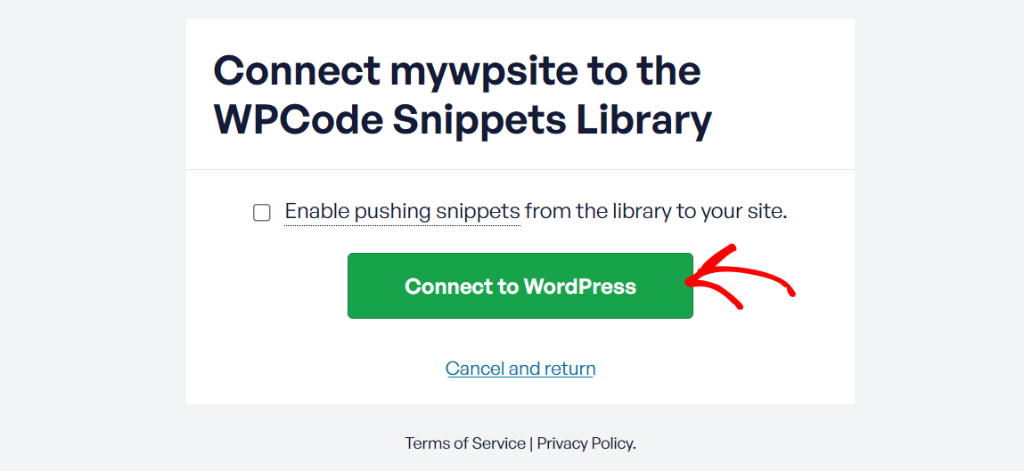
After that, a new popup window will open.
Go ahead and click the ‘Connect to WordPress’ button.
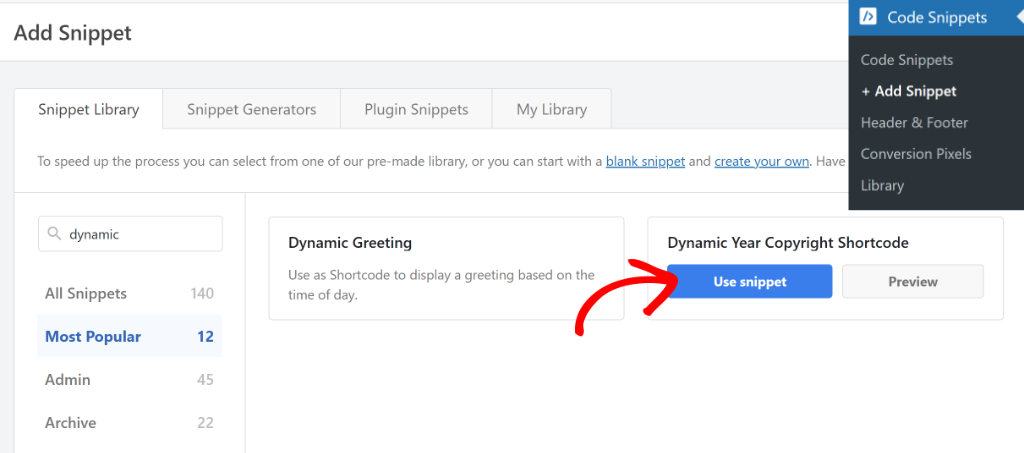
Next, you can head to Code Snippets » Add Snippet from the WordPress dashboard. From here, you’ll need to navigate to the ‘Dynamic Year Copyright Shortcode’ snippet.
You can also search for the snippet using the search bar and then click the ‘Use snippet’ button.
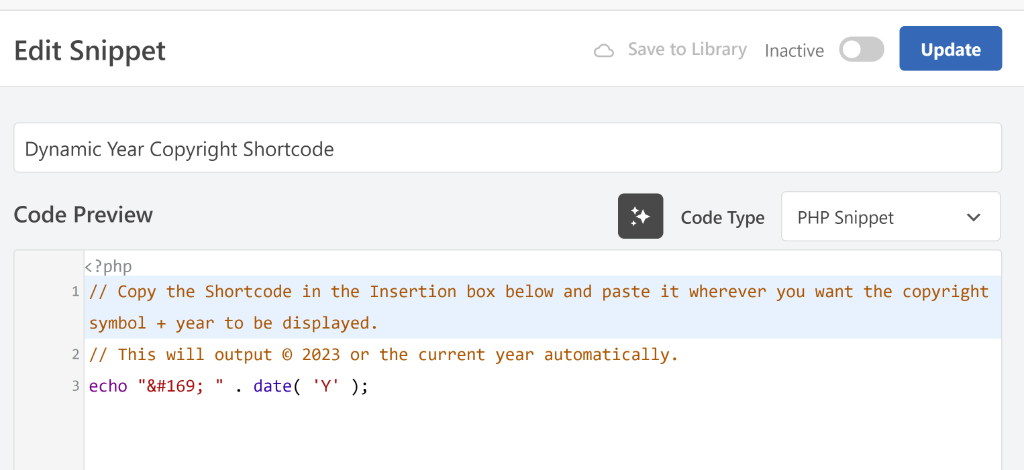
On the next screen, you’ll see the snippet in the code editor.
The best part is that WPCode will automatically set up all the settings to correctly run the code on your site.
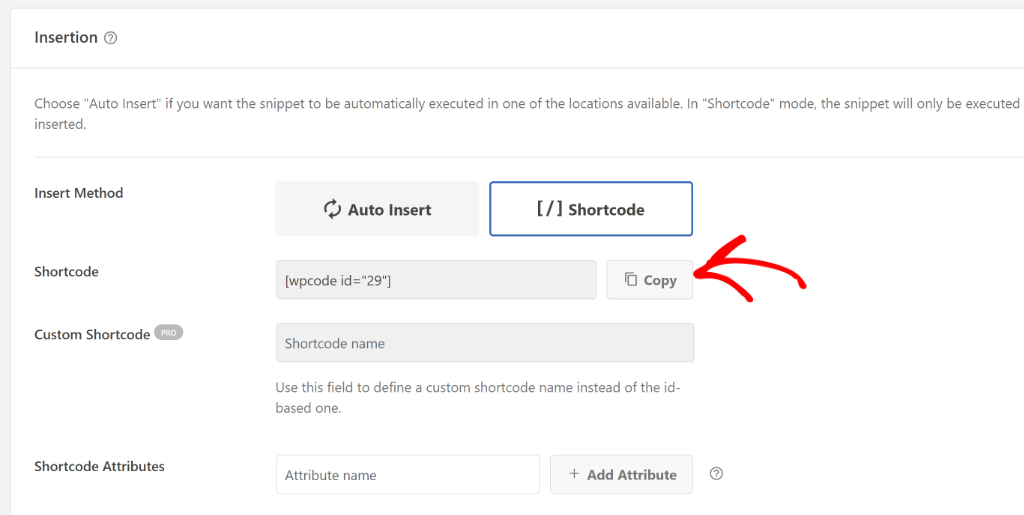
Next, you can scroll down to the ‘Insertion’ section. You’ll see that WPCode will configure the way you can add the code snippet to your site.
Go ahead and copy the shortcode to insert the dynamic copyright date in your site’s footer.
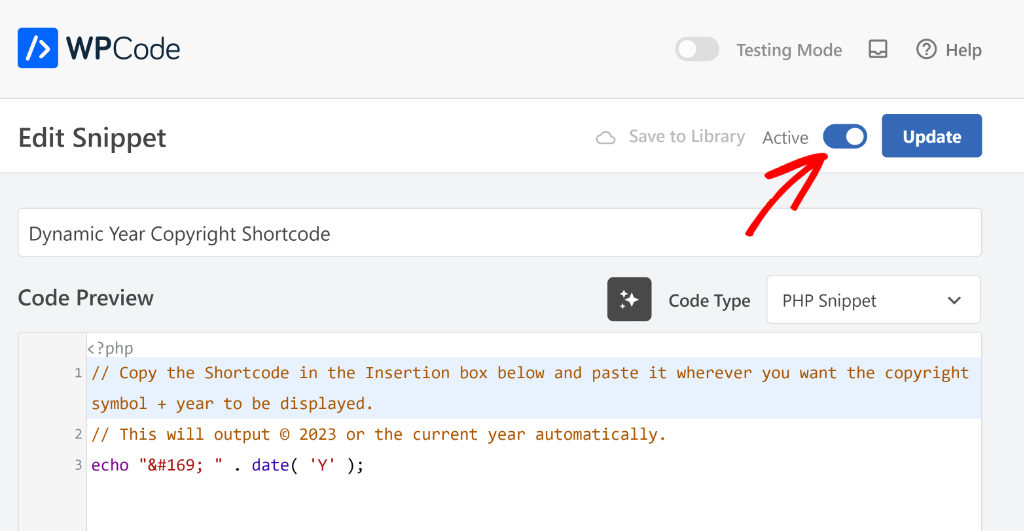
Once that’s done, you’ll need to scroll to the top and click the toggle to make the snippet Active.
When you’re done, don’t forget to click the ‘Update’ button.
Insert the Dynamic Copyright Date in WordPress Footer
Next, you’ll need to insert the shortcode in the footer of your WordPress site to display the dynamic copyright date.
Note: The method will vary depending on the WordPress theme you’re using. If you’re not sure which way to use, then please see this guide on how to edit the footer in WordPress (4 ways).
For instance, if you’re using a block-based theme, then you can use the WordPress Full Site Editor to customize the theme and insert the shortcode.
Simply head to Appearance » Themes from the WordPress admin panel and click the ‘Customize’ button for your theme.
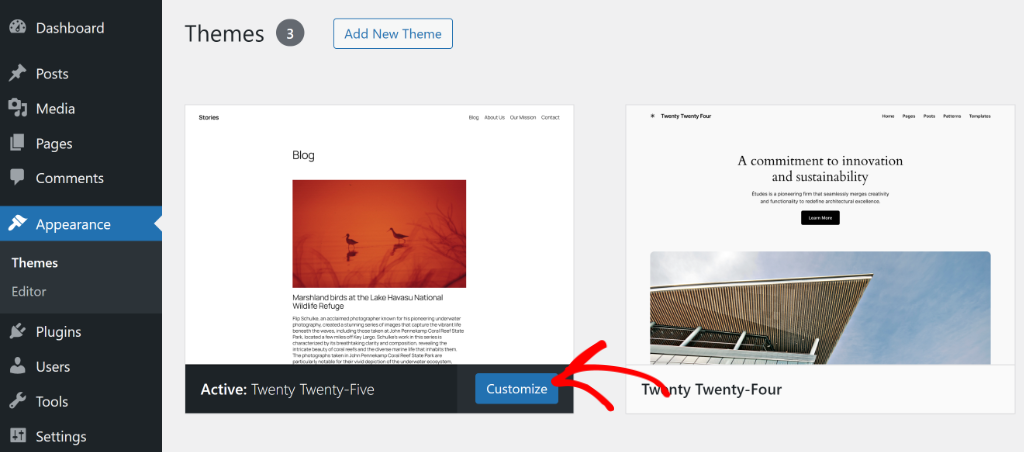
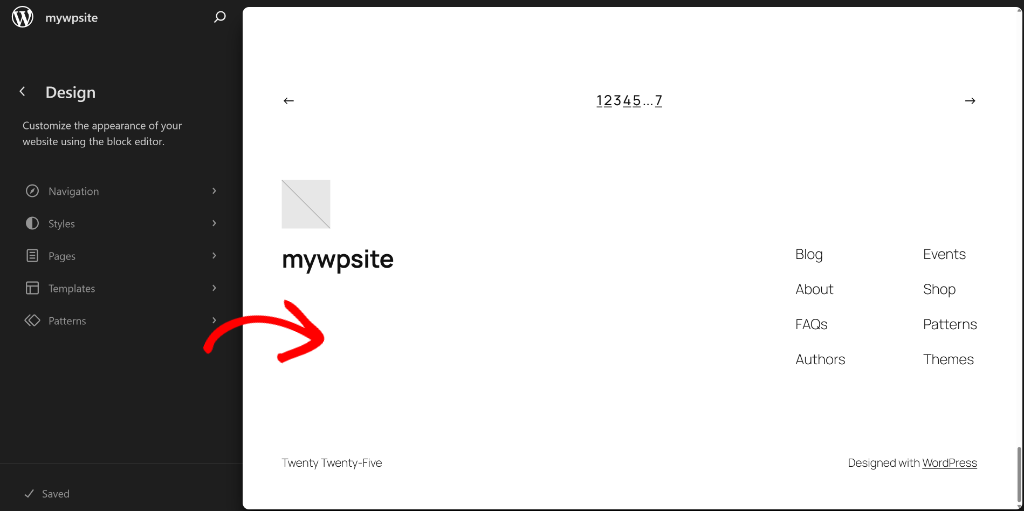
On the next screen, you will see the Full Site Editor in WordPress.
Simply scroll down and click on the footer area to edit it.
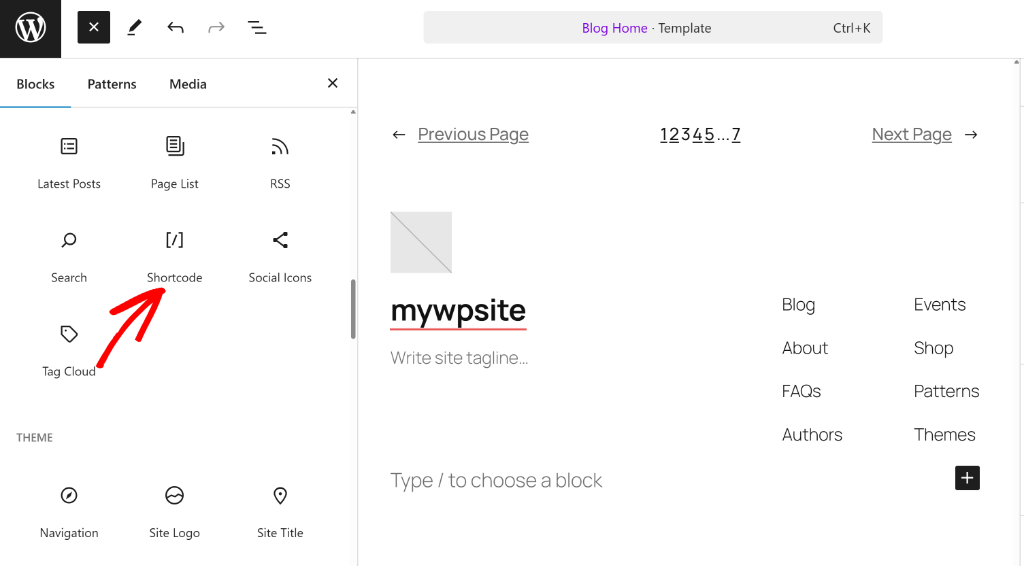
After that, you’ll need to choose where you’d like to insert the copyright date.
From here, click the ‘+‘ icon and add a Shortcode block.
You should now see the shortcode block appear in your site’s footer area.
Go ahead and enter the shortcode you copied earlier in WPCode.
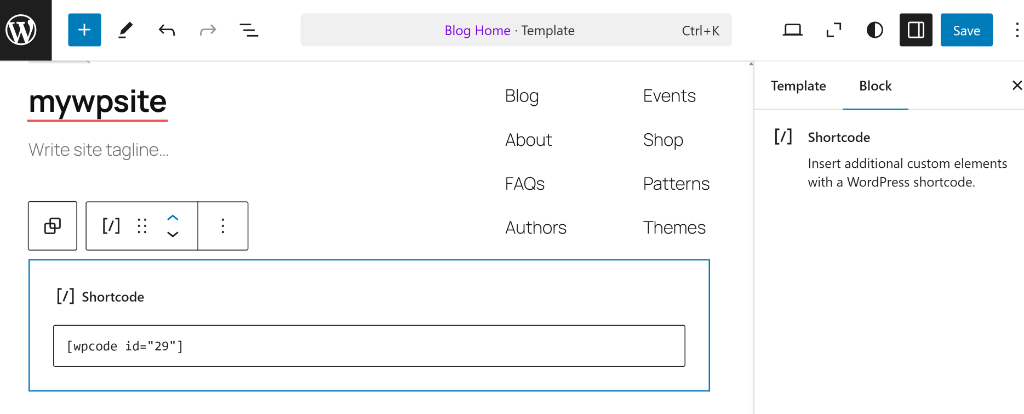
When you’re done, simply click the ‘Save’ button.
Now you can visit your site to see the dynamic copyright date in action.

That’s it! You’ve successfully added a copyright year to the footer of your site that will change automatically.
I hope this article helped you learn how to add a dynamic copyright date in WordPress footer. You may also want to see our guide on how to allow SVG file upload to WordPress and how to add custom CSS to your WordPress site.
If you need help, then feel free to leave a comment below. And don’t forget to follow us on X (formerly known as Twitter) and subscribe to our newsletter for all the latest updates.

