Copyright © 2026 WPCode. WPCode® is a registered trademark of WPCode, LLC
Documentation, Reference Materials, and Tutorials for WPCode
Version 1.1.0 of the WPCode Conversion Pixels addon added support for tracking conversions using the Snapchat Pixel or Snap Pixel.
Below, we’ll walk you through the steps needed to find your Snapchat Pixel id and Conversions API Token so that you can start tracking your data reliably.
First, you need to login to your Snapchat Ads account – do so by going to https://ads.snapchat.com/ – if you don’t already have an account you can sign up there.
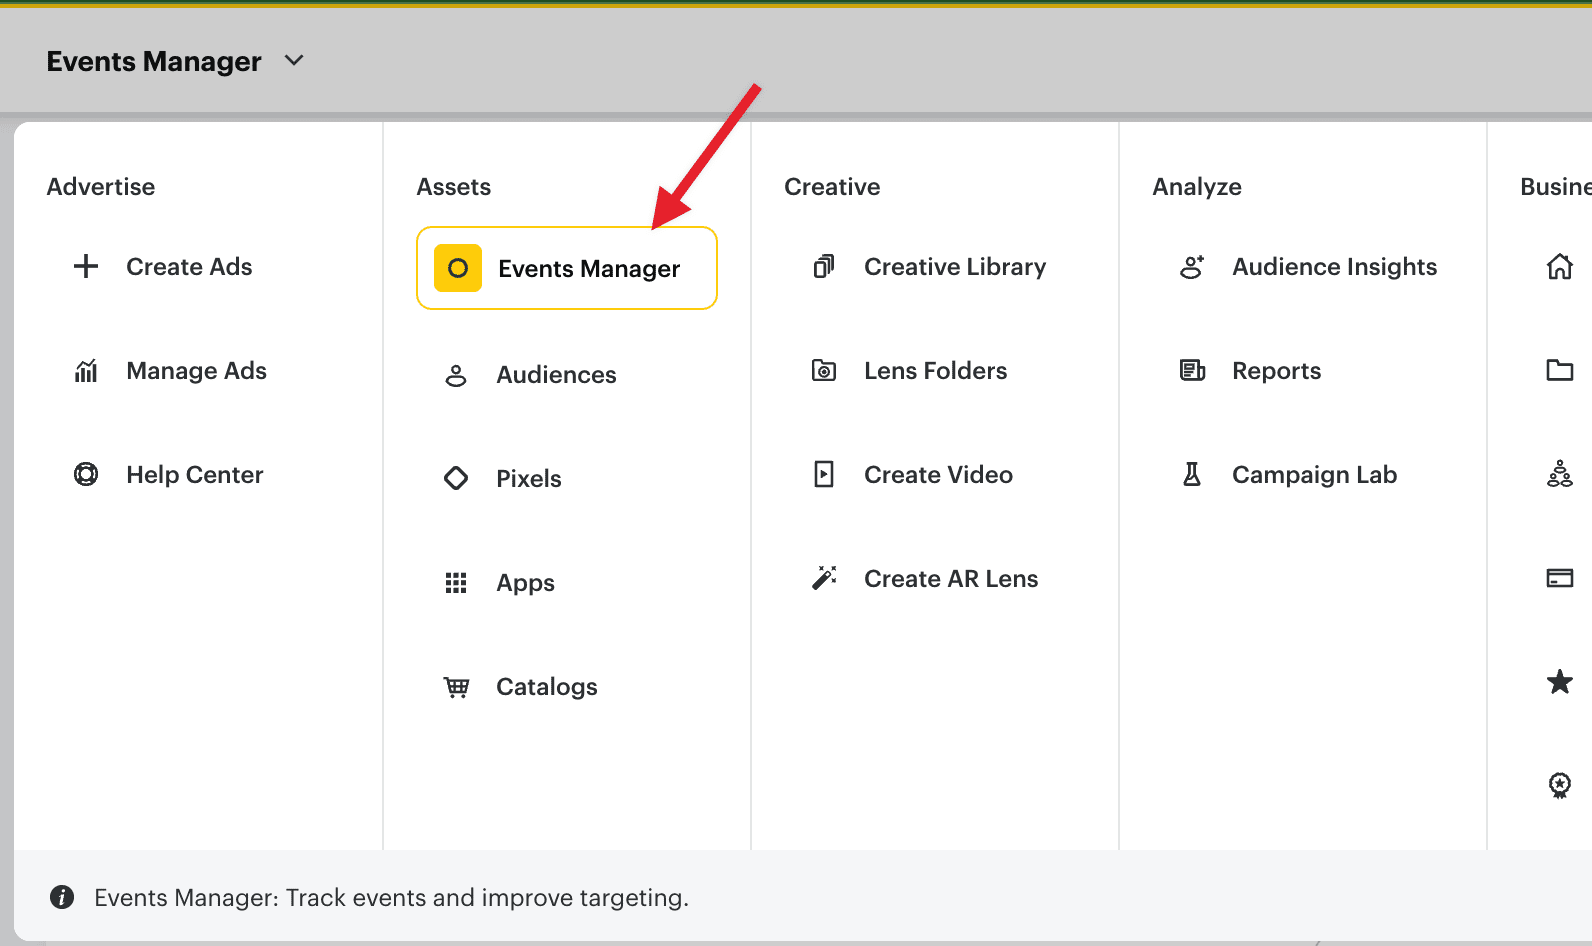
Once you are in the ad manager interface you will have to go to the “Events Manager” page. From the top left menu select “Events Manager”:

Once you are in the events manager interface you will need to click the “New Event Source” button if you don’t already have a pixel set up.
In the overlay that opens select “Web” for the Event source:
![]()
Next you will have to select a way to connect your site and you will have to select “Pixel” for now.
![]()
You will be prompted to name your pixel, use a name that is relevant to the website where you will be using this Pixel:
![]()
Once the pixel is created you will be prompted to choose how you want to connect it again – please choose “Pixel Code” again and you will see a page where you can copy your pixel id by clicking on the copy icon next to the pixel id:
![]()
The final step here is to paste the pixel id in the WPCode Conversion Pixels settings in the Snapchat Pixel Id field and save your changes:
![]()
All that’s left now is to make sure you enable the events that you want to track, we recommend enabling the Page View event for better attribution.
Once your Pixel id is set up you can add the Conversions API Token to enable the WPCode Conversion Pixels addon to track your events more reliably using server events with more details.
You can do that by clicking on the Setup Snap Pixel button next to the Pixel you just created:
![]()
In the menu that pops up choose the Conversions API option:
![]()
Next. choose the Direct Integration option as WPCode will handle all the requests for you:
![]()
You will be prompted to go to the Business Manager part of your Snapchat account to create the token, click the “go to Business Manager” link in that view:
In the Business Manager page scroll down to the Conversions API Tokens area and click the “Generate Token” button:
![]()
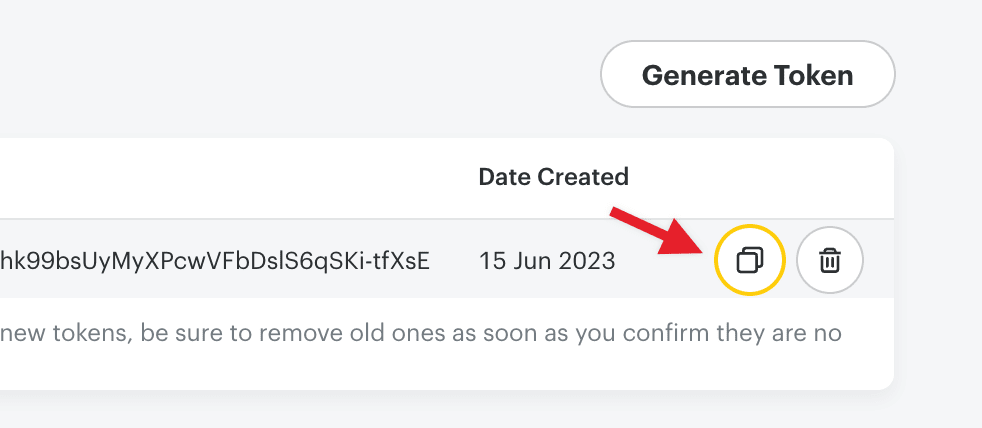
Once the Token is generated, hover over it to reveal the Copy button and click it to grab your token:

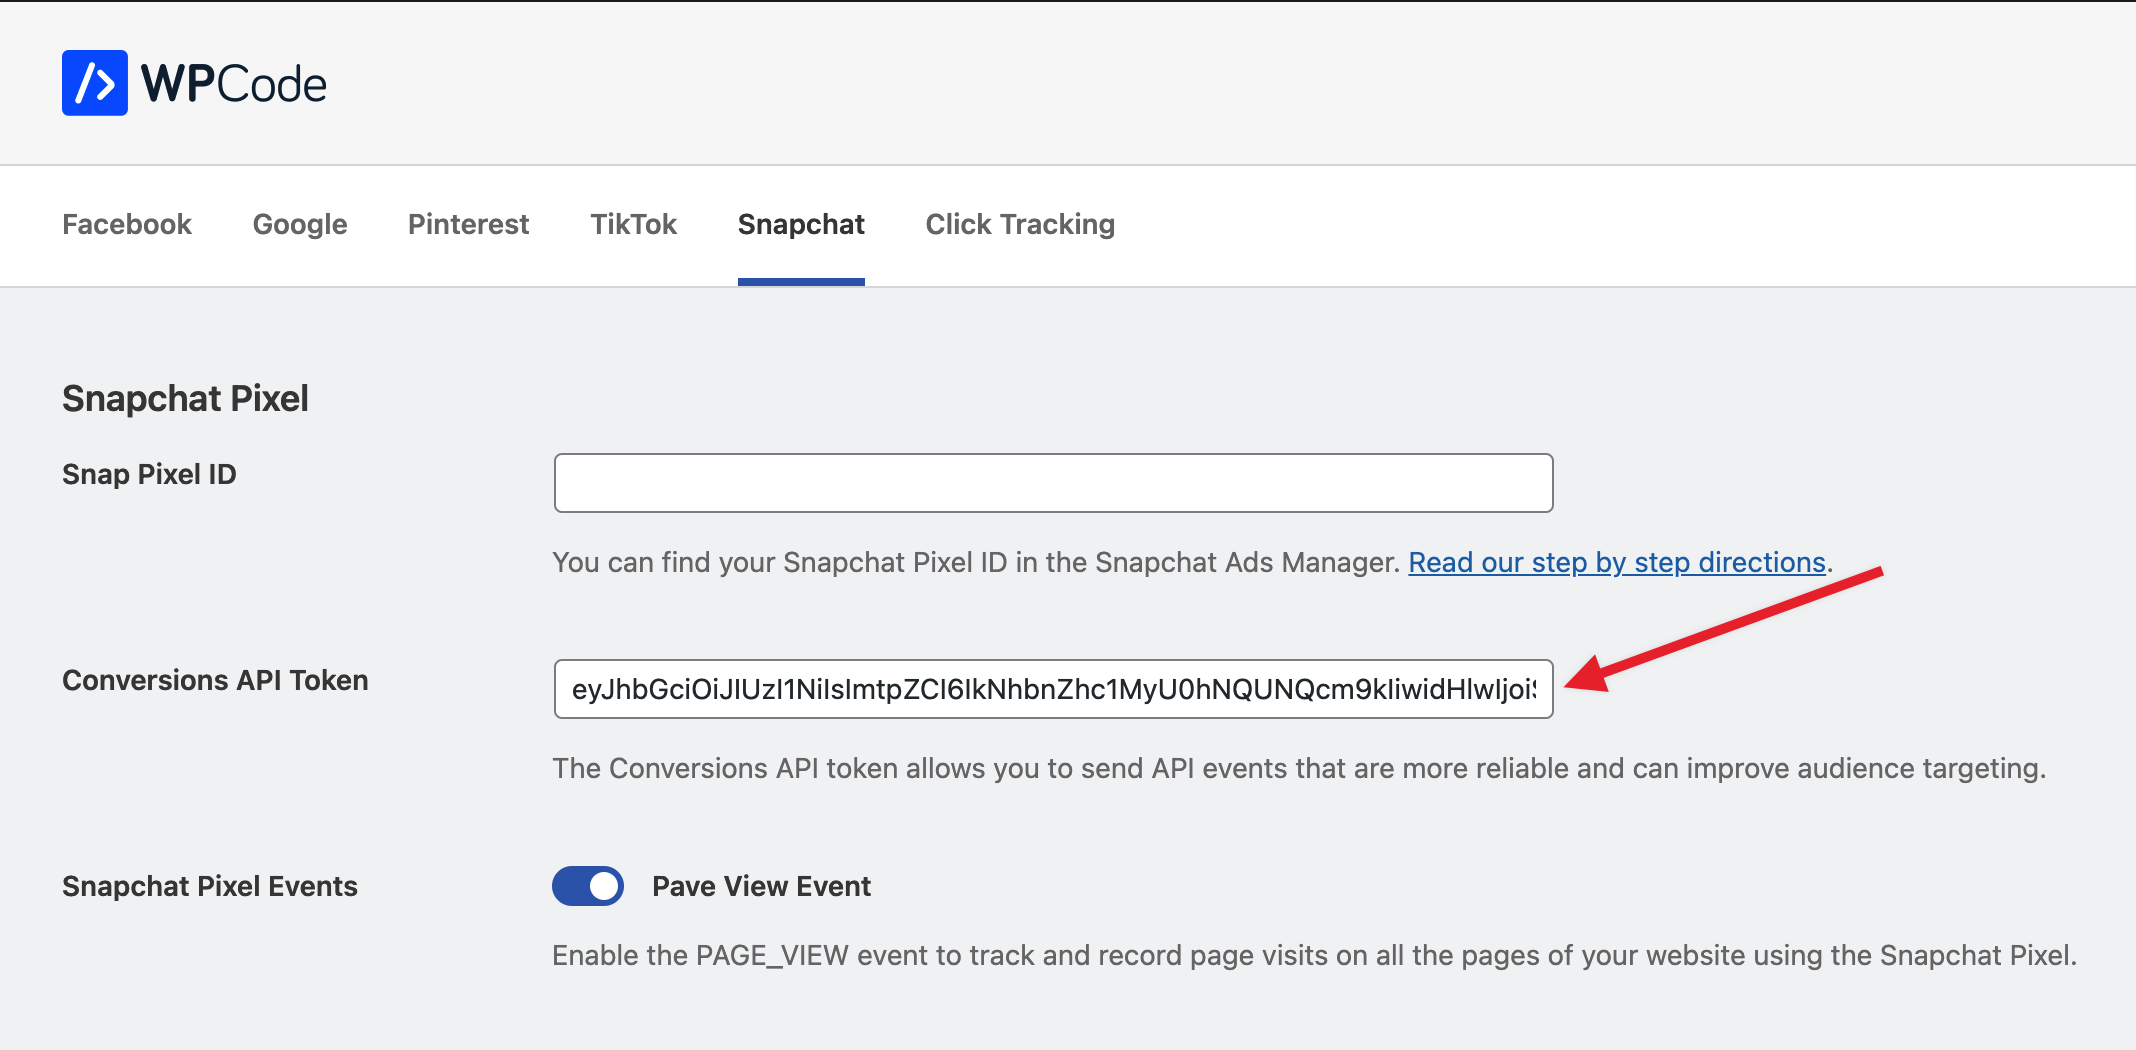
Back in the WPCode Conversion Pixels settings, paste the token in the “Conversions API Token” field and save your settings.

That’s it! You can now track Snapchat Pixel events using the Conversions API automatically from WPCode, don’t forget to enable all the events in the eCommerce area that you want to track.
Future-proof your website with WPCode Snippets and improve the way you manage code across all your websites.