
Documentation, Reference Materials, and Tutorials for WPCode
Finding your Google Ads Tag ID is easy following the steps below.
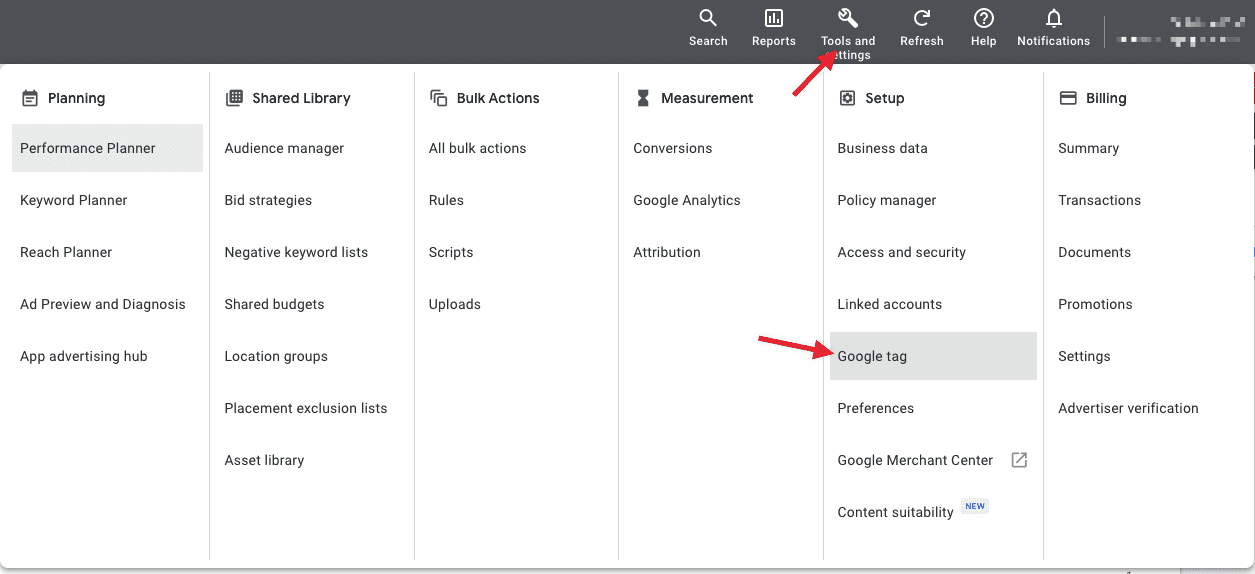
First, go to https://ads.google.com/ and if you haven’t already, sign up for an account. Once you are in the Campaigns view all you have to do is go to Tools and settings > Google Tag from the top menu:
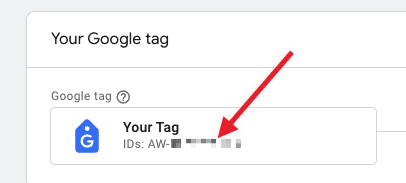
From that screen you can copy the Tag ID (make sure you include the AW- prefix):
All that’s left now is to paste that in the Google Ads Tag ID field in the Conversion Pixels settings of the WPCode plugin:
![]()
Google Ads gives you the option to track different types of conversions separately by creating custom conversions. Each of these unique conversion actions have an unique label that you can use in the WPCode Conversion Pixels plugin to identify purchases on your site with a specific conversion. This gives you more control over the data you track and more reporting power inside the Google Ads dashboard. Follow the steps below to create a new Conversion Action for your campaign and grab the label of that action to add it in WPCode.
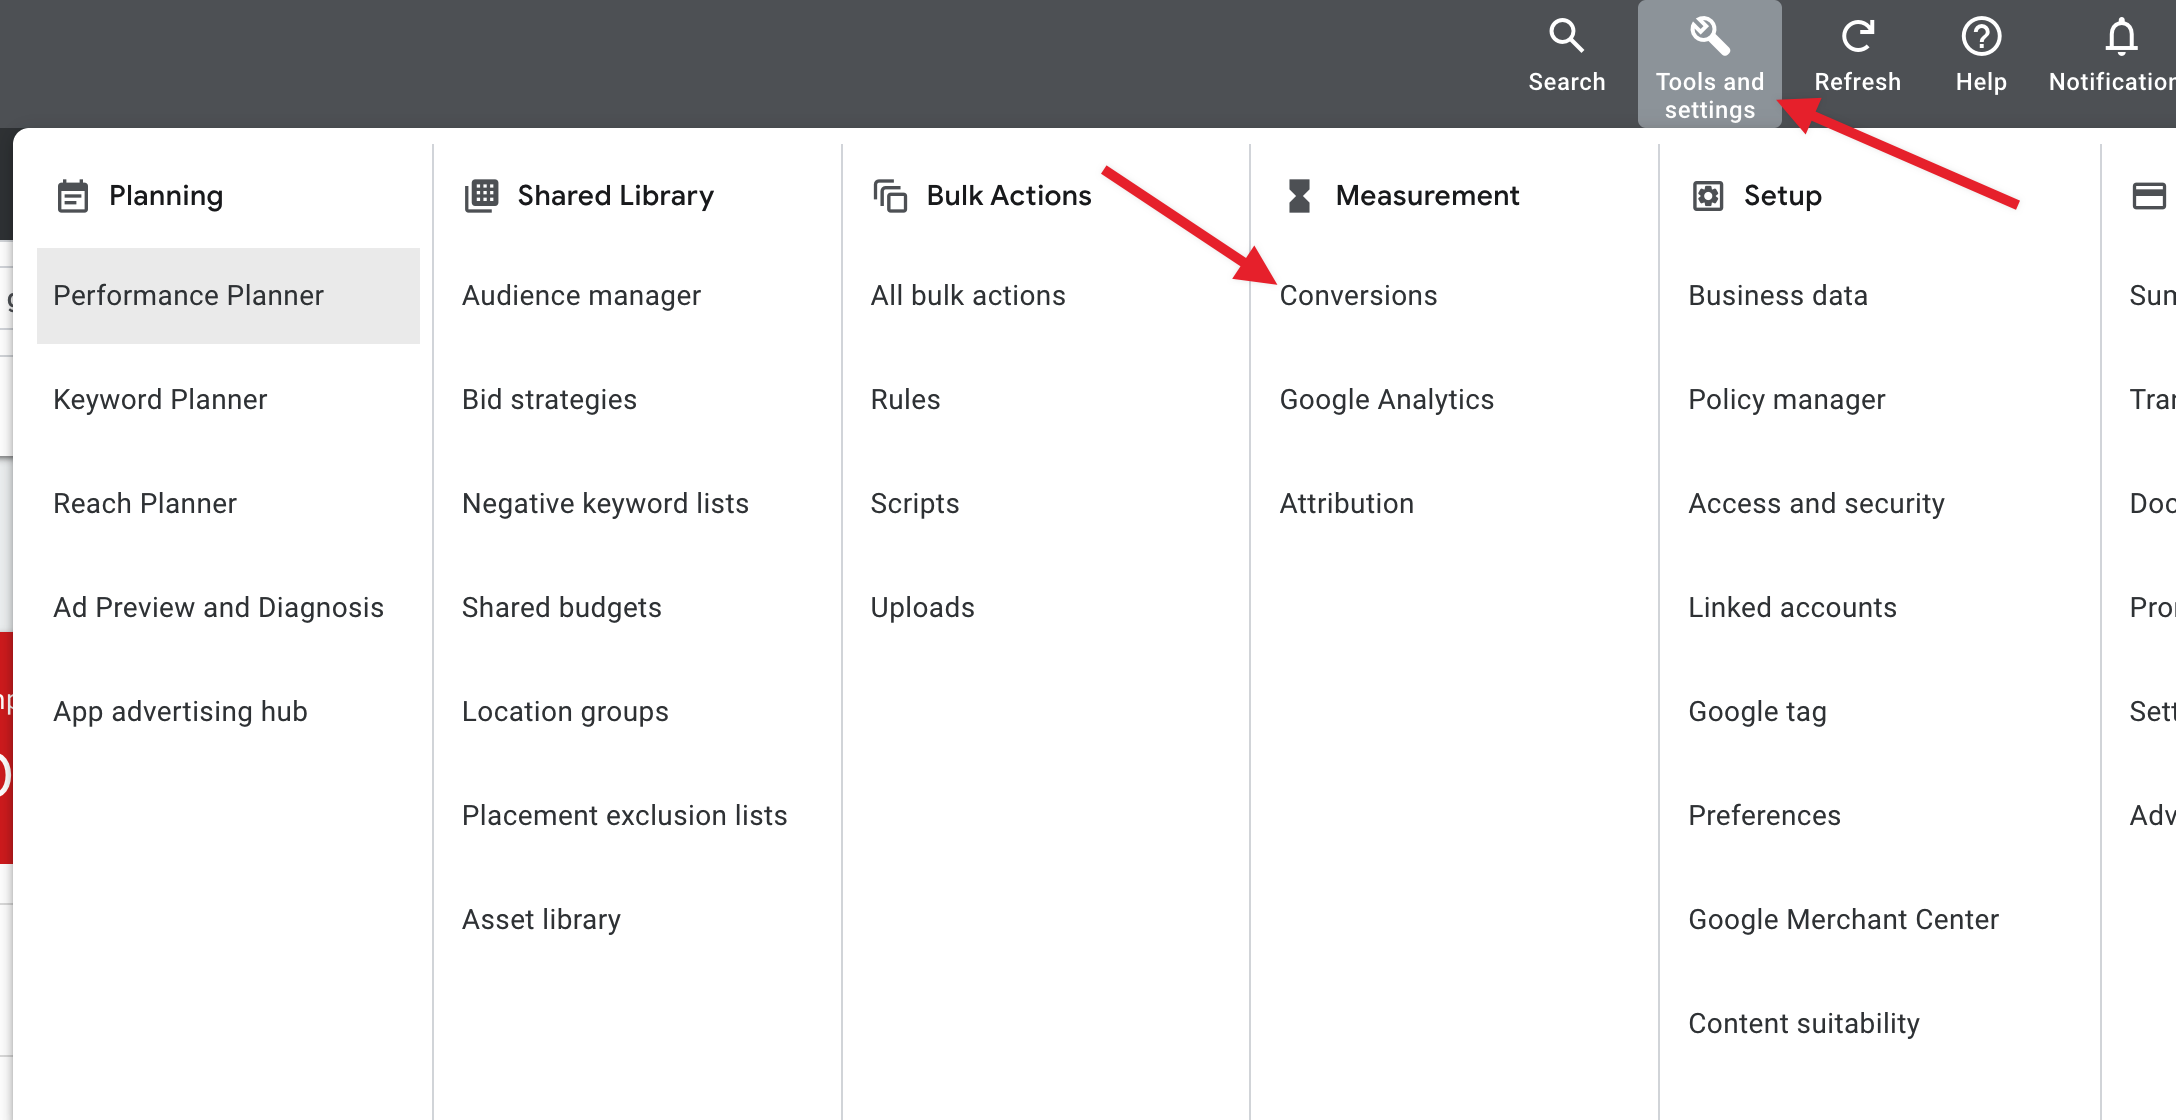
Step 1: Go to your Google Ads account Conversions area, from the top menu click on “Tools and settings” and in the dropdown menu click the “Conversions” link in the “Measurement” column.
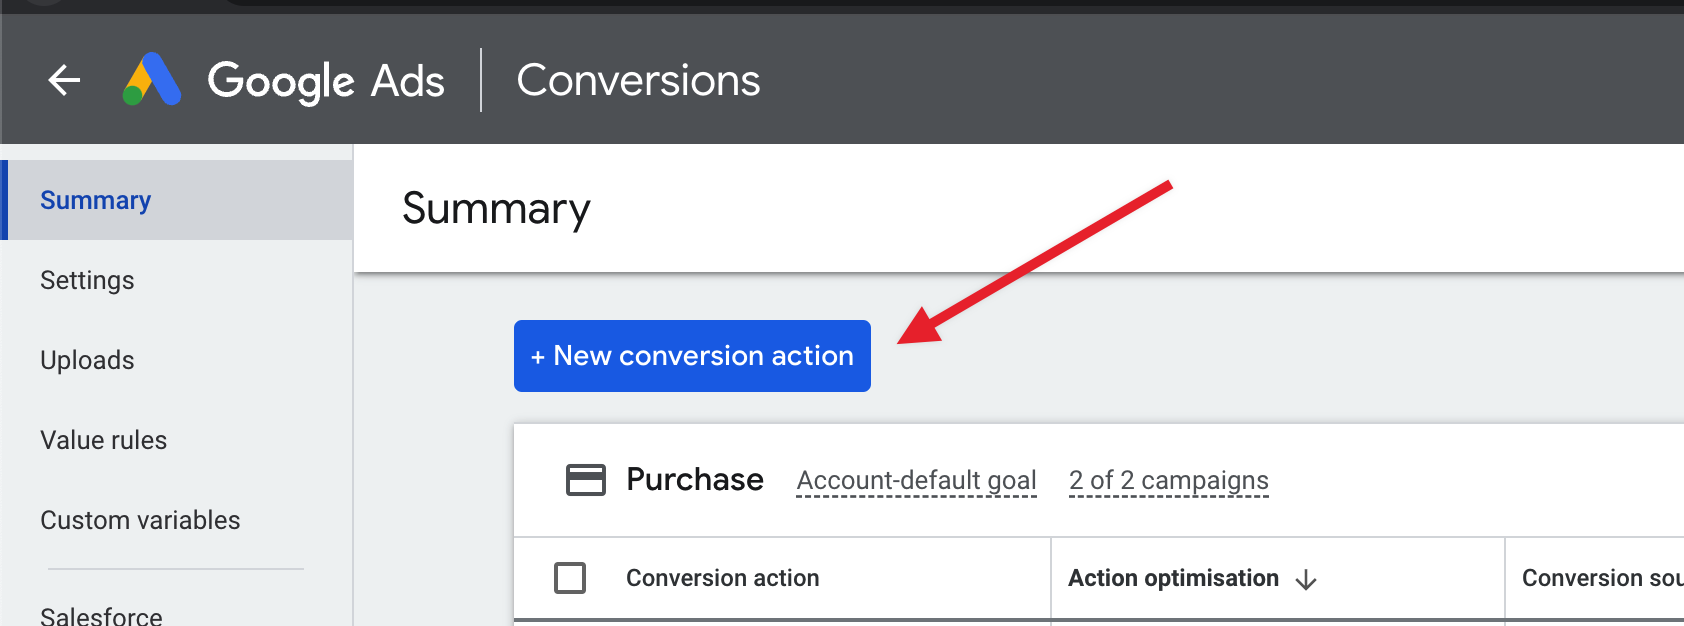
Step 2: Create a new Conversion Action.
In the Conversions screen, click the “New conversion action” button (or the blue plus button) above the table of conversion items:
This will open a new page with 4 options for the type of conversion, you should select the first option, Website, since we are going to use this new conversion action on your website with WPCode:
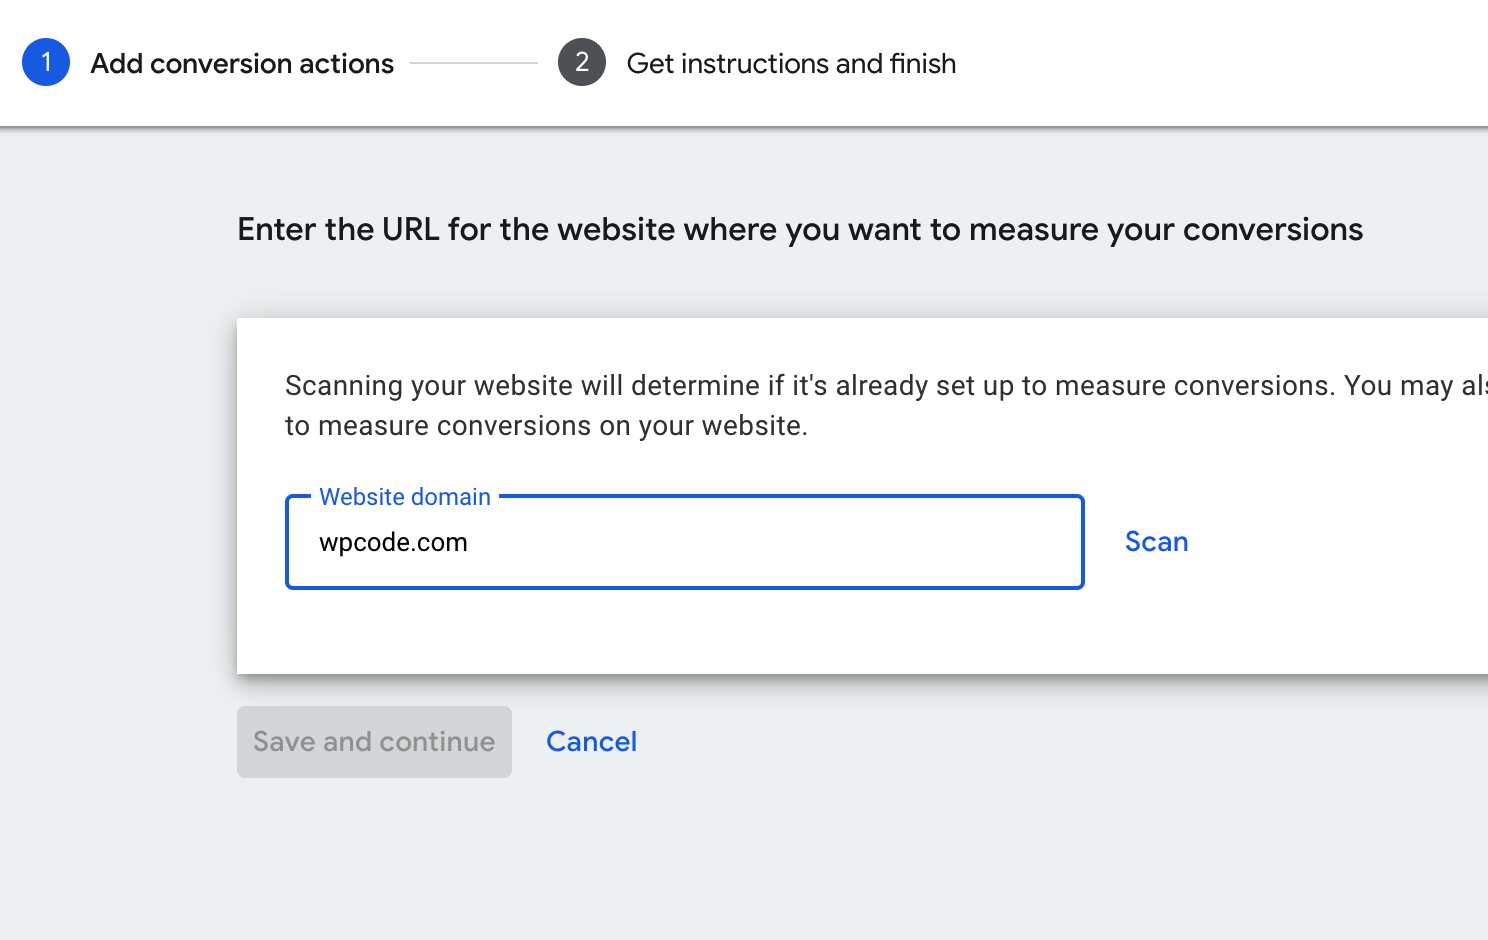
 In the next screen Google Ads will ask you to input your site URL so that they can suggest the best solution, simply fill in your website URL and click scan:
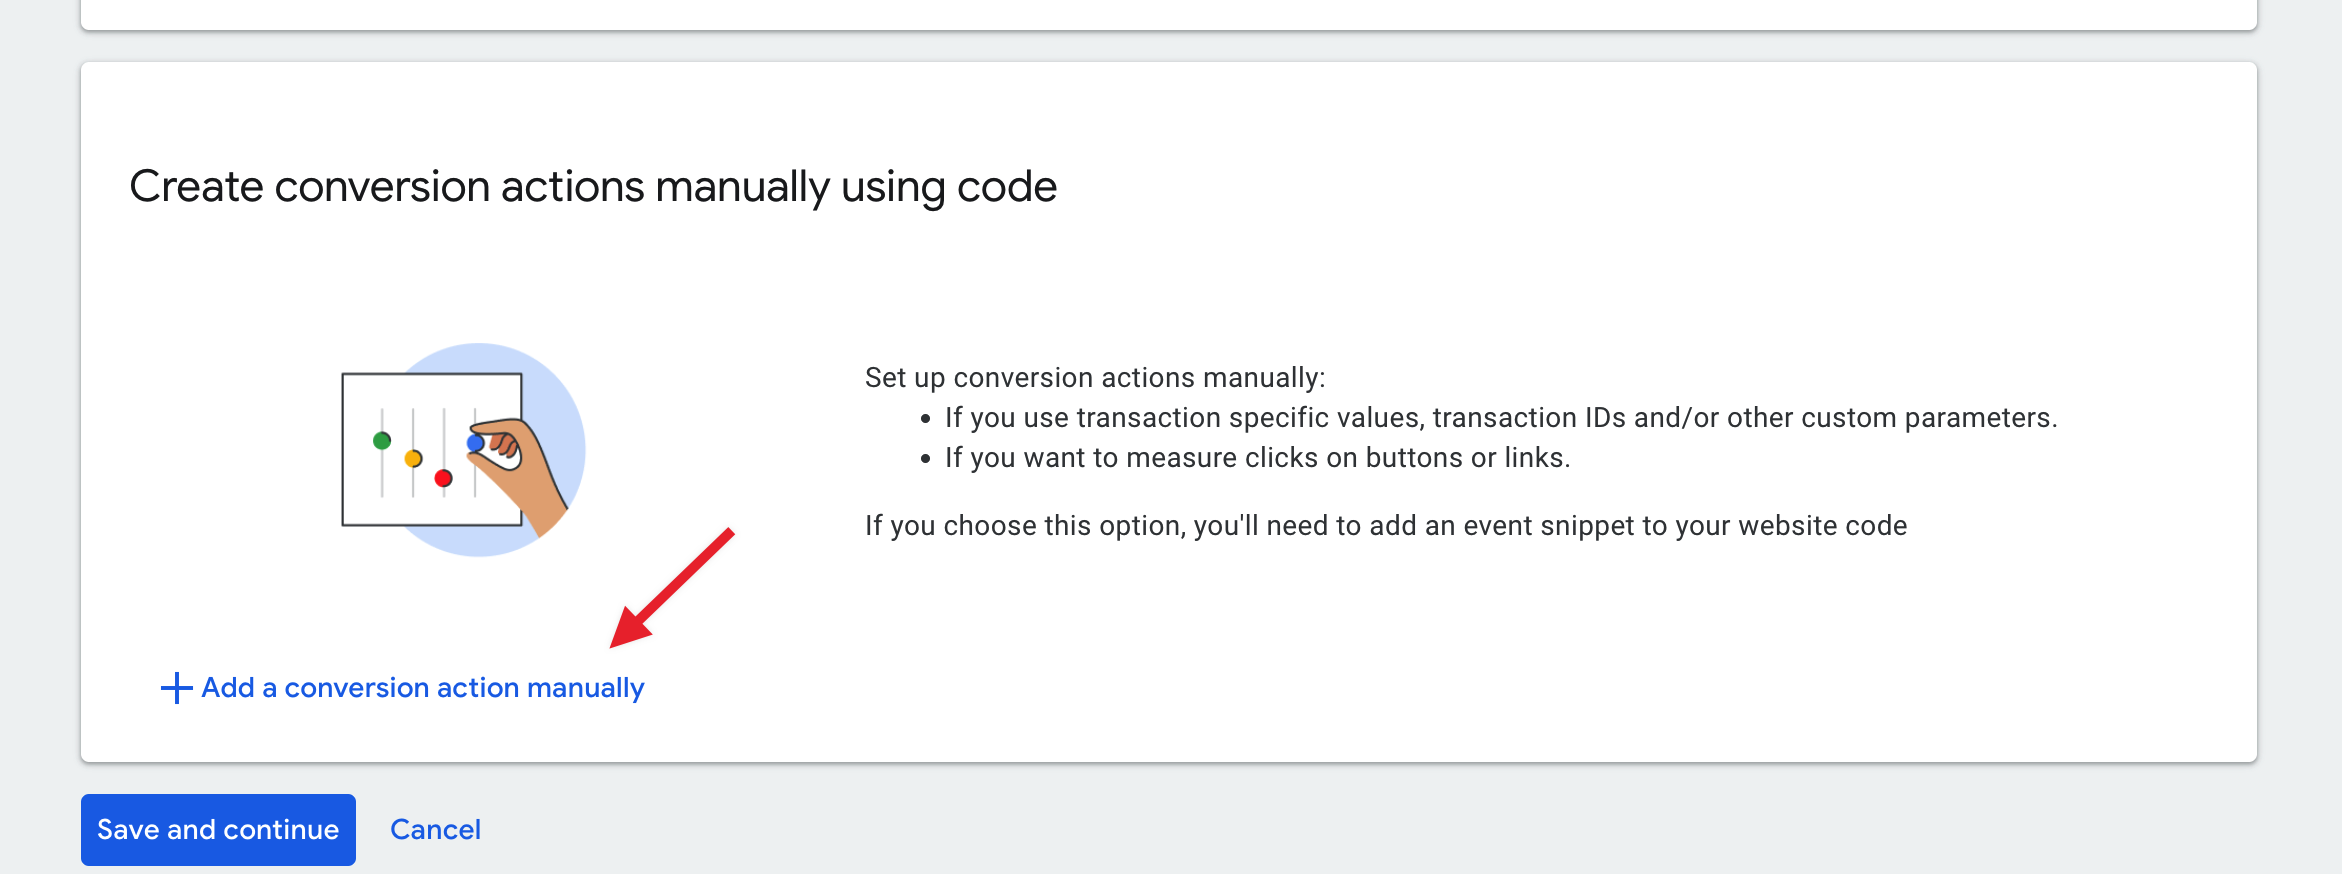
Regardless of the result of the scan, since you already have a conversion pixels solution set up on the site with the WPCode Conversion Pixels addon, click the “Add a conversion action manually” button in the “Create Conversions Manually using Code” section towards the bottom of the page – don’t worry, you won’t have to add any code as that part is handled by WPCode.
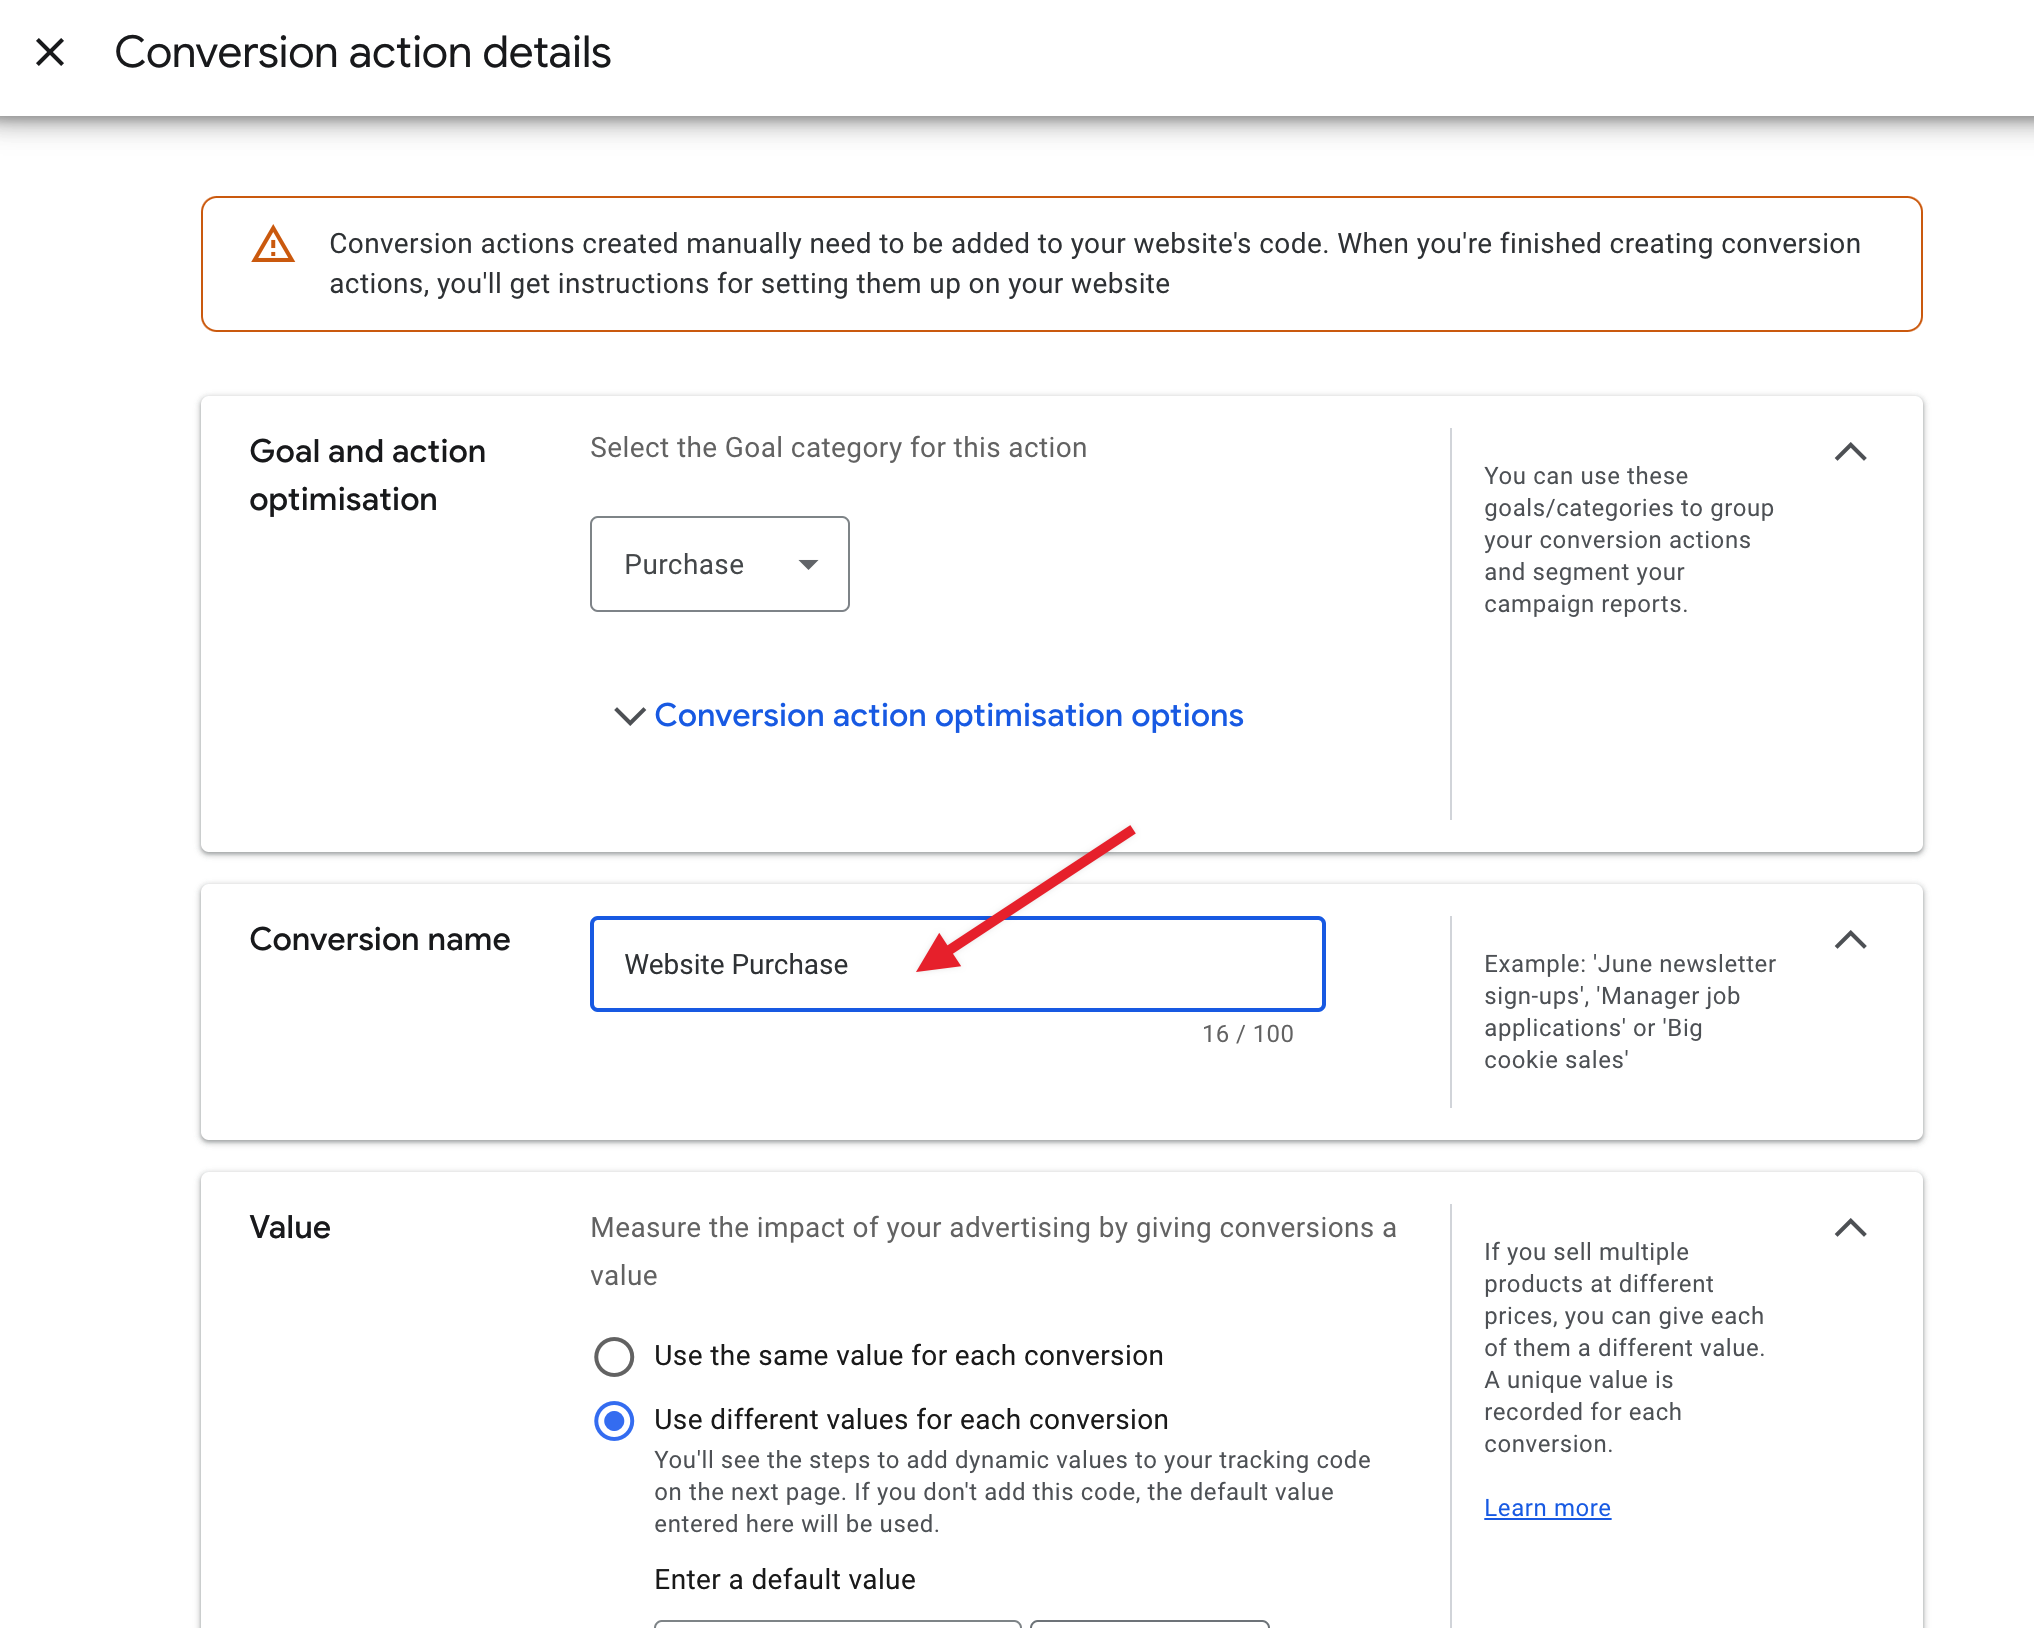
This will open a side menu with a form where you will define the parameters of your custom conversion. The first part of the form is the category Goal – since we are tracking purchases for most of the integrations we recommend choosing the “Purchase” category. If you are tracking a different type of conversion, choose a relevant category.
Next, you will have the chance to give your conversion action a relevant name – this should make it easy for you to distinguish this specific conversion from others, if any.
In the Value section we recommend choosing the “Use different values for each conversion” since WPCode will send the actual value from the order details. You can leave the default value to 1 – all your orders should have a value set from WPCode so that should never be used.
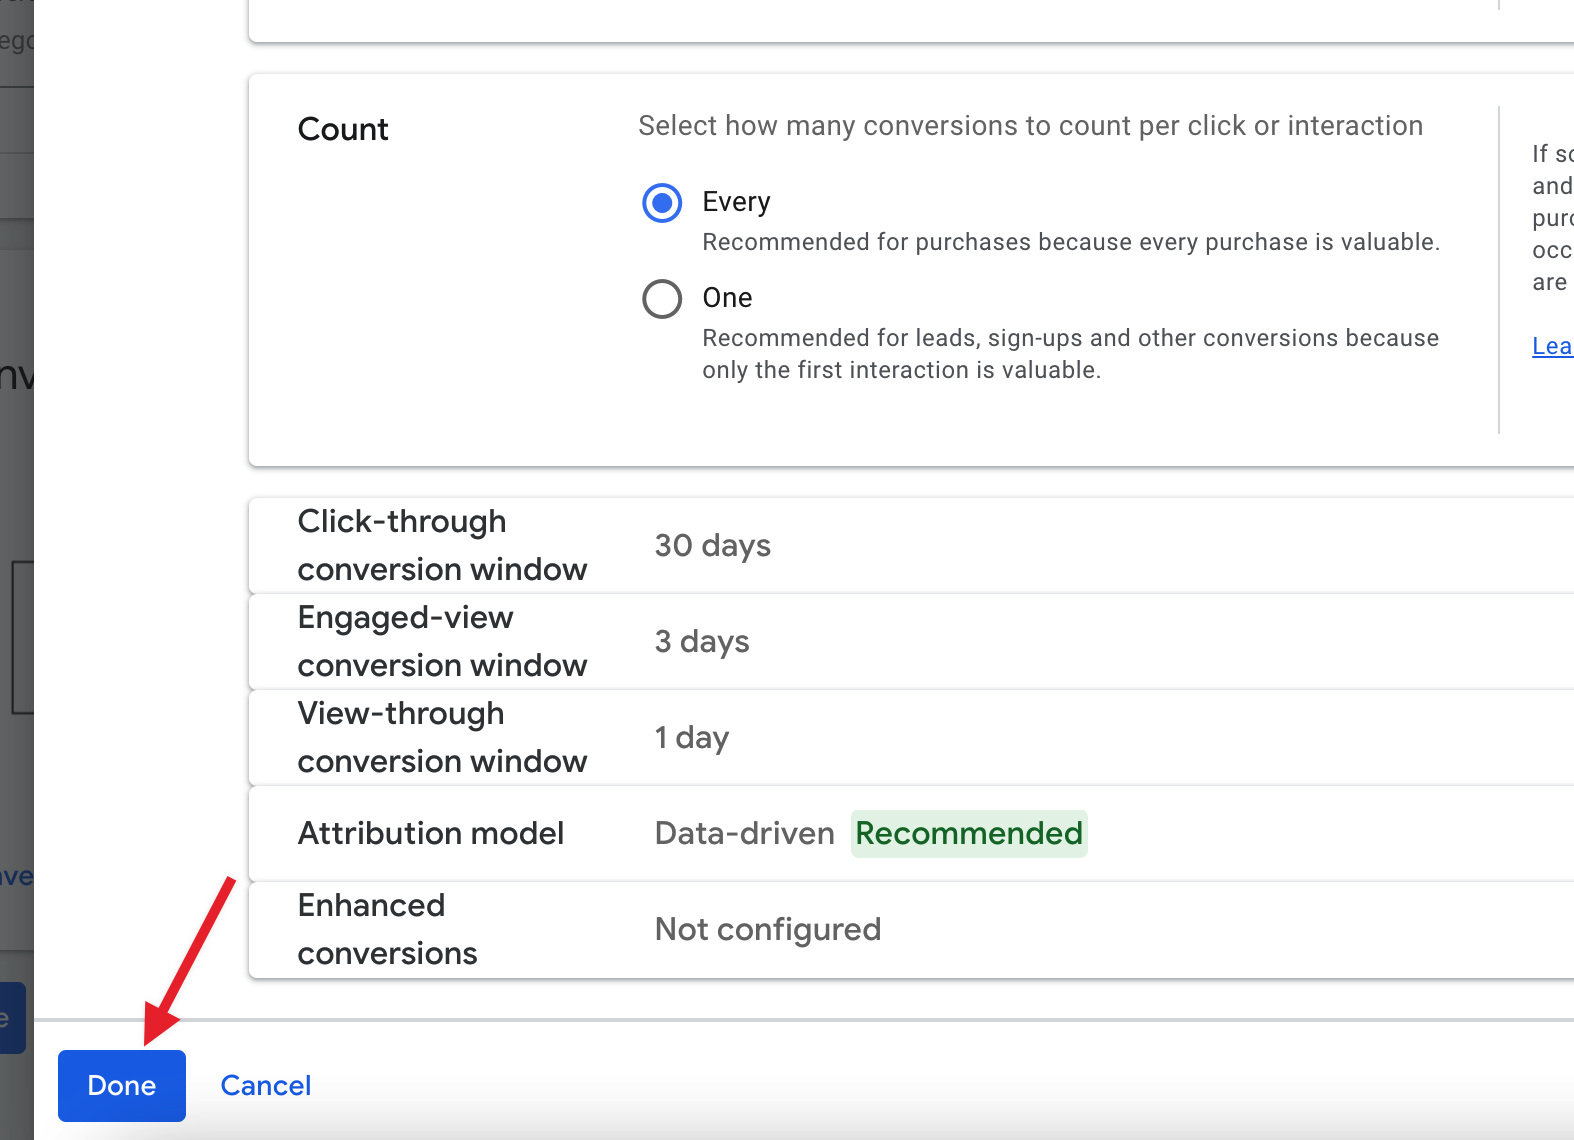
Finally, in the “Count” section make sure to leave the “Every” option selected and click the “Done” button at the bottom to finish configuring your Conversion Action.
Step 3: Copy/paste the newly create Conversion Label in the WPCode settings
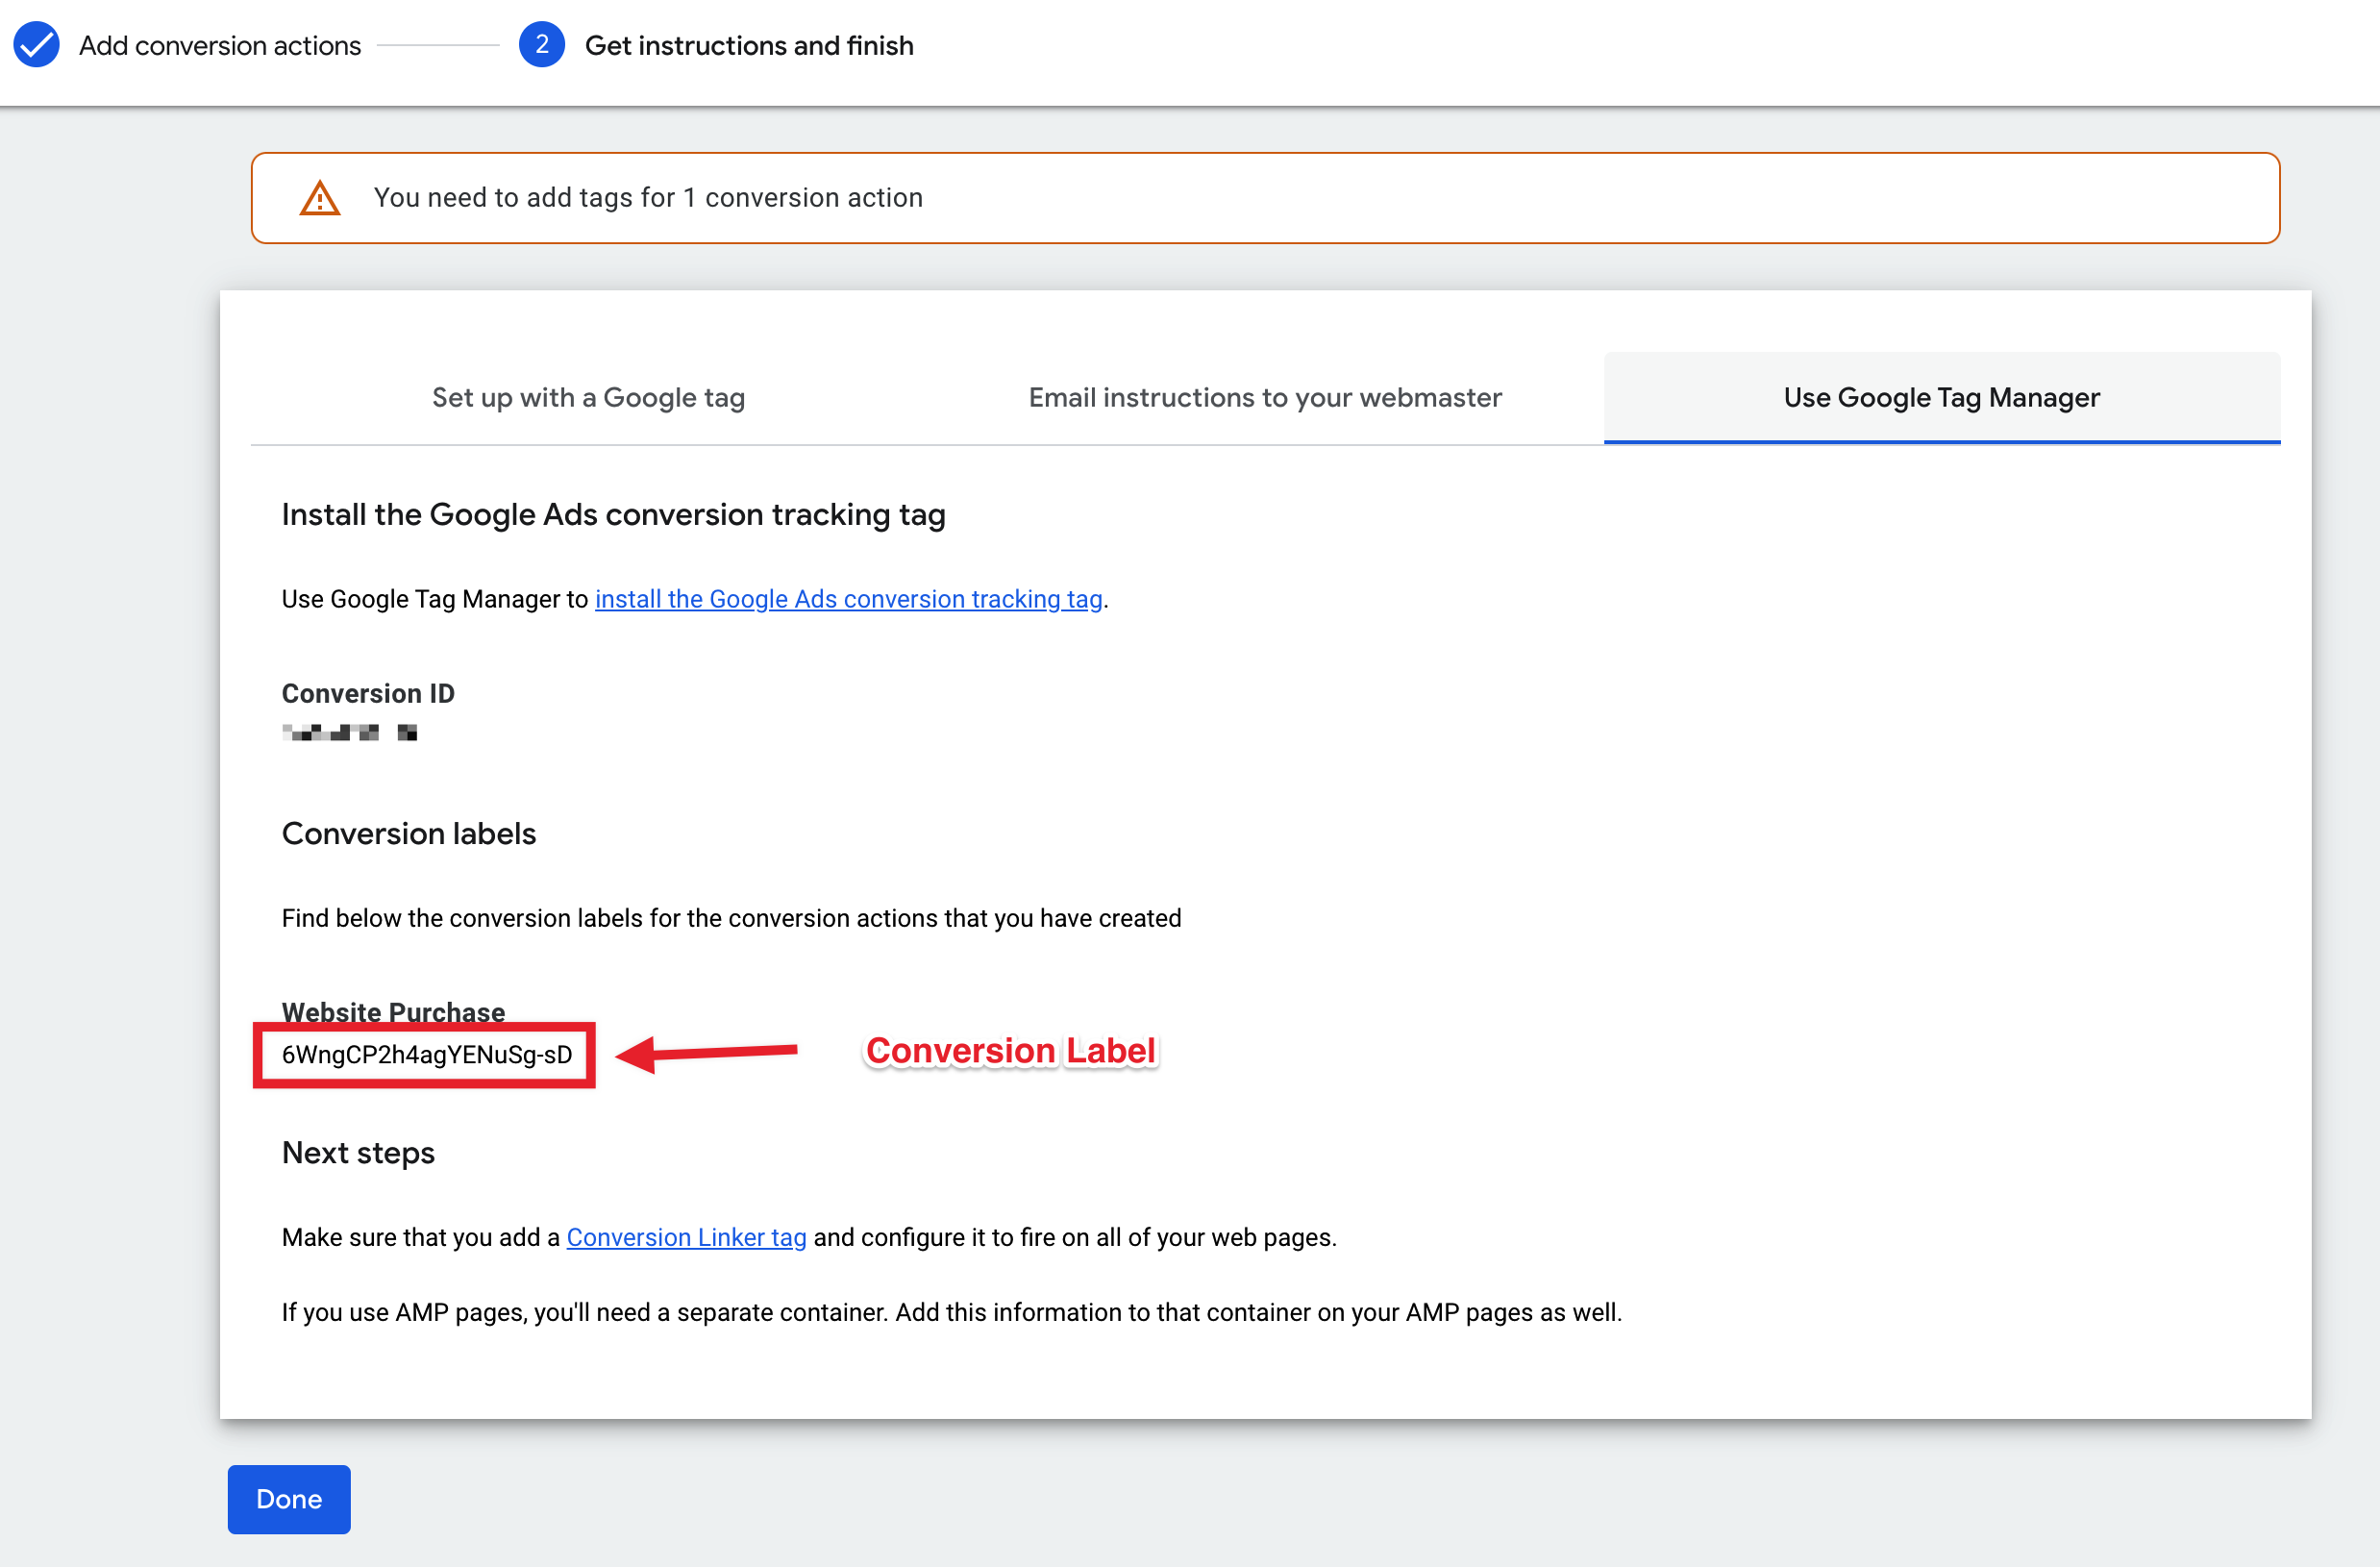
In the final screen you should have 3 tabs to choose how you will add the conversion details to your site – the easiest way to grab the label is to select the “Use Google Tag Manager” tab and copy the conversion label which will show up under the name you used for your conversion in the previous step:
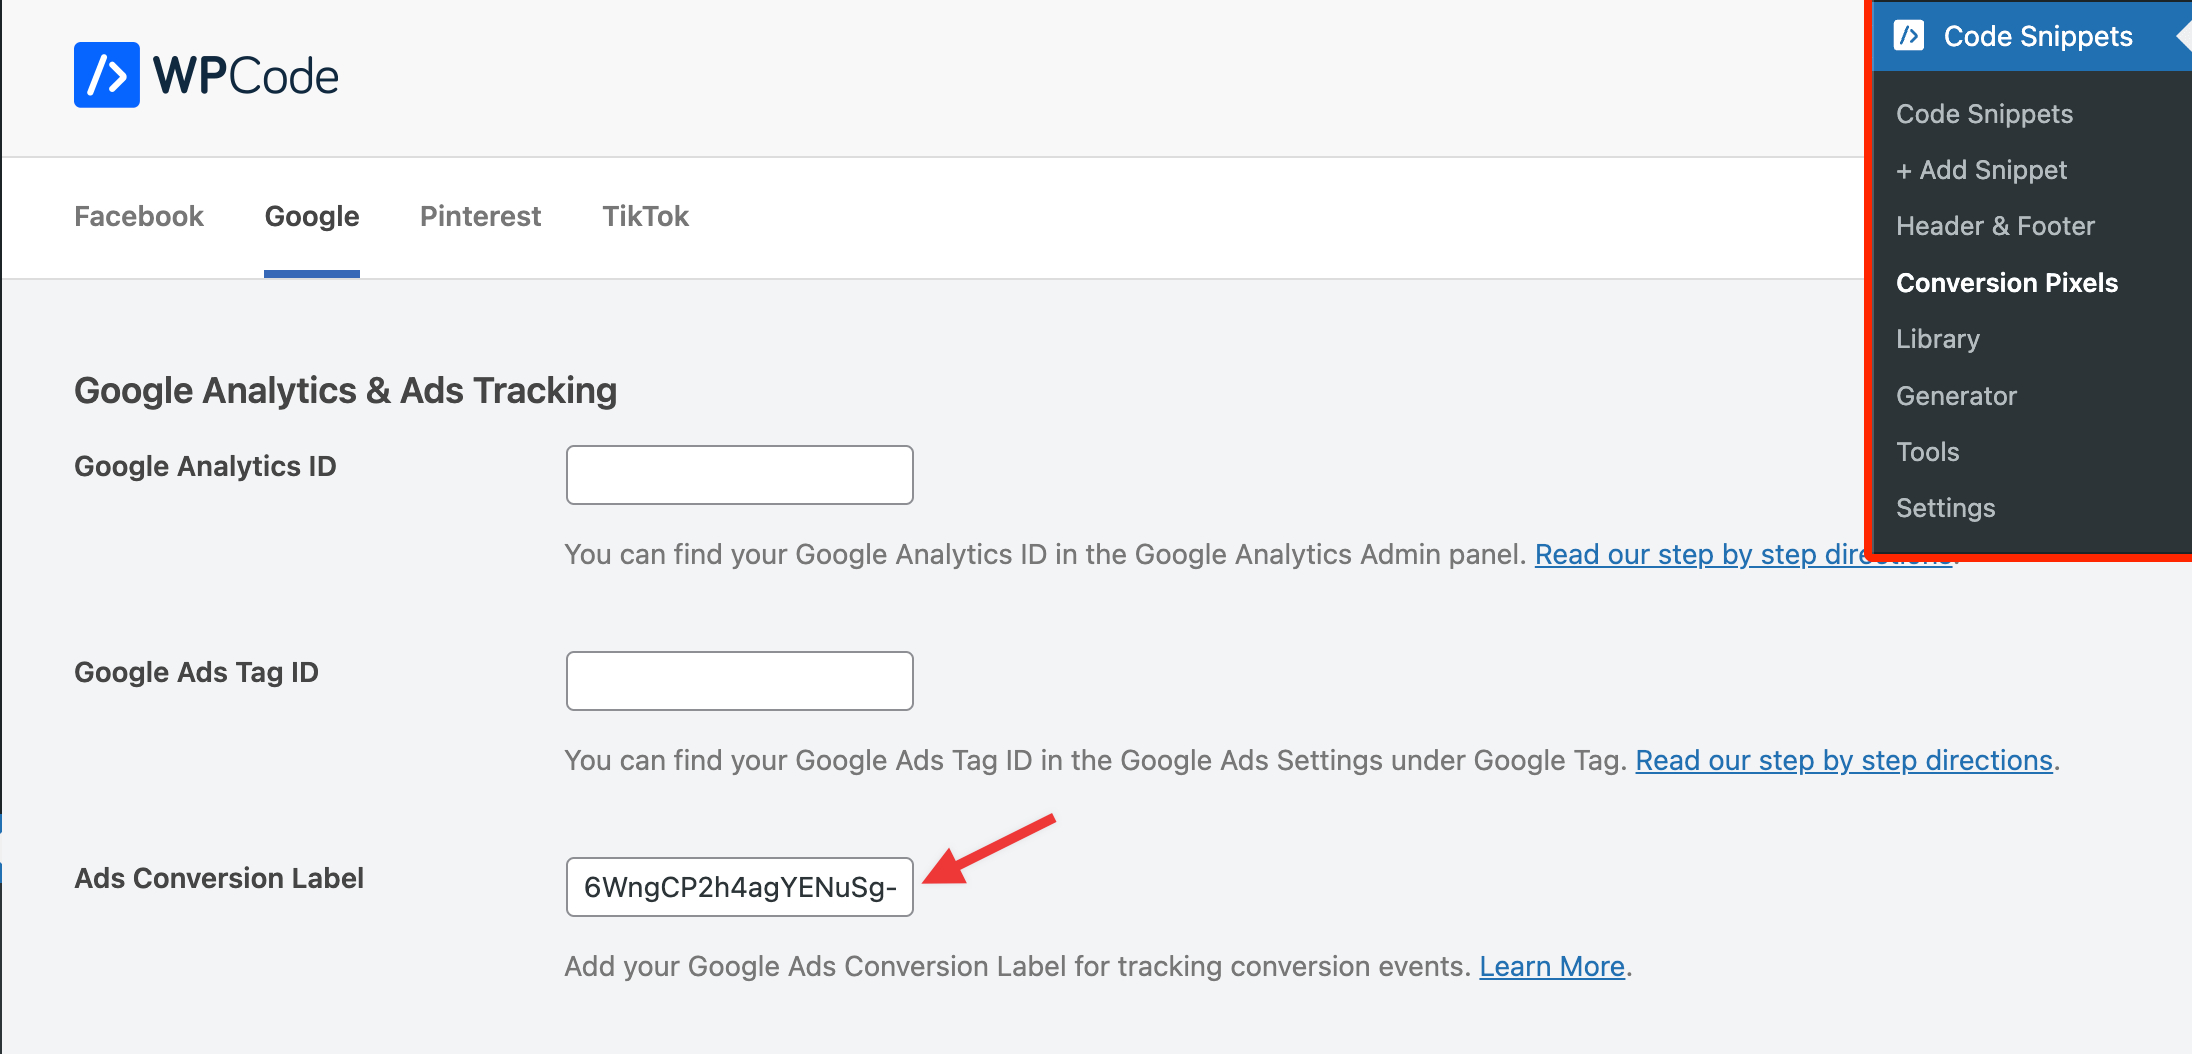
Once you have that value you can paste it the WPCode Conversion Pixels settings in the “Ads Conversion Label” under the Google tab & don’t forget to click save.
That’s it, with these details you are ready to track conversion for your Google Ads campaigns using the WPCode Conversion Pixels addn.
Future-proof your website with WPCode Snippets and improve the way you manage code across all your websites.
Copyright © 2026 WPCode. WPCode® is a registered trademark of WPCode, LLC

The WordPress® trademark is the intellectual property of the WordPress Foundation. Uses of the WordPress®, names in this website are for identification purposes only and do not imply an endorsement by WordPress Foundation. WPCode is not endorsed or owned by, or affiliated with, the WordPress Foundation.