
Do you want to control which ads to show on your website? Then, you would benefit from learning how to add, edit, and manage the Ads.txt file in WordPress.
If your website displays fake ads, it could harm your reputation and decrease your ad revenue. However, you can safeguard your website, business partners, and content creators from ad fraud by simply adding an ads.txt file. This simple step can help you build trust and make more money from your ads.
Why Create Or Edit Ads.txt Files In WordPress?
The Authorized Digital Seller file is also known as ads.txt. It’s a special file that tells everyone which companies can rightfully sell ads on your WordPress site, helping to block fake ads.
If you’re using ad platforms like Google AdSense, it’s crucial to implement an ads.txt file. Without it, unauthorized sellers might display low-quality or misleading ads on your blog, which could damage your reputation and user experience.
With an ads.txt file, you effectively prevent anyone not on your list from selling ads on your site.
Excited to get started? Let’s dive into how to add, edit, and manage the Ads.txt file in WordPress, with two straightforward methods for you to choose from.
We recommend that you follow method 1 as it doesn’t require you to add, edit, and manage ads.txt file in WordPress. This hassle has been taken care of for you!
Method 1: Add, Edit, And Manage Ads.txt File In WordPress Using WPCode (Recommended)
WPCode is the most advanced WordPress code snippets plugin. It helps everyone, even with no programming experience, add custom code to WordPress.
Therefore, please get a copy of WPCode Pro because it comes with a feature that lets us manage ads.txt files in WordPress. You can install and activate it like any other WordPress plugin.
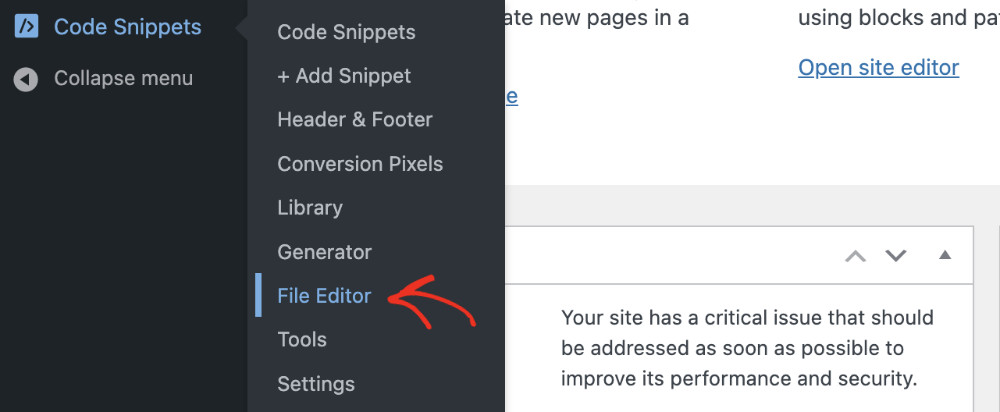
Once you’re ready, visit Code Snippets > File Editor from the backend of your Dashboard. You’ll land on a new page.
Get the following information from your advertising platform. Organize it in this format: domain, published ID, relationship type, and advertising platform ID (optional).
For example, if we are adding Google AdSense as an approved advertising platform, we’ll write the following.
google.com, pub-0000000000000000, DIRECT, f08c47fec0942fa0
Here’s the explanation for this example:
The initial part is the website address of the company that has the authorization to sell or resell your advertisements. For instance, in our example, it’s google.com.
Next, you should input your unique publisher ID, like ‘pub-0000000000000000’ in our example. If you’re uncertain about your publisher ID, a good place to look is the online help resources of the ad network or platform you’re using. It’s crucial to enter your ID accurately to avoid the ‘Earnings at risk’ warning.
In the third part, you need to specify the nature of your relationship with the ad seller, which can be either DIRECT or RESELLER. ‘Direct’ indicates a direct partnership with the AdTech provider, while ‘Reseller’ means that you’ve permitted a third party, such as an ad network or ad management service, to resell your ad space on your behalf.
Finally, there’s an optional field for the ID of the ad platform itself.
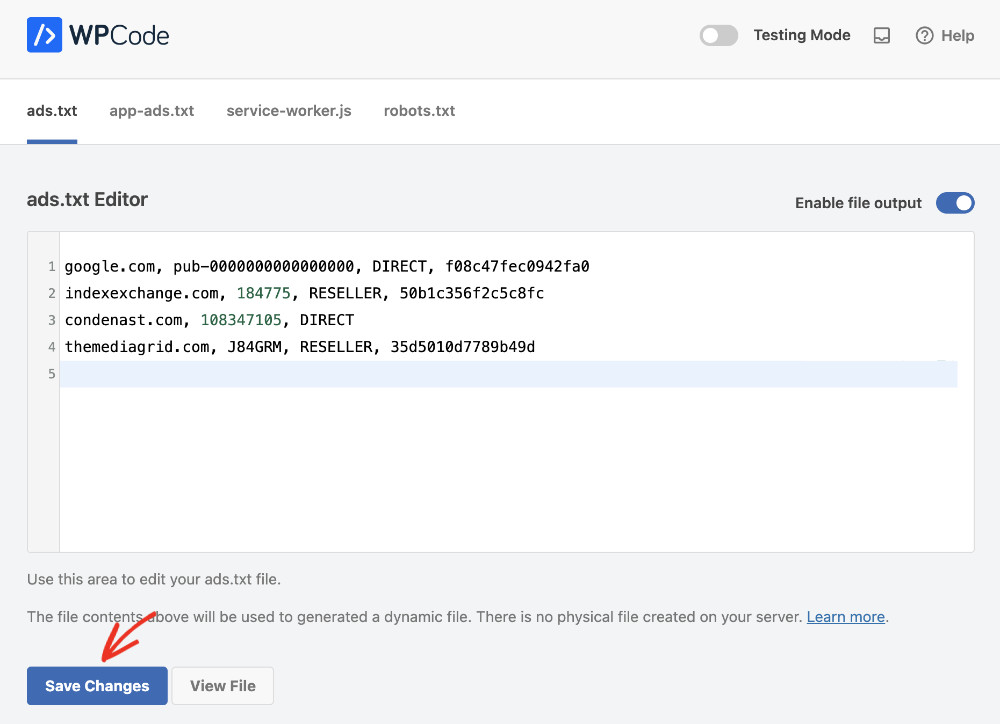
Make sure to paste this information on the ads.txt tab. Click “Save Changes” once you’re done.
Method 2: Add, Edit, And Manage Ads.txt File In WordPress Using An FTP Client
This method is a bit difficult and requires you to add the ads.txt file in WordPress manually. In order to proceed, you need the following:
1. An ads.txt file: This is a plain text file that lists all authorized advertising networks in your ad inventory. You need to write the information here in the following format: domain, published ID, relationship type, and advertising platform ID (optional). You can create it using any word processing software, for instance, Notepad, Microsoft Word, LibreOffice Writer, etc.
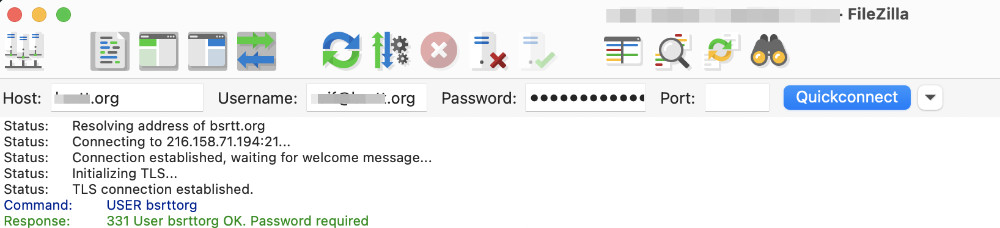
2. FTP client software: This is a program that allows you to transfer files between your computer and your website’s server. Popular FTP clients include FileZilla, WinSCP, and Cyberduck. We’ll use FileZilla for this tutorial.
3. FTP login credentials: These are provided by your web hosting service and typically include a server address, username, and password.
Once the prerequisites are ready, let’s upload the ads.txt file on your WordPress site using FTP.
1. Open up FileZilla or the FTP Client of your choice on your computer.
2. Connect to your website’s server using your credentials. In the case of FileZilla, write your website domain in the Host field, your email address or username in the Username field, the password for your FTP account in the Password field, and finally, the port number in the Port field. Click “Quickconnect” to establish a remote connection.
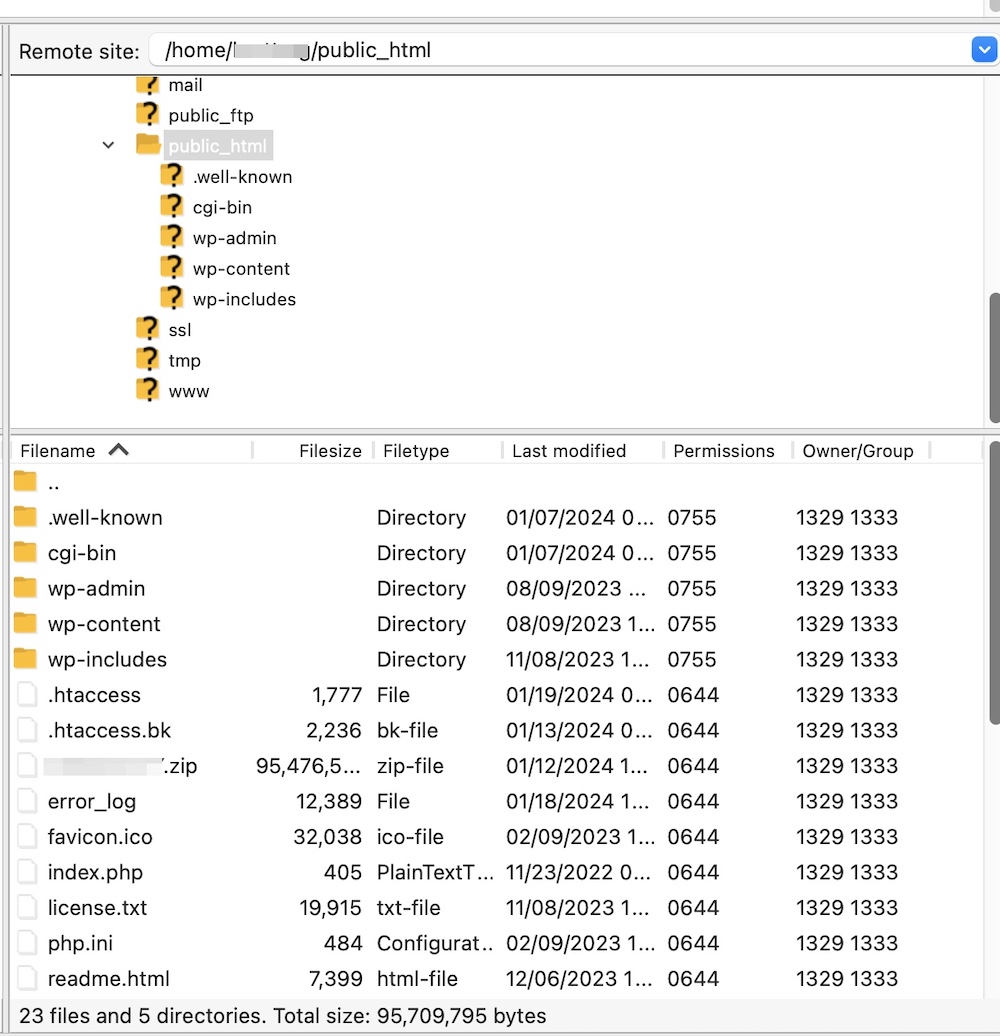
3. Now, you need to navigate to the root directory from the right tab of FileZilla. It’s usually named public_html, www, or simply the domain name. An easier way to understand if you’re in the root directory is that you’ll see the main files of your website, such as index.html or index.php.
4. Now, it’s time to upload the ads.txt file. Find the file from your local pane, then drag and drop the file into the root directory of the remote panel. This means from the left tab of file Zilla to the right tab.
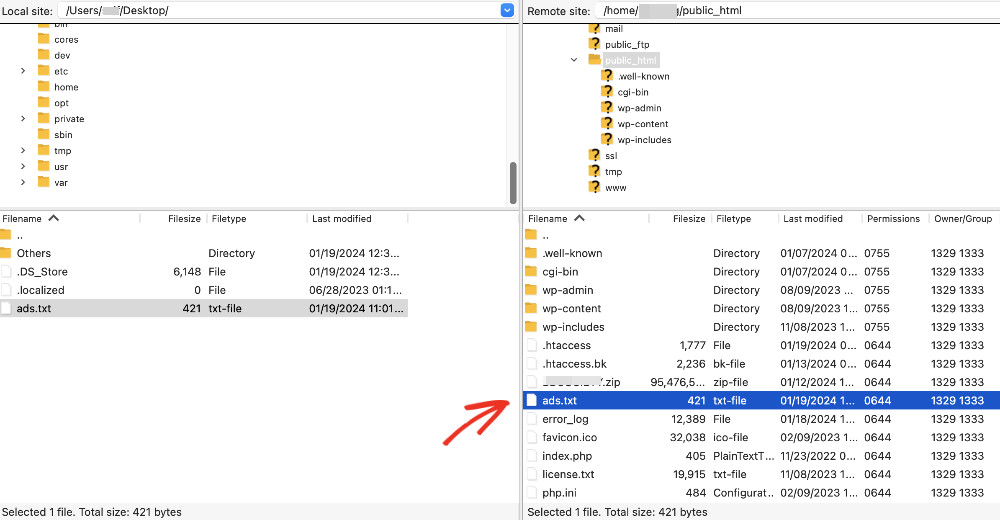
5. Wait for the file transfer to complete, and you’re done!
How To Check If Ads.txt Is Working Correctly
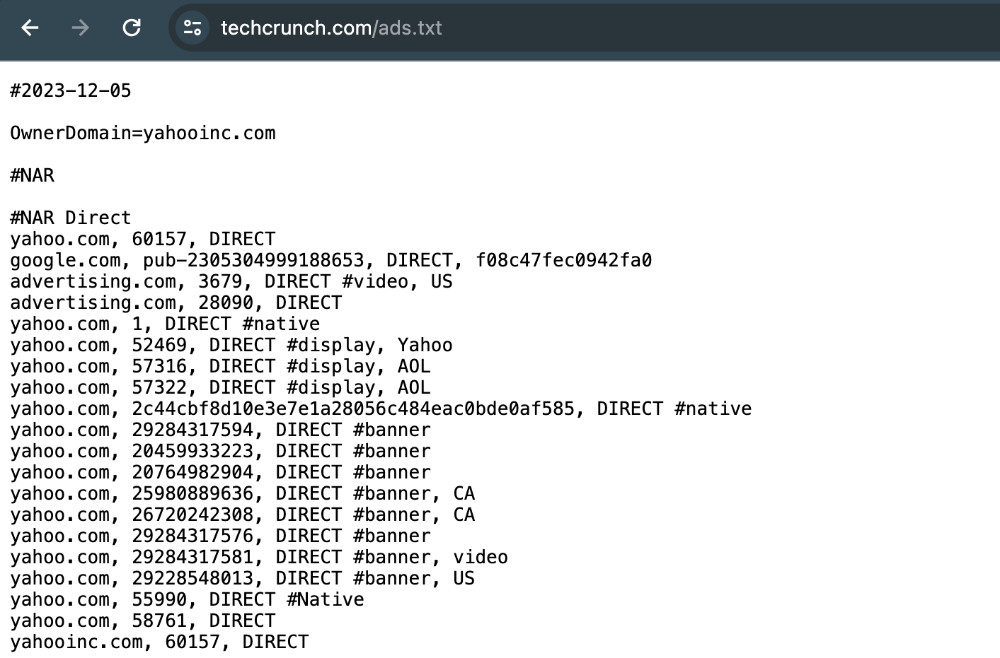
It’s quite easy to check if Ads.txt is working properly. Simply add ads.txt at the end of your website URL, for example, yourwebsite.com/ads.txt.
Here’s an example of the ads.txt file of TechCrunch (the ads.txt is typically a public file for the world to see).
Why is the Ads.txt file important?
Makes it Clear Who Can Sell Your Ads: Adding an Ads.txt file to your website is like putting up a sign that says who is allowed to sell your ads. This makes things clear and honest, which can make advertisers trust you more and maybe even pay you more for your ad space.
Stops Fake Ads: Ads.txt is like a guard against fake ads. It ensures only the people you say can sell your ads are doing it. This means less chance of fake or bad ads, keeping your ad money safe.
Gives Advertisers Confidence: When advertisers see you have an ads.txt file, they feel better about buying ads from you. They know you’re doing things right, so they’re more likely to want to put their ads on your site, which could mean more money for you.
Helps Manage Your Ads Better: If you work with different companies to sell your ads, ads.txt helps you keep track of who has permission to sell them. This organization can help you sell your ads more smoothly and maybe make more money.
Follows Good Rules for Online Ads: Using an ads.txt file means you’re following the rules that the online ad world agrees are good. It shows you’re a responsible website and helps make the whole online ad world a better place.
Conclusion
By taking control of your ads.txt file, you can not only control which ads to show on your website but also build trust and increase your ad revenue. We hope you learned how to add, edit, and manage Ads.txt file in WordPress from this tutorial and apply it to your website.

