
If you manage a WordPress site with more than a handful of posts, you’ve probably been scrolling through the Posts list in your admin panel, trying to remember which post has which featured image.
I used to click into individual posts just to check if a featured image was set. On a small blog, that’s mildly annoying. On a site with dozens or hundreds of posts, it becomes a real time-consuming task.
The frustrating thing is that WordPress doesn’t show featured images in the posts list by default. That information is just hidden from you, even though it’s right there in the database. However, with a small code snippet, adding a featured image column to your dashboard is super easy.
In this article, I will show you how to add a featured image column to your WordPress admin panel.
Why a Featured Image Column Is So Useful
Once you add this column, you’ll wonder how you managed without it. Here’s why it makes such a difference:
- It saves you a lot of time: Instead of clicking into each post to check its image, you can see everything at a glance right from the posts list. It turns what used to be a multi-step process into a two-second scan.
- It makes missing images easy to spot: If a post doesn’t have a featured image set, the column will just be empty. That makes it incredibly easy to do a quick audit and catch any posts that are missing images before they go out or while doing a content refresh.
- It helps with visual consistency: If you’re managing a blog or content-heavy site, keeping your featured images consistent in style and dimensions matters. Being able to see thumbnails side by side makes it much easier to notice when something looks off.
- It’s a lifesaver for content teams: When multiple people are publishing and editing posts, things can slip through the cracks. A featured image column gives everyone a quick visual reference so nothing gets missed.
How to Display a Featured Image Column in WordPress
The easiest way to add this column is with WPCode, the most popular code snippets plugin for WordPress. It lets you add custom functionality to your site safely, without touching your theme files or hiring a developer.
WPCode comes with a library of 140+ ready-to-use and verified code snippets for different WordPress tasks and features, including showing featured images in the dashboard area.
The best part is that each snippet can be activated or deactivated with a single toggle, so there’s no risk of permanently changing anything on your site. Plus, your custom code snippets stay in one place, and you don’t have to worry about recovering them when you change or update your website theme.
For this tutorial, I’ll be using the free version, WPCode Lite. That’s all you need to get this done.
Step 1: Install and Activate WPCode
Head over to your WordPress dashboard and go to Plugins » Add New Plugin from the left-hand menu. In the search bar, type “WPCode” and hit enter.
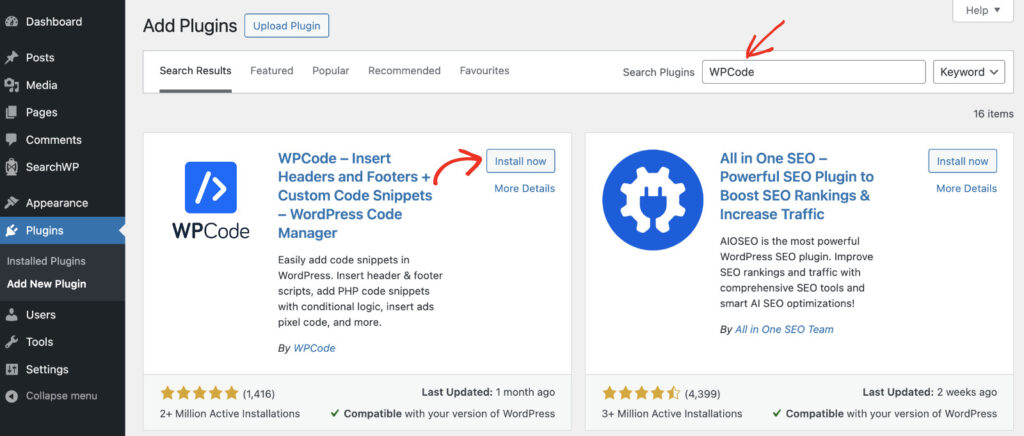
When WPCode appears in the results, click the Install Now button next to it. Once the installation finishes, click Activate.
If you’ve never installed a WordPress plugin before, you can follow this beginner-friendly guide on how to install a WordPress plugin.
Step 2: Find and Add the Featured Image Column Snippet
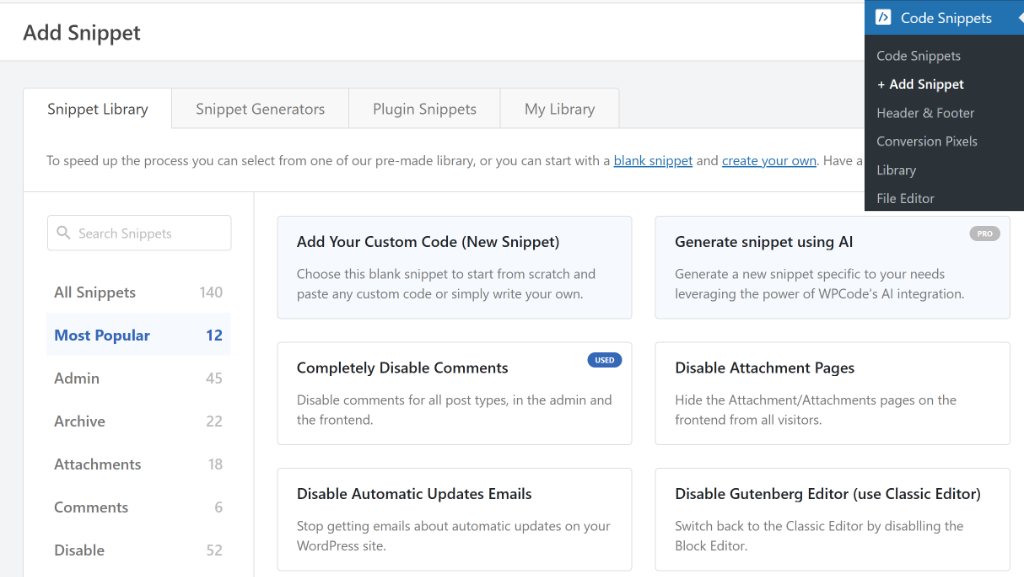
After activation, you’ll see a new Code Snippets menu item in your WordPress dashboard.
From your WordPress dashboard, navigate to Code Snippets » Add Snippet. This opens up WPCode’s snippet library, where you can browse or search for pre-built code snippets.
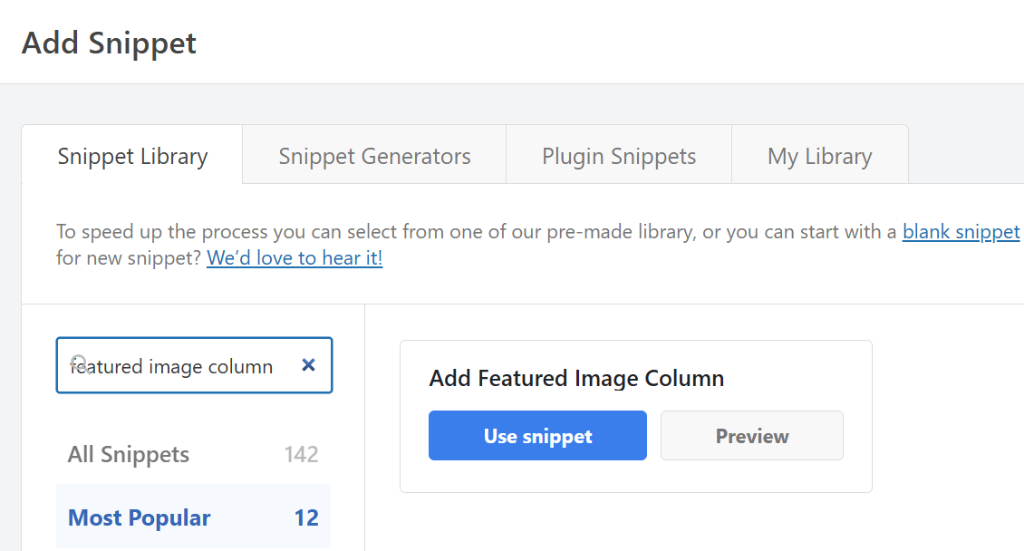
Use the search bar to look for “featured image column” snippet.
Next, find the snippet called “Add Featured Image Column to Post List” and click the Use snippet button.
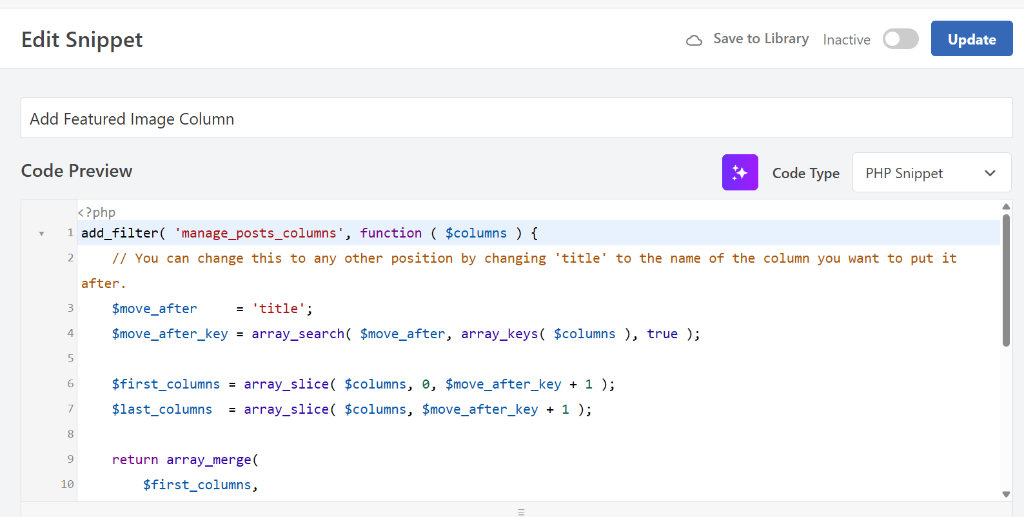
WPCode will load the snippet into the code editor automatically.
What makes this so great is that you don’t need to change anything inside the code itself. It’s already configured and ready to go.
Next, you can scroll down to the Insertion section to see how WPCode will run the snippet.
It should be set to Auto Insert and configured to run for Admin Only. This way, site admins will be able to view the featured image column in the Posts dashboard. You can leave these settings as they are, no adjustments needed.

Step 3: Activate the Snippet and Check Your Posts List
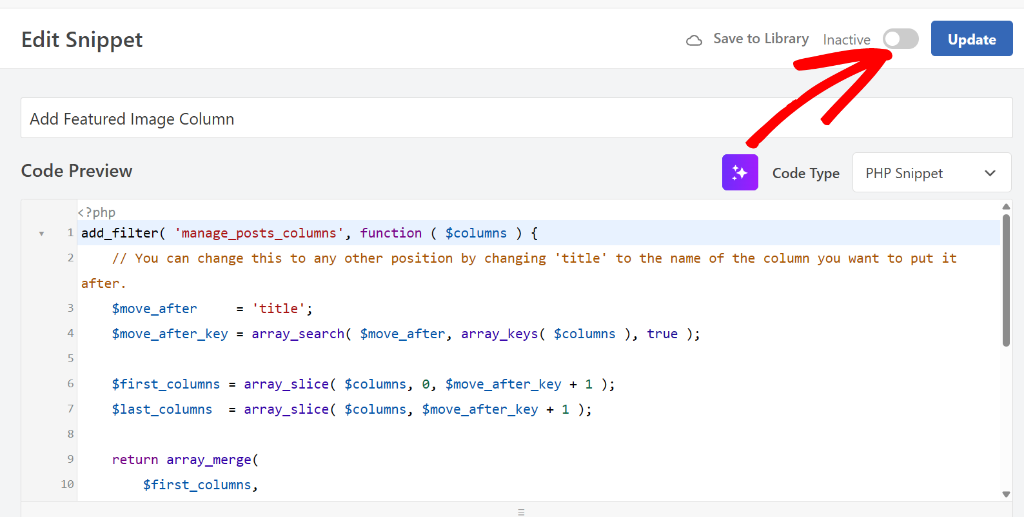
After that, you can scroll back to the top of the page. You’ll see a toggle near the top-right that currently says “Inactive”. Click it to switch it to Active.
Then click the Update button to save everything.
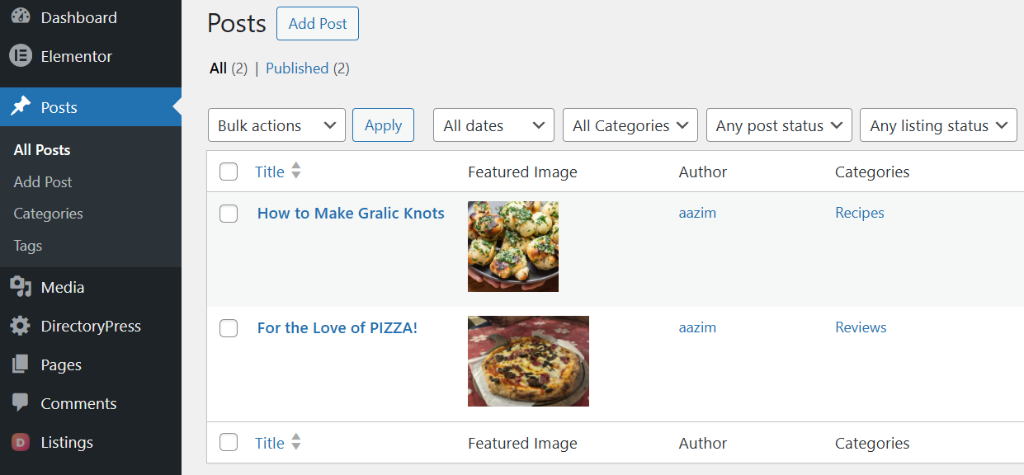
Now, you can go to Posts » All Posts in your WordPress dashboard. You should see a new column has appeared in your posts list showing a small thumbnail of the featured image for each post.
Take a look down the list. Any post without a featured image will have an empty space in that column, making it immediately obvious which ones need attention.
Bonus: Take Your Image Management Further
Now that you can see all your featured images at a glance, you might notice something else worth tidying up.
Maybe an image looks outdated and needs to be swapped out, or your media library has quietly filled up with files nobody is using anymore. Here are two ways that can help you tackle both of those things.
1. Replace an image across your entire site at once.
If you spot a featured image that needs to be updated, maybe a logo has changed, or a product photo is outdated, WordPress doesn’t make it easy to swap it out everywhere it appears.
Our guide on how to replace images and media files in WordPress walks you through how to do it in just a few clicks using the Search & Replace Everything plugin, without having to hunt down every post or page where that image shows up.
2. Clean out images you no longer need.
Every image you’ve ever uploaded to WordPress is still sitting in your media library, even if it’s not being used anywhere on your site anymore. Over time, this adds up and takes up real storage space on your hosting plan.
See our guide on how to delete unused images from your WordPress media library, which shows you how to scan your entire site and safely remove files that are just taking up space, without accidentally deleting anything that’s still in use.
FAQs About Adding a Featured Image Column
1. Can I also add this column to the Pages list?
Yes, it’s possible, but it requires a separate snippet since Pages are managed differently from Posts in WordPress. If you want the column to appear on both, you’ll need to either find a snippet that covers both or add two separate snippets in WPCode (one for Posts and one for Pages).
2. Will the snippet slow down my WordPress admin?
No. The snippet is lightweight and only affects the posts list view inside your admin panel. It has no impact on your site’s front-end speed or performance for visitors.
3. What happens if I deactivate the WPCode snippet?
If you toggle the snippet to Inactive in WPCode, the featured image column will disappear from your posts list immediately after refreshing the page. Nothing is permanently changed on your site, so you can turn it on and off whenever you like.
4. Can I change the size of the thumbnail shown in the column?
Not through a setting, unfortunately. The thumbnail size is fixed by the snippet code, so there’s no simple option to adjust it. The default size works well for most sites, but if you need it to be different, you’d need to edit the snippet code itself, which we’d recommend leaving to a developer if you’re not comfortable with code.
I hope this guide helped you get a cleaner, more visual view of your WordPress posts list. If you found this useful, you might also want to check out our guide on how to add code snippets before HTML elements in WordPress and how to add custom HTML code to your WordPress website.
If you have any questions or run into any trouble, feel free to leave a comment below. And don’t forget to follow us on X (formerly known as Twitter) and subscribe to our newsletter for more tips and updates.

