

TL;DR: To search and replace text in your WordPress database: install the free Search & Replace Everything plugin, enter the text to find and its replacement, then preview the matches and click Replace. The plugin handles serialized data safely and can undo the whole operation with one click.
I’ll never forget the panic I felt when I migrated my WordPress site to a new domain and realized all my internal links were broken.
Every image, every button, every carefully crafted link pointed to my old domain name. I knew I needed to update thousands of database entries, but the thought of doing it manually was overwhelming.
A WordPress database stores everything about your site, like your posts, pages, settings, and URLs. Sometimes you need to find specific text in this database and replace it with something new. This might sound technical, but with the right plugin, it’s actually straightforward.
In this guide, I’ll show you how to search and replace text in your WordPress database.
Why Search and Replace Text in WordPress Database?
Every WordPress site owner eventually runs into situations where they need to update the same information across their entire website. Maybe you’ve changed your company name, moved to a new domain, or discovered a spelling mistake that appears on dozens of pages.
The problem is that this information lives in your WordPress database. You could manually edit each post, page, and setting where it appears. But that would take hours or even days, and you’d probably miss some instances anyway.
Here are the most common situations where you’ll need database search and replace:
- Moving Your Site to a New Domain: When you change your domain name, WordPress stores the old URL in thousands of places. Your images won’t load, internal links break, and your site stops working properly.
- After Site Migrations: Even when moving from a staging site to production, URLs often get mixed up. You’ll have staging URLs scattered throughout your live database.
- Fixing Broken Links: If you’ve reorganized your site structure, old internal links might point to pages that no longer exist. A quick search and replace fixes them all at once.
- Updating Company or Product Names: Rebranded your business? Changed a product name? You don’t want to manually edit hundreds of posts and pages.
- Correcting Repeated Typos: Everyone makes spelling mistakes. When you discover you’ve been spelling something wrong across your entire site, database search and replace saves the day.
That said, let’s look at a simple way of replacing text in your WordPress database.
| Method | Search & Replace Everything | phpMyAdmin (SQL) | WP-CLI |
|---|---|---|---|
| Skill needed | None, works from your dashboard | SQL queries and database knowledge | Command line and server access |
| Preview before replacing | Yes, see every match first | No, changes run immediately | Dry-run flag only |
| Handles serialized data | Yes, automatically | No, can corrupt settings and widgets | Yes |
| Undo | One click | Only by restoring a backup | Only by restoring a backup |
| Cost | Free version available | Free | Free |
Search & Replace Text in WordPress Database
The traditional way to edit your WordPress database involves accessing phpMyAdmin and writing SQL queries. This is risky because one wrong character in an SQL command can break your entire site. I’ve seen people accidentally delete their whole database this way.
That’s why I recommend using a dedicated plugin like Search & Replace Everything. It gives you a safety net to make changes to your database, shows you exactly what will change, and makes the whole process very simple.
Designed by WPCode team, Search & Replace Everything also lets you replace images, update media file URLs globally across your site, preview changes and prevent accidental damage to your site, instant 1-click revert changes option, and more.
Note: For this tutorial, I will use the Search & Replace Everything Pro version because it includes the 1-click undo option, view history of all search and replace operations, and other advanced features like replace unused media files. There is also a Search & Replace Everything Lite version that you can use for free.
Now, let’s look at the steps you can follow to easily perform a search and replace operation.
⚠️ Back up first: A search and replace edits your database directly, and a wrong match can change text you never intended to touch. Take 2 minutes to create a full backup with Duplicator before you run anything. Search & Replace Everything includes a one-click undo, but a backup protects you no matter what.
Step 1: Install Search & Replace Everything Plugin
First, you need to install the Search & Replace Everything plugin on your WordPress site.
Simply visit the WPCode website and head to Search & Replace Everything page to create a new account.
Next, you will need to install and activate the Search & Replace Everything plugin on your site. If you need help, then please see this guide on how to install a WordPress plugin.
Once the plugin is active, you’ll need to go to Tools » WP Search & Replace page from the WordPress dashboard. After that, simply go to the ‘Settings’ tab and enter your license key. You can find the key in your Search & Replace Everything account area.
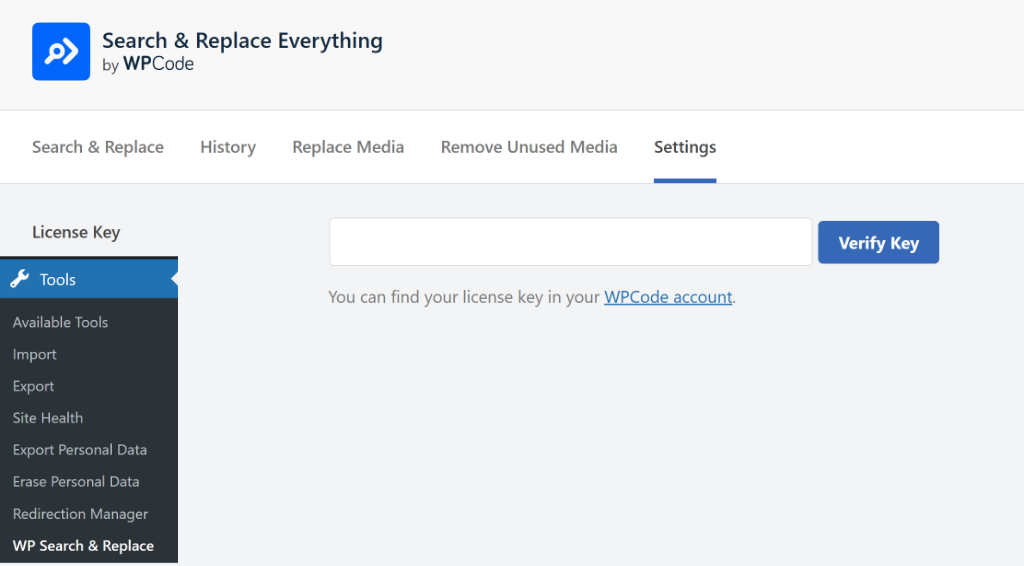
Simply click the ‘Verify Key’ button after entering the license key.
Step 2: Search & Replace Text in Database
Next, you can switch to the Search & Replace tab at the top.
Pro Tip: Before performing the search and replace operation, it’s a good idea to backup your WordPress database using Duplicator. It is the best WordPress backup plugin and will help you restore previous changes in case something goes wrong.
Here, you’ll need to enter the text under the ‘Search for’ field that you’d like to find in your database. You must then write the text you want to replace with under the ‘Replace with’ field.

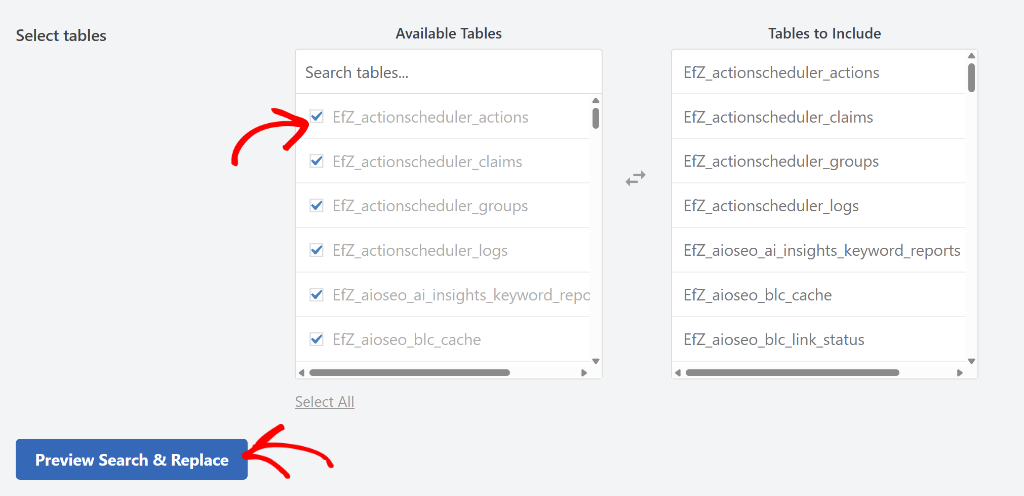
After that, you will need to select the tables in the WordPress database to perform the search and replace operation. Simply select a specific or all the tables.
Once that’s done, go ahead and click the Preview Search & Replace button.
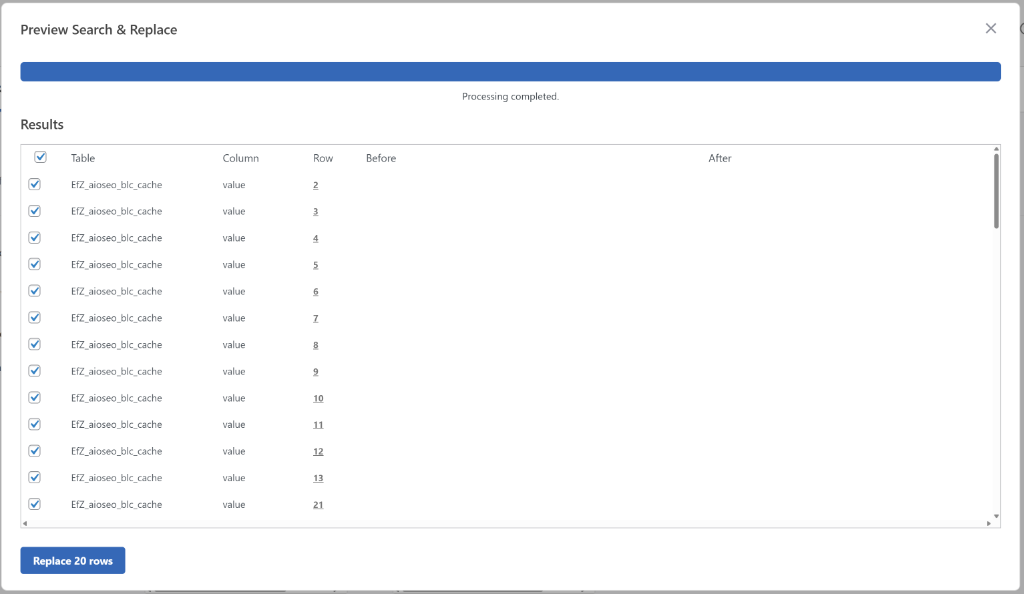
Next, you will see a list of tables that contain the term you searched for.
Simply select the tables by clicking the checkbox next to them, and then click the ‘Replace rows’ button at the bottom.
A popup warning message will appear before performing the replacement operation.
You can go ahead and click the Yes button to proceed.

That’s it, you’ve successfully replaced the text on your WordPress database.
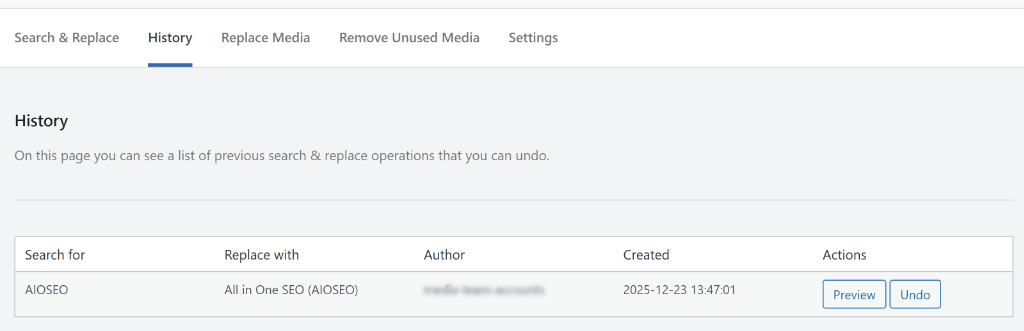
If you switch to the ‘History’ tab, then you can see a list of all your previous search and replace operations that you can undo.
Bonus: Reuse Previous Search & Replace Operations
Do you want to reuse your previous search and replace operations without having to manually reenter the text and selecting tables?
As a website owner, it can be frustrating to manually re-type the exact terms and try to remember exactly which database tables you selected the last time. It is a painful task and takes up time you could spend on more important things.
But Search & Replace Everything now automatically saves your 20 most recent searches. And the best part is that you can reuse them with 1-click.
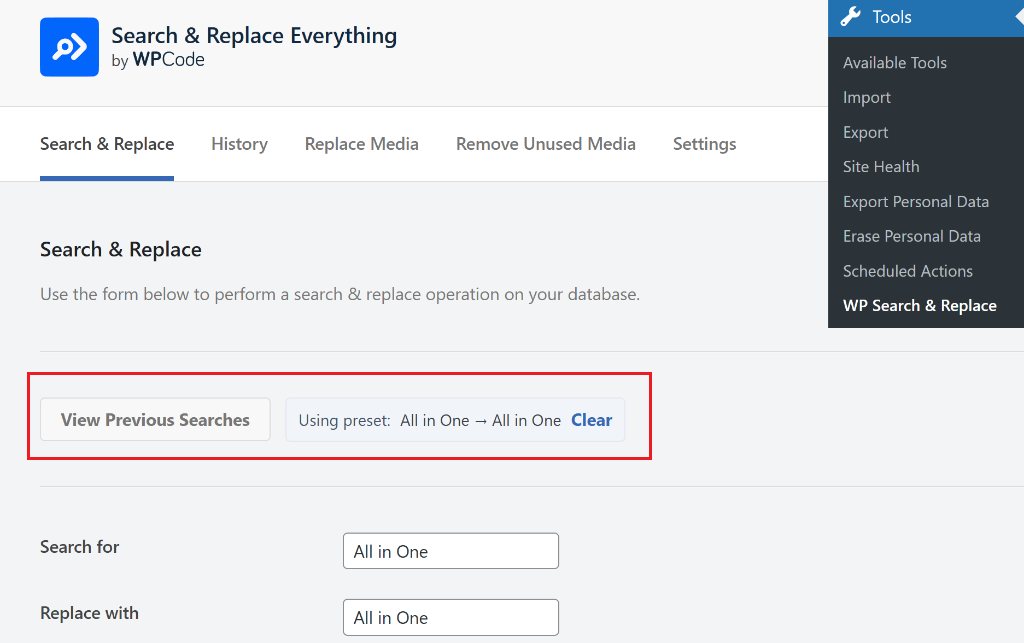
Simply head to Tools » WP Search & Replace page from the WordPress dashboard and click the View Previous Searches option.
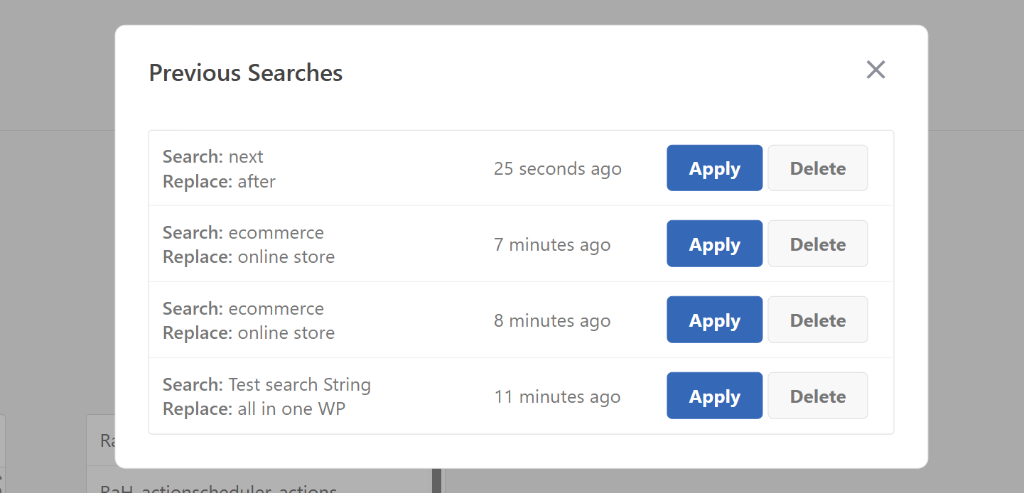
Next, a new popup window will open with your previous search and replace operations.
You can simply click the Apply button to instantly use the past search operation. And if you want to remove any of the past searches, simply click the ‘Delete’ button.
FAQs About Search and Replace in WordPress
Is search and replace in WordPress safe?
Yes, if you use a tool with a preview and take a backup first. Search & Replace Everything shows every match before changing anything and includes one-click undo. The risky version is running raw SQL in phpMyAdmin, where changes apply instantly with no preview and no undo.
Can a search and replace break my site?
It can if done carelessly. The two common causes are overly broad search terms that match text you didn’t intend, and raw SQL replacements that corrupt serialized data in your settings. Avoid both by previewing matches, searching specific strings, and using a tool that handles serialization automatically.
What is serialized data, and why does it matter?
WordPress stores some settings as serialized data, which records each value’s exact character length. A raw SQL replace changes the text but not the recorded length, which corrupts the data. That’s how widgets and theme settings vanish after a manual replace. Search & Replace Everything recalculates lengths automatically.
Can I undo a search and replace in WordPress?
With Search & Replace Everything, yes. The plugin keeps a record of each operation, and you can revert it with one click from the History tab. With phpMyAdmin or SQL queries there is no undo. Your only way back is restoring the database backup you made beforehand.
Can I search and replace URLs after moving my site?
Yes, that’s the most common use. Enter your old domain as the search term and the new one as the replacement, then preview and run it. We cover the full process, including which tables to select, in our guide on replacing WordPress URLs after migration.
I hope this article helped you learn how to search and replace text in WordPress database. You may also want to see our guide on how to replace image with different file extensions in WordPress and how to disable the “Remember Me” checkbox on a WordPress login page.
If you need help, then feel free to leave a comment below. And don’t forget to follow us on X (formerly known as Twitter) and subscribe to our newsletter for all the latest updates.

