
As someone who’s managed WordPress sites for over a decade, I know from experience how frustrating it can be when you need to replace images across your website.
Imagine you need to update your company logo, replace an old product image with a new one, or maybe you’ve migrated your site and some media links point to the wrong place.
Replacing an image or media file that’s used in multiple places across your WordPress site can quickly become a headache. You’d have to manually track down all the posts, pages, widgets, or theme options. But with the right plugin, you can save time and automatically replace media files in multiple places.
In this article, I’ll show you how to replace images and media files in WordPress using a very simple method.
Challenges of Replacing Images Manually in WordPress
When you upload a file to your WordPress Media Library, WordPress stores it on your server and records its unique URL in the database. For example, an image might have a URL like:
https://yourwebsite.com/wp-content/uploads/2024/04/your-image-name.jpg
If you upload a new version of that image, WordPress often treats it as a different file, potentially adding a number to the filename (your-image-name-1.jpg) or giving it a new upload date directory. The old URL still exists in the database wherever you inserted the image.
To replace it manually, you’d have to:
- Open every post, page, or custom field where the old image is embedded
- Remove the old image block or shortcode
- Add the new image from the Media Library
- Update the content
Imagine doing this for dozens or hundreds of images across your entire site! It’s a massive task that’s time-consuming, and it’s easy to miss one, leaving broken images or outdated content behind.
That said, let’s look at an easy way to replace images and media files on your website.
Replace Images and Media Files in WordPress
The easiest way to replace your pictures and other media files across multiple locations is by using the Search & Replace Everything plugin.
It’s designed by WPCode team and is exactly what you need to update media file URLs globally across your site. Instead of manually editing content, you can use the plugin to find the old URL and replace it with the new one everywhere it appears in your database.
Besides that, Search & Replace Everything also lets you replace text across the database, remove unused media files, direct Gutenberg block integration, and more.
For this tutorial, I’ll use the Search & Replace Everything Pro version because it offers more advanced features like 1-click undo button to replace text, replace images from the block editor, remove unused media files, and more. There is also a Search & Replace Everything Lite version that’s available for free that you can use to replace media files.
First, you’ll need to install and activate the Search & Replace Everything plugin on your site. If you need help, then please see this guide on how to install a WordPress plugin.
Upon activation, you’ll need to go to Tools » WP Search & Replace page from the WordPress dashboard. After that, simply go to the ‘Settings’ tab and enter your license key. You can find the key in your Search & Replace Everything account area.
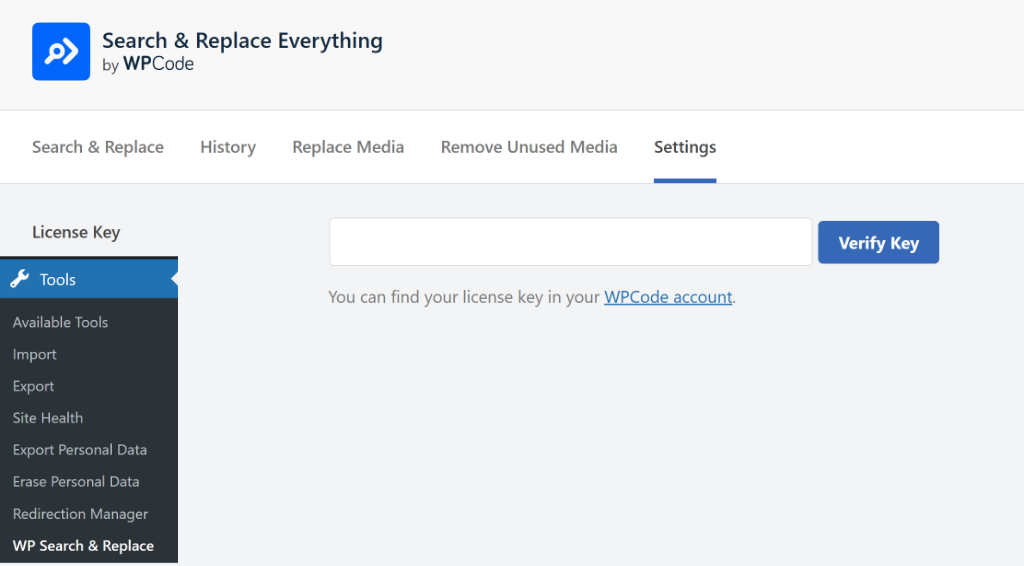
Once you’ve entered the license key, simply click the ‘Verify Key’ button.
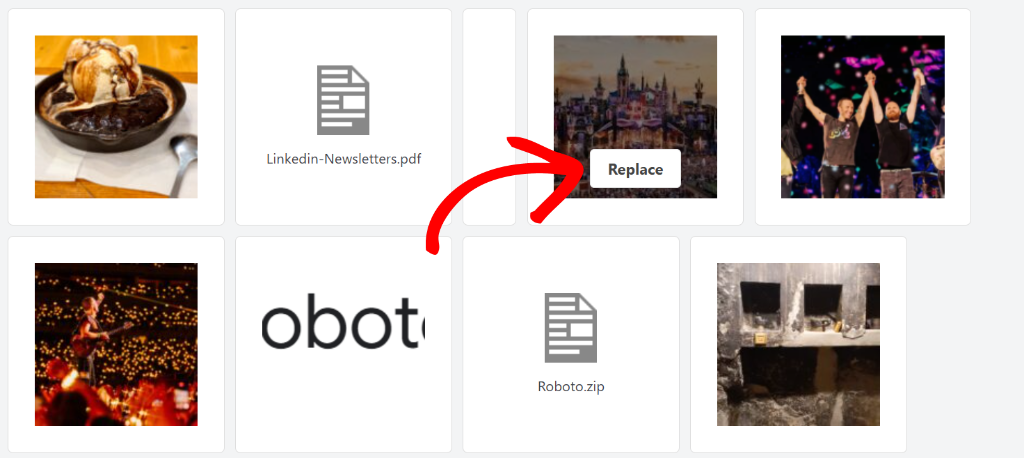
Next, you can go to the ‘Replace Media’ tab. Here you’ll see all the images and media files on your website.

From here, you can choose the media file that you want to replace across your website.
Simply hover over the file and click the Replace button.
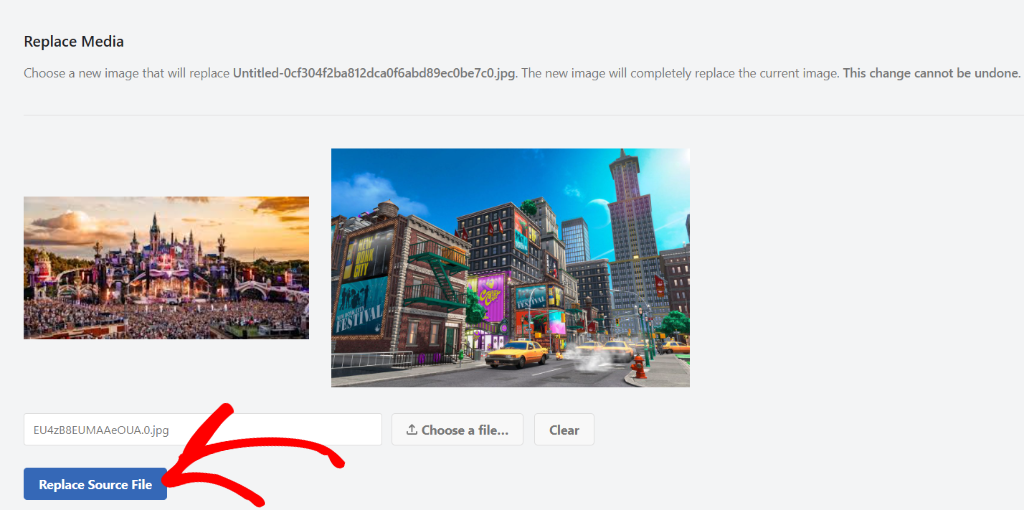
Next, you can drag and drop the new image or media file onto the replacement area.
Search & Replace Everything also lets you choose a file from your computer and upload it.
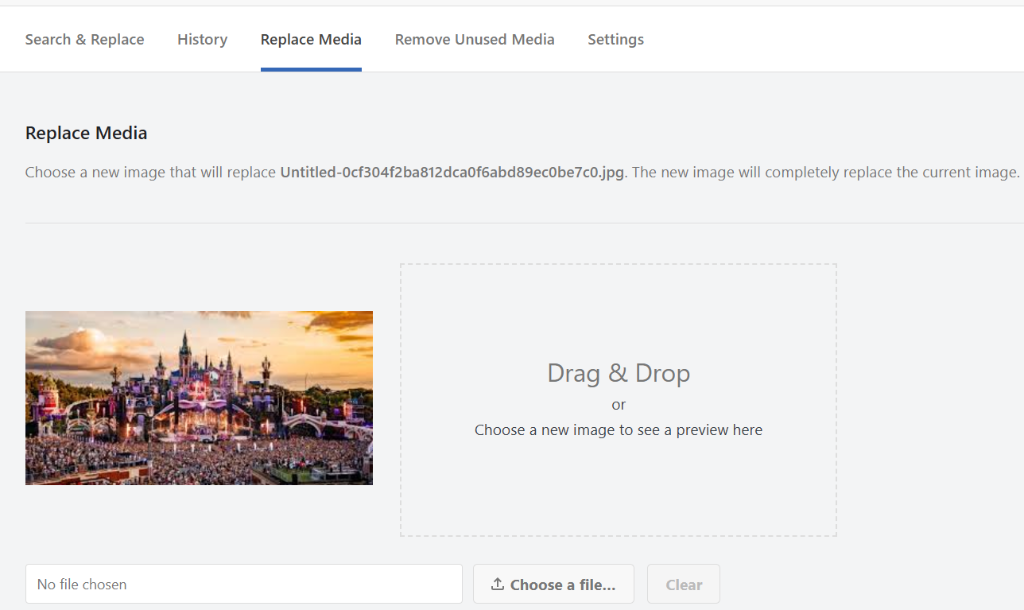
After uploading the new file, go ahead and click the Replace Source File button.
The plugin will then replace the old image with the new one across your entire website.
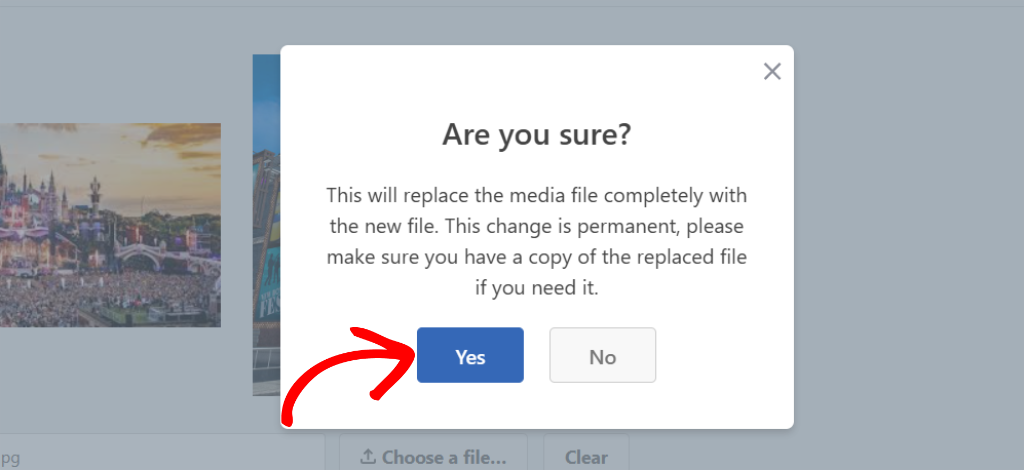
Next, a popup message will open warning you that the changes will be permanent. So make sure you have a copy of the replaced file if you need it again.
Simply click the ‘Yes’ button to continue.
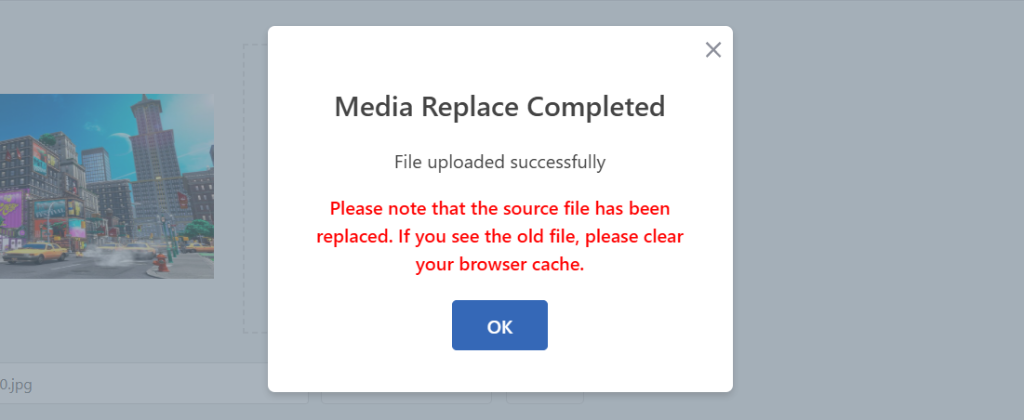
Once the media file is successfully replaced, you’ll see a message.
Simply click the OK button to close the popup.
That’s it! You’ve successfully replaced the media file using the Search & Replace Everything plugin.
Replace Media Files in the WordPress Block Editor
With Search & Replace Everything, you can also replace images and other media files from the WordPress block editor (Gutenberg editor).
First, you’ll need to edit any blog post or page. Once you’re in the WordPress block editor, navigate to the image you want to replace.

From here, select the image and click the Replace option.
After that, you’ll see more options appear under the Replace dropdown. Simply click the Replace Source File option.
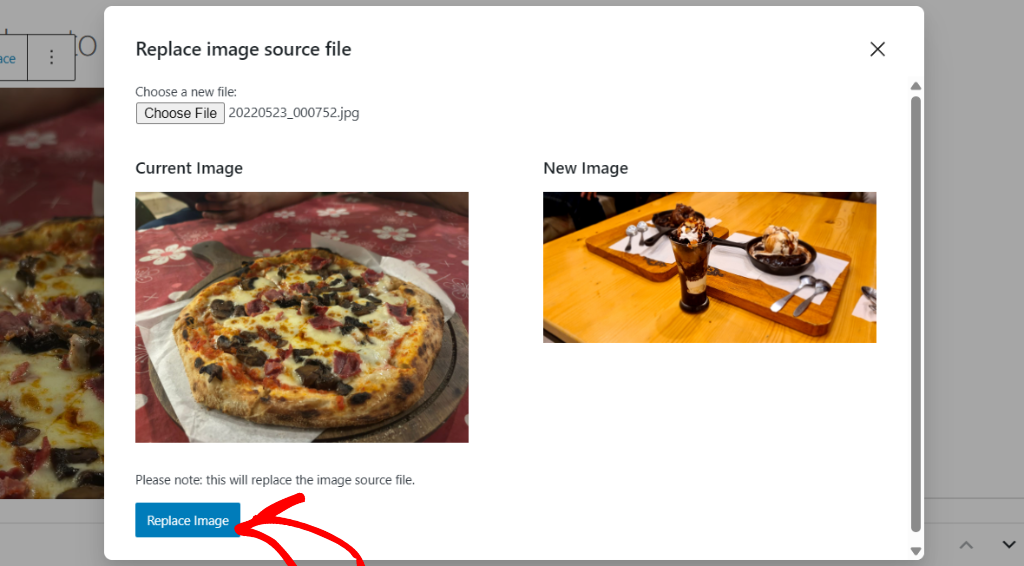
Next, a new window will open. Go ahead and click the ‘Choose File’ button to upload a new image you want to replace.
Once that’s done, you can click the Replace Image button. Search & Replace Everything will now change the old media file with the new one. You can now then save or update your blog post or page.
That’s it! Replacing images and media files throughout your WordPress site doesn’t have to be a dreaded task. With the help of the Search & Replace Everything, you can perform this update quickly, efficiently, and safely.
I hope this article helped you learn how to replace image and media files in WordPress. You may also want to see our guide on how to keep your website customizations intact with WPCode and how to allow SVG file upload to WordPress.
If you need help, then feel free to leave a comment below. And don’t forget to follow us on X (formerly known as Twitter) and subscribe to our newsletter for all the latest updates.

