
Adding social share buttons to your WordPress website is essential in today’s social media-driven world.
When I first started my blog, I noticed my content wasn’t getting the exposure it deserved because readers had no easy way to share it with their networks.
Like many website owners, I struggled with the challenge of finding the right way to add social sharing buttons. Some plugins were too bloated, slowing down my site, while others didn’t offer the flexibility I needed to customize the buttons’ appearance and placement.
However, with the right solution, you can add social share buttons to your site in just a few clicks, no need to worry about performance issues or editing code.
In this article, I’ll show you exactly how to add social share buttons to your WordPress website.
Why Add Social Share Buttons in WordPress?
Having social share buttons on your WordPress site solves several common problems. First, it eliminates the need for visitors to copy and paste your URL into their social media platforms manually.
Without social sharing buttons, most readers won’t take the time to share your content, even if they find it valuable. The extra steps of copying the URL, opening a new tab, and crafting a post create too much friction.
Social share buttons make content sharing quick and effortless for your visitors. Instead of multiple steps, they can share your content with a single click.
These buttons also help track how often your content gets shared across different platforms. This data can help you understand which content resonates most with your audience.
That said, let’s look at how you can easily add social share buttons to WordPress.
Adding Social Share Buttons in WordPress
WPCode is the best code snippet plugin for WordPress, and it lets you add social share buttons by inserting a custom snippet.
The advantage of using this method is that your snippet will remain in place even if you update or change your WordPress theme. Plus, WPCode won’t slow down your site like some heavier social media plugins. Besides that, you can use it to add JavaScript, custom CSS, HTML, PHP, and more.
For this tutorial, we will use the WPCode Lite version, which is available for free. There is also a WPCode Pro version that offers more features like code revisions, AI snippet generator, eCommerce integrations, and more.
First, you’ll need to go to Plugins » Add New Plugin from the WordPress admin panel and search for ‘WPCode’ in the search bar.
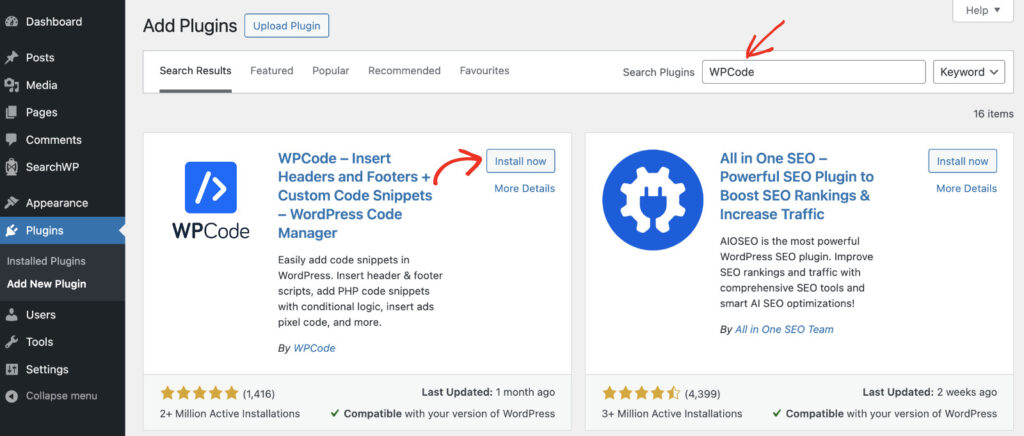
Next, you can click the ‘Install now’ button and activate the plugin. If you need help with this, then please follow this guide on how to install a WordPress plugin.
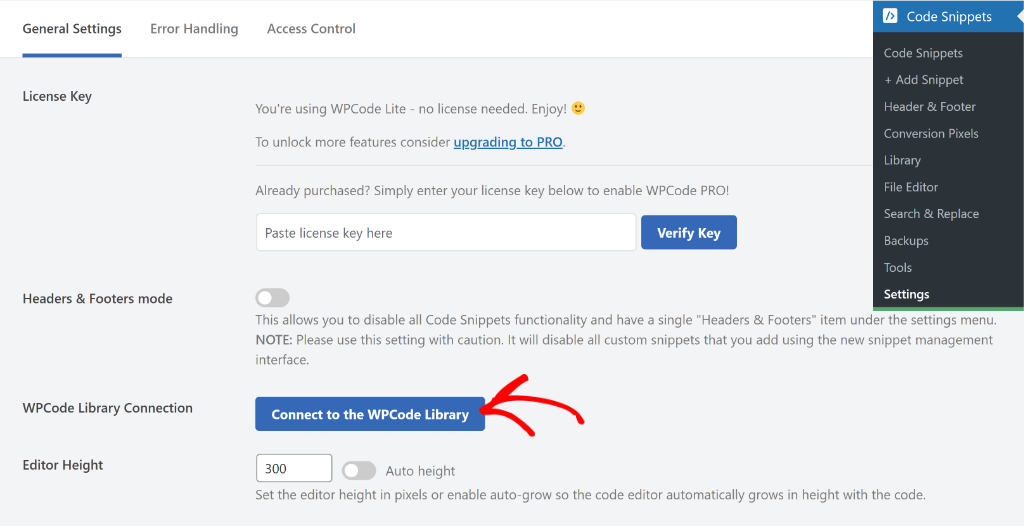
After that, you’ll need to go to Code Snippets » Settings and under ‘General Settings’, click Connect to the WPCode Library. WPCode offers over 140 verified code snippets in its library that you can use to add different features and functionalities to your site.
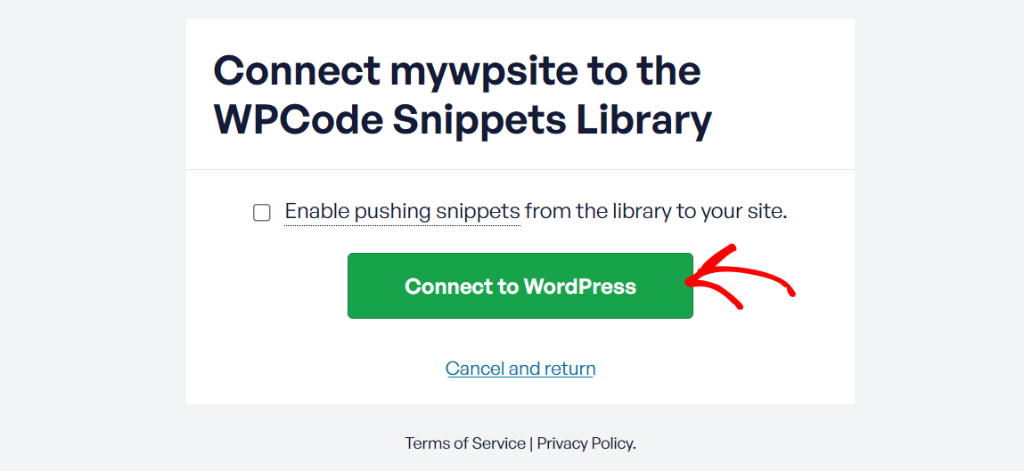
Next, you’ll see a popup window asking to add the snippet library to your site.
Simply click the ‘Connect to WordPress’ button to continue.
Once the snippet library is added, you can now add social share buttons to your site.
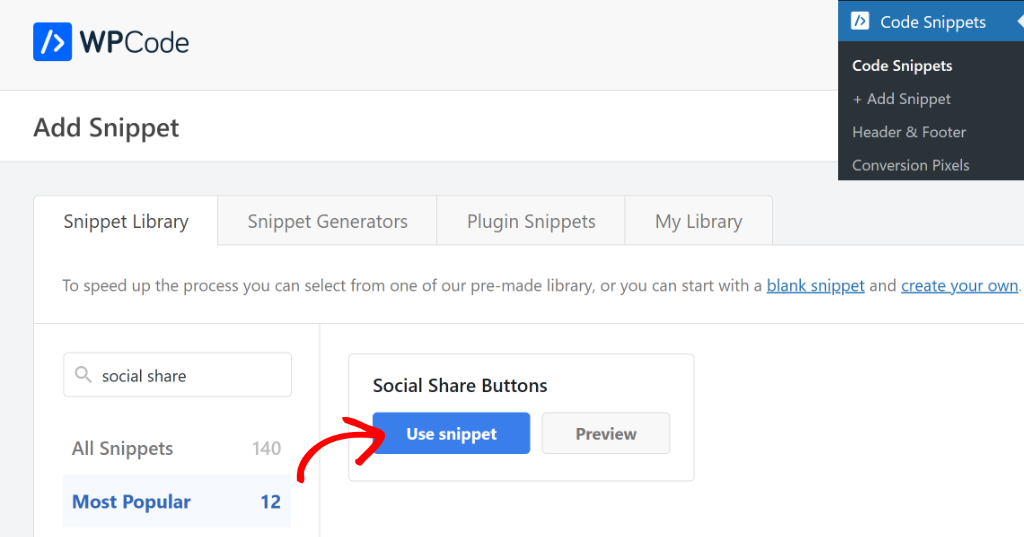
Simply go to the Code Snippets » Add Snippet page from the WordPress dashboard. Then you can search for the social share button code snippet or head to the Most Popular tab.
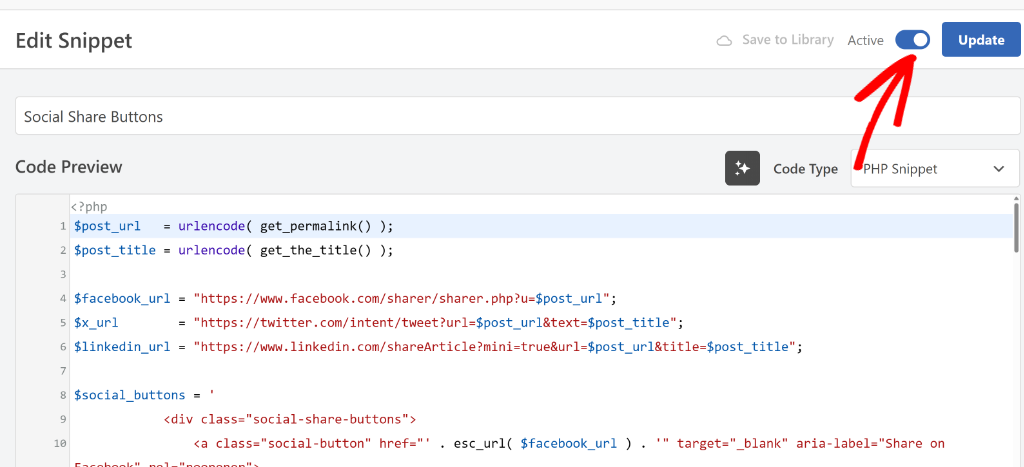
After that, navigate to Social Share Buttons and click the ‘Use snippet’ button.
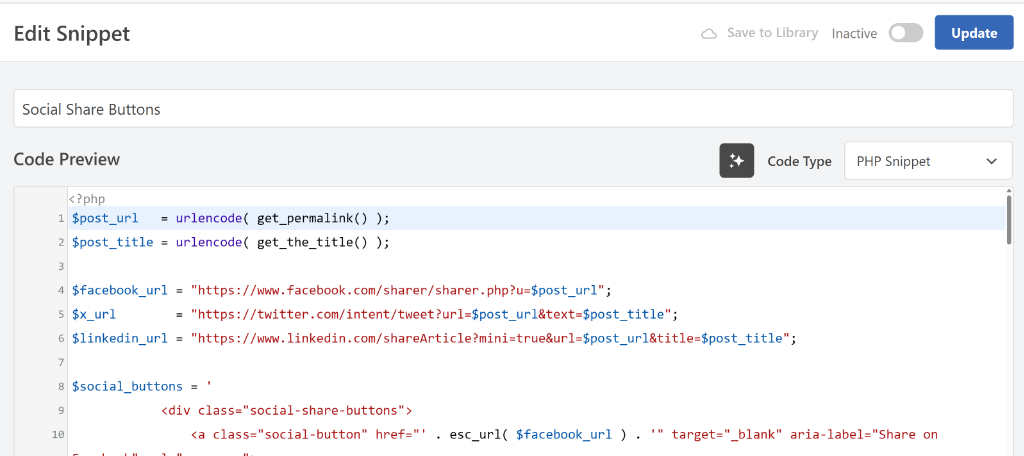
On the next screen, you’ll see the code editor.
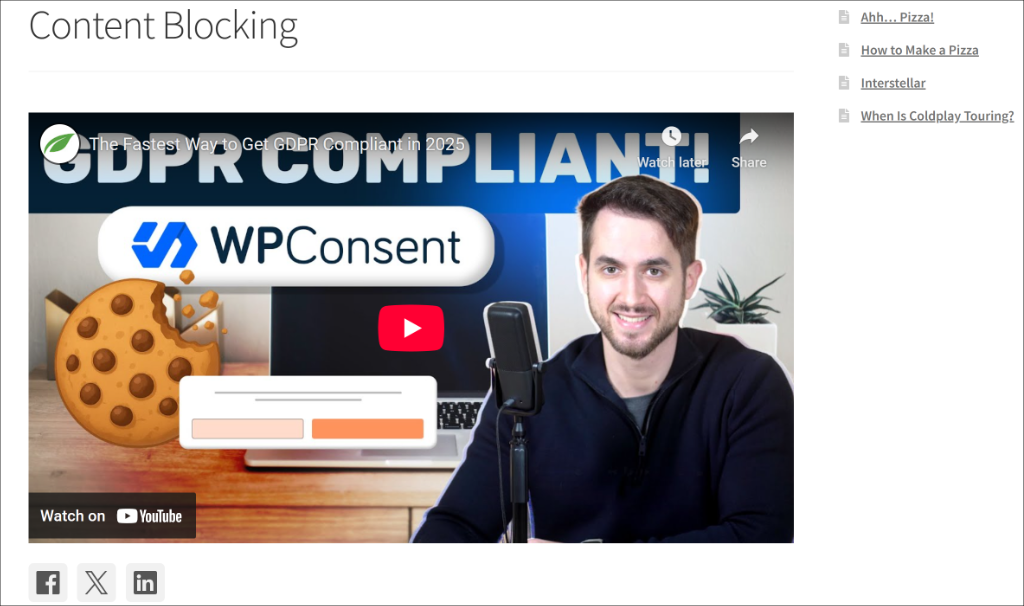
The best part is that the code snippet will be preloaded and all the settings will be already configured by WPCode. The code snippet will add Facebook, X (formerly Twitter), and LinkedIn social share buttons.
From here, you can scroll down to the Insertion section and choose where you’d like to show the social share buttons.
By default, the snippet will be auto inserted after the content.
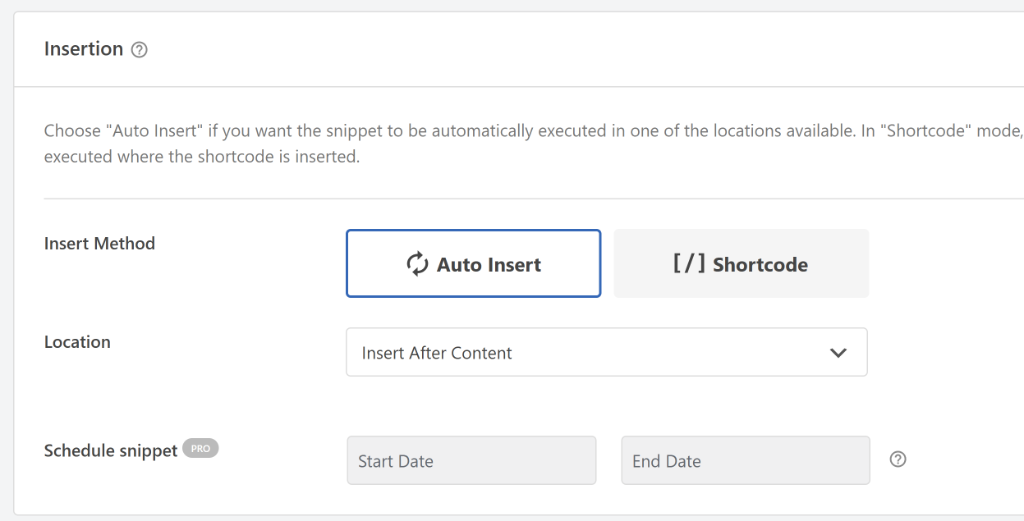
If you want to change the insertion method, then simply click the Location dropdown menu.
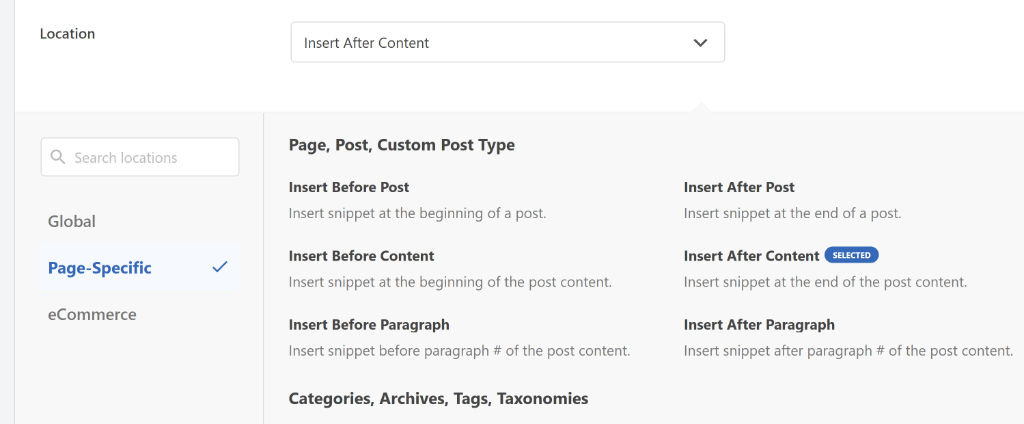
For example, you can select whether you’d like to display the social share buttons before the content or paragraphs.
Next, you’ll need to scroll to the top and click the toggle to make the snippet Active.
From here, simply click the ‘Update’ button.
That’s it, you’ve successfully added social buttons to your site using a code snippet.
Simply visit your site to see them in action.
Bonus: Add Social Share Buttons to Custom Landing Pages
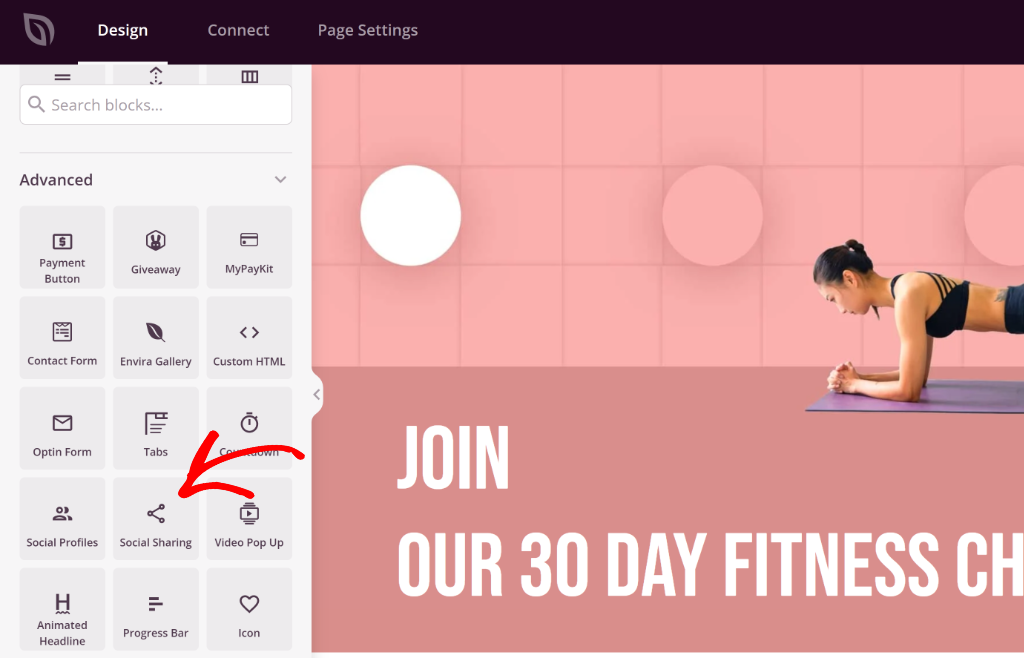
If you’re looking to add social share buttons to custom landing pages or WordPress theme you’re creating, then SeedProd is the best solution.
It is the best WordPress theme builder that offers prebuilt templates, multiple blocks for customization, and a drag and drop website builder. You can easily create a custom landing page or theme without editing code using the plugin.
With SeedProd, you can simply select the Social Sharing block and drag it anywhere on the page template.
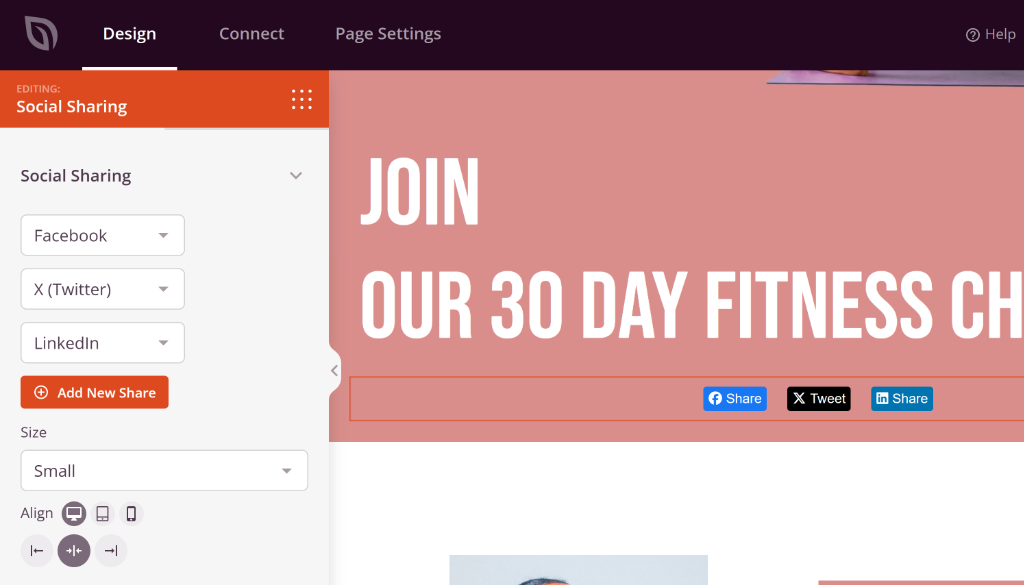
The best part is that you can further customize the social sharing block.
For instance, there are options to add different social media platforms, edit the size of the buttons, change their alignment, and more.
If you need help creating custom pages, then please see this complete guide on how to create a landing page with WordPress.
I hope this article helped you learn how to add social share button in WordPress. You may also want to see our guides on how to add floating social media icons in WordPress and how to replace images and media files in WordPress.
If you need help, then feel free to leave a comment below. And don’t forget to follow us on X (formerly known as Twitter) and subscribe to our newsletter for all the latest updates.


Great snippet!
Is it possible to add Bluesky and Instagram to this snippet? Many people aren’t using Twitter anymore.
Thank you for the suggestion, we’ll add Bluesky to the snippet