
When I first started creating tutorial content on my WordPress site, I noticed something frustrating. My detailed step-by-step guides were getting buried in search results and weren’t showing up in Google AI Overviews or featured snippets.
After some research, I discovered the missing piece: how-to schema markup. However, trying to manually add schema code to my posts was very difficult.
It was a nightmare of JSON-LD snippets, constant validation errors, and hours of troubleshooting. Every time I wanted to publish a new tutorial, I had to copy and paste complex code, then pray I didn’t break something.
But with the right plugin like WPCode, adding how-to schema is as simple as filling out a form. No more wrestling with code or worrying about syntax errors.
In this guide, I’ll show you how to add SEO-friendly How-to schema in WordPress.
What is a How-to Schema and Why Use It?
How-to schema is structured data markup that tells search engines exactly how your tutorial content is organized.
It identifies your step-by-step instructions, required materials, time estimates, and provides more details so search engines can display them as rich snippets in search results.
Think of schema markup as a translator between your content and search engines. When you write a tutorial, you naturally organize it with steps, time estimates, and required materials. But search engines can’t automatically understand this structure without proper markup.
When you add this markup correctly, search engines can create rich snippets and display your content in search results. For example, your tutorial steps can appear in AI Overviews and your site is mentioned as a source.
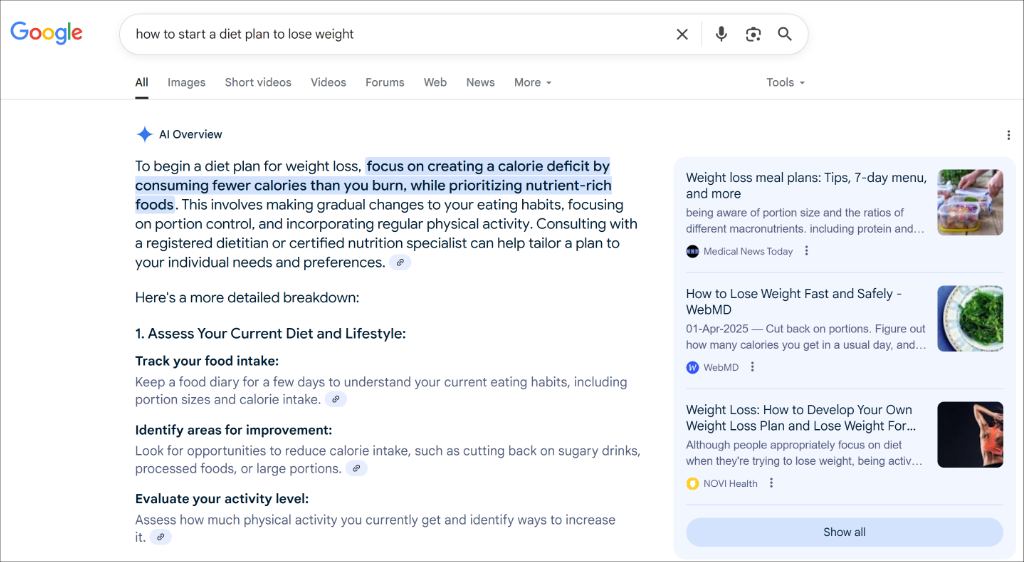
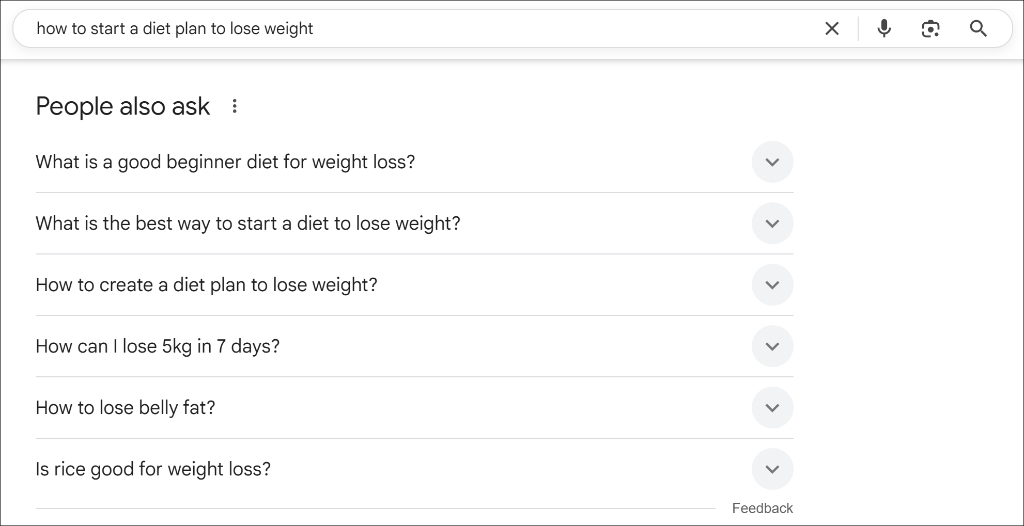
Besides that, Google might also display content from your guides under the ‘People also ask’ section.
Pro Tip: You can also set up a FAQ schema on your WordPress site to increase your chances of capturing People also ask queries.
That said, let’s look at an easy way of adding how-to schema markups in WordPress.
Adding a How-to Schema Markup in WordPress
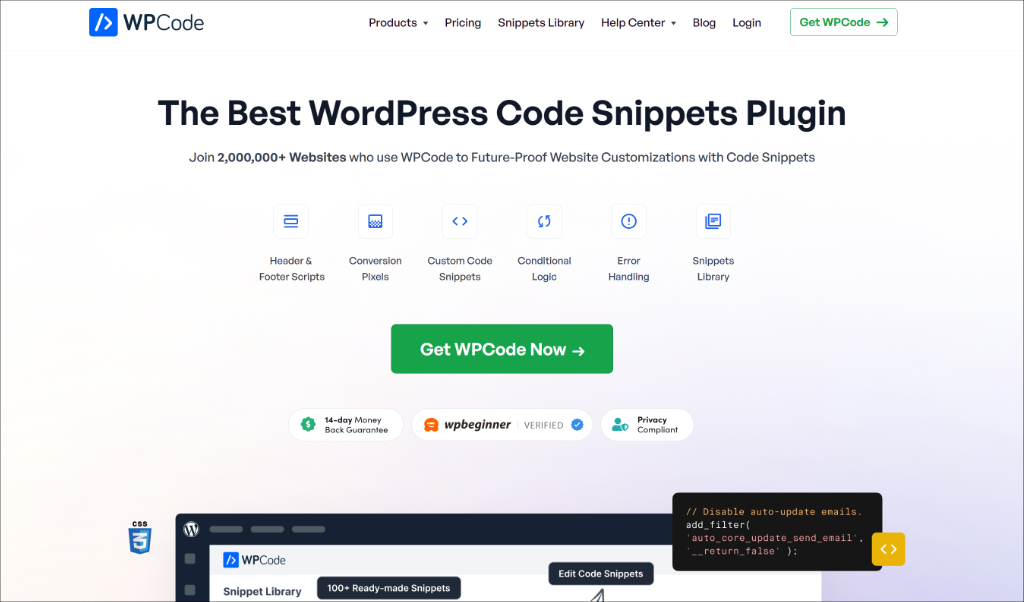
Adding how-to schema to your WordPress tutorials doesn’t have to be complicated, and the easiest way to add them is by using WPCode.
It is the best code snippets plugin for WordPress that lets you add custom code to your site without editing theme files. It includes a schema generator that helps create all types of schema, including how-to markup, which saves you from writing complex code from scratch.
Note: For this tutorial, I am using WPCode Pro version because it includes Smart Tags for dynamic values when generating the schema, Page Scripts for inserting the schema markup on specific pages, and more. However, you can also use the WPCode Lite version to create schema markup for WordPress.
Now, let’s look at the steps for generating a how-to schema for a blog post on your site.
Step 1: Install and Activate WPCode
First, you’ll need to visit the WPCode website and click the ‘Get WPCode Now’ button to signup for a new account.
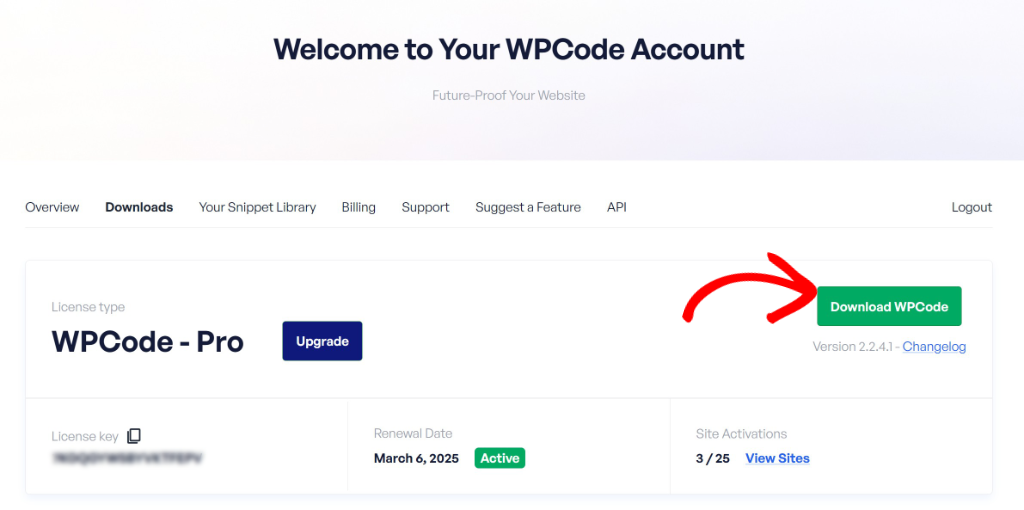
After purchasing, you’ll find the plugin file in your account area under the Downloads tab.
Simply click the Download WPCode button and save the plugin file on your computer.
Next, you can install and activate the plugin in WordPress. If you need help, then please see this guide on how to install a WordPress plugin.
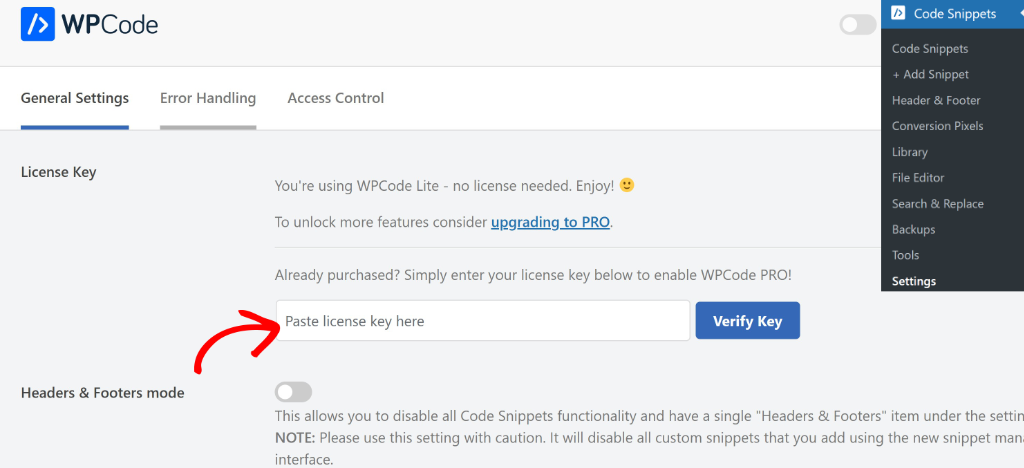
Once activated, simply go to Code Snippets » Settings in your WordPress dashboard and enter your license key. You can find this key in your WPCode account area.
Now, you’re ready to create a how-to schema using WPCode.
Step 2: Generate a How-to Schema Markup
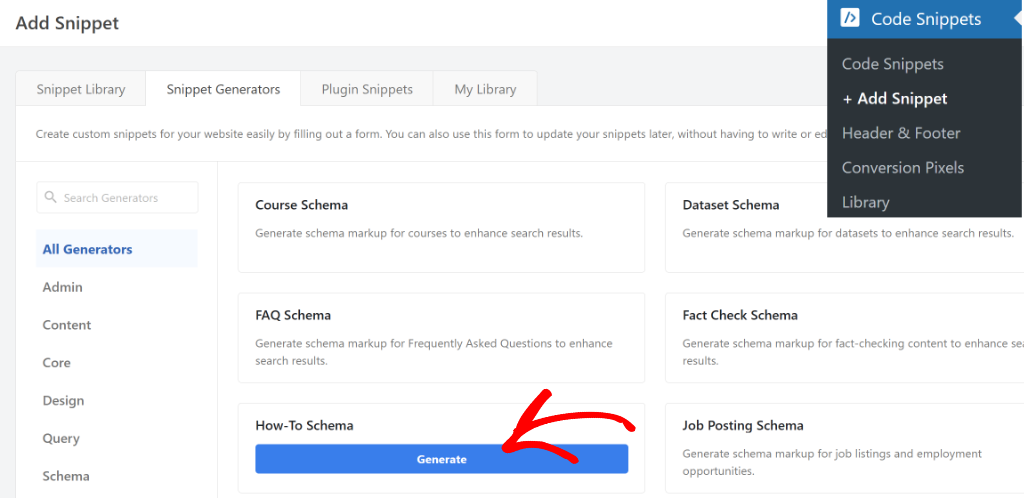
First, you’ll need to navigate to Code Snippets » Add Snippet from your WordPress admin panel.
From here, you can click on the ‘Snippet Generators’ tab at the top and then select How-To Schema.
On the next screen, you’ll see the info about How-To schema.
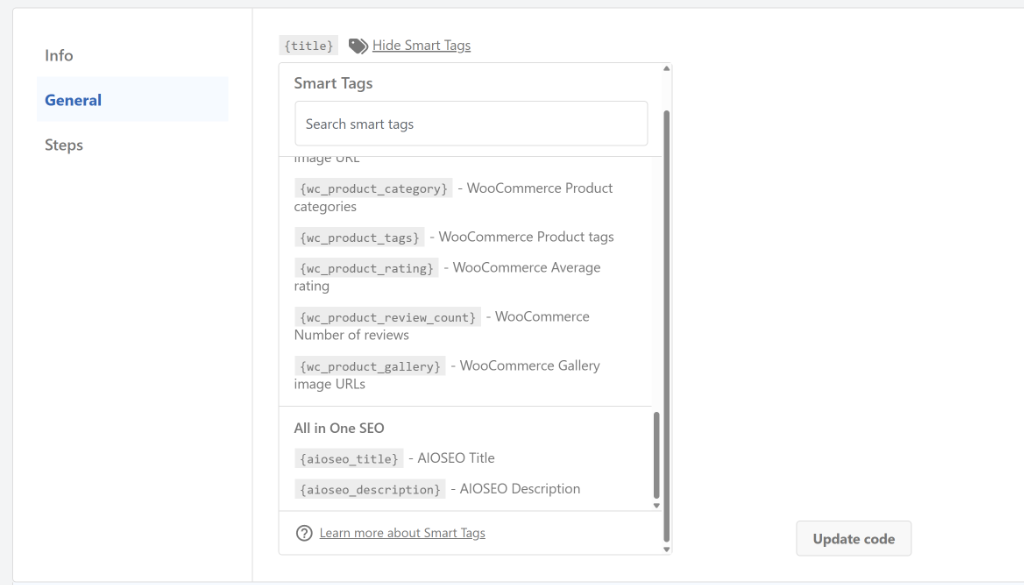
From here, you can switch to ‘General’ tab and then enter the title, description, and total time for the article.
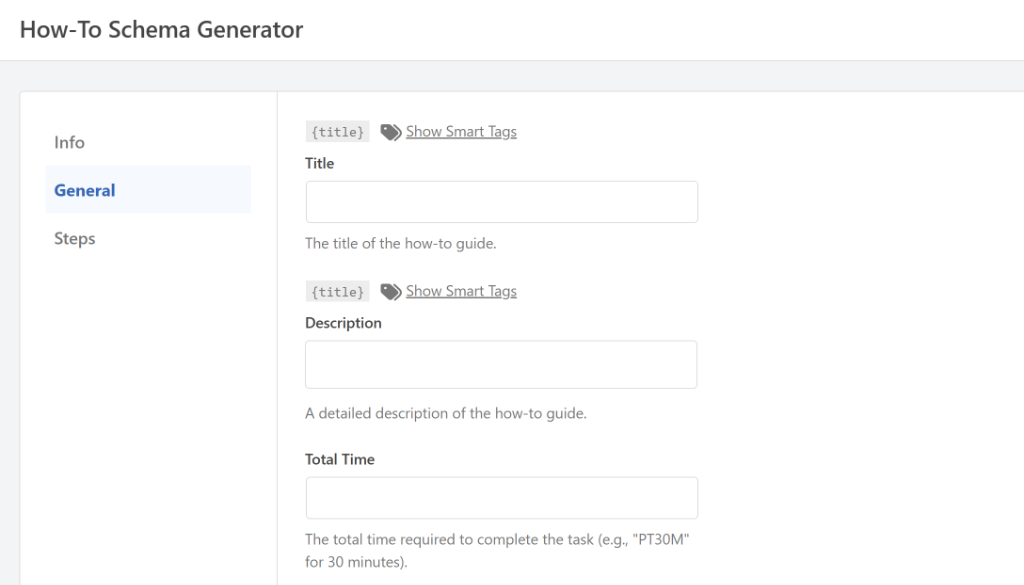
WPCode also lets you add Smart Tags to dynamically fill-in values.
For example, if you’re using All in One SEO (AIOSEO), then you can enter the {aioseo_title} tag and automatically use the AIOSEO Title.
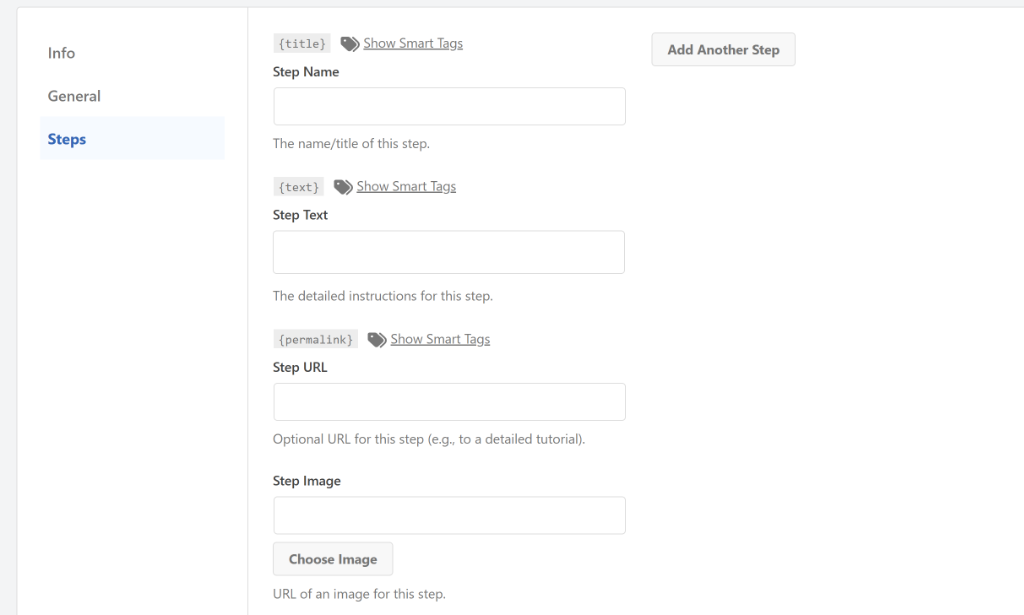
Next, you can switch to the ‘Steps’ tab from the menu on the left.
After that, you can enter the step name, text, URL, and image. To add more steps, simply click the ‘Add Another Step’ and enter the details for each step.
Once you’ve added all the steps for the how-to schema, simply scroll down to the Code Preview section.
From here, go ahead and click the Use Snippet button.
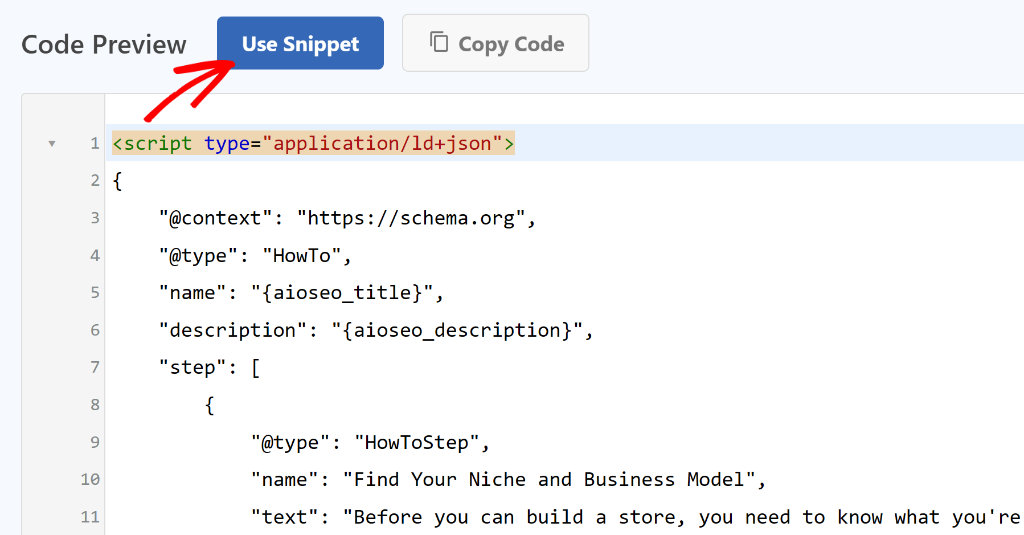
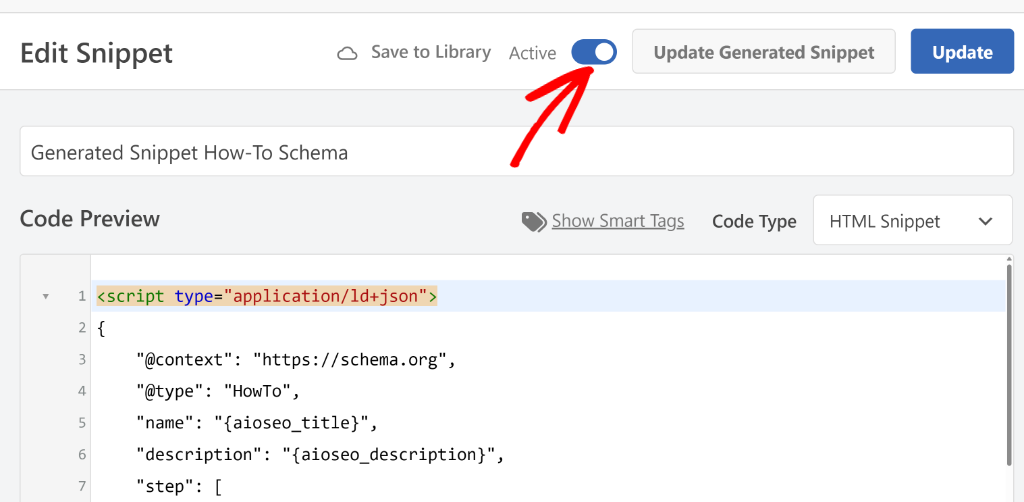
On the next screen, you’ll see the how-to schema code preloaded in the WPCode code editor.
Here, you can edit the code, make adjustments, or add smart tags if you’re using the WPCode Pro version.
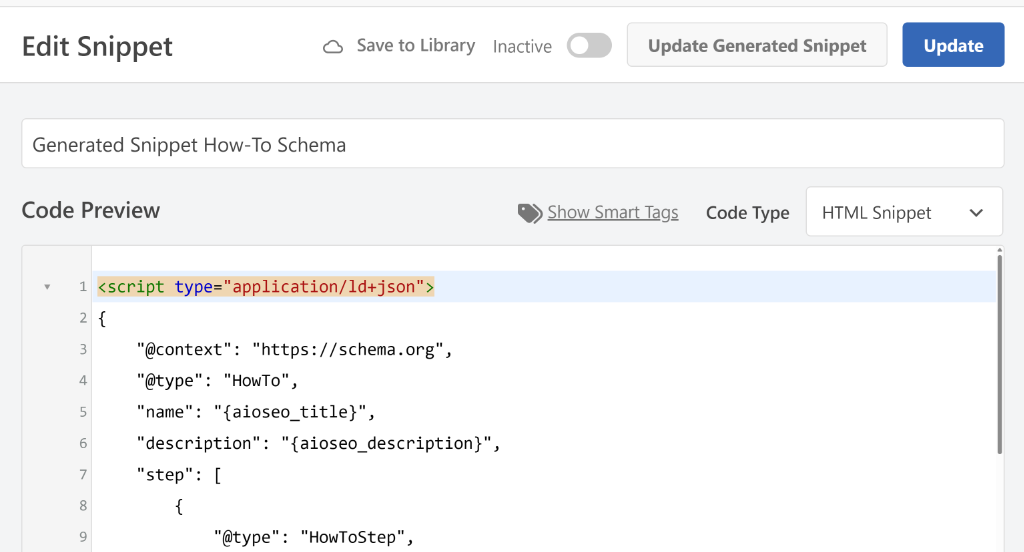
You also get an option to make changes to the schema snippet. Simply click the Update Generated Snippet button, and you’ll be taken back to the schema generator page, where you can add more steps or update schema code.
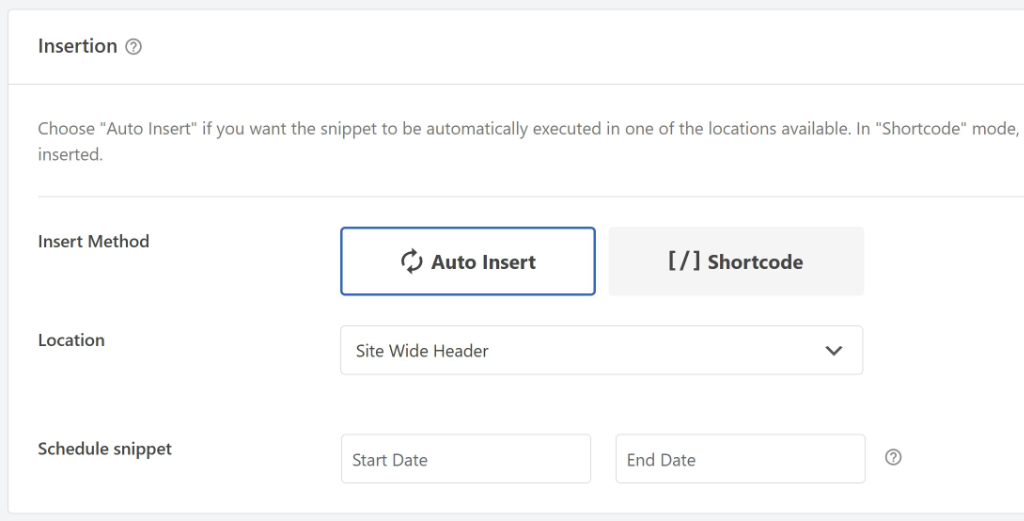
Next, you can scroll down to the ‘Insertion’ section. This is where you can select where the schema markup will be inserted on your site. By default, WPCode will auto insert the code in the ‘Site Wide Header’ of your website.
From here, you can scroll to the top and click the toggle to make the how-to schema code Active.
Once that’s done, go ahead and click the ‘Update’ button.
Step 3: Adding How-to Schema to a Post or Page
Next, you’ll need to add the how-to schema you just created to the relevant blog post or landing page.
WPCode offers two main methods for this. If you’re using WPCode Pro, then you can use the Page Scripts feature directly in the WordPress content editor. Alternatively, you can use conditional logic to specify exactly which posts or pages should display the schema.
Let’s look at both the methods to add the schema markup to your content.
1. Add How-to Schema Using WPCode Page Scripts
The Page Scripts feature in WPCode allows you to insert custom snippets to any blog post or landing page inside the block editor.
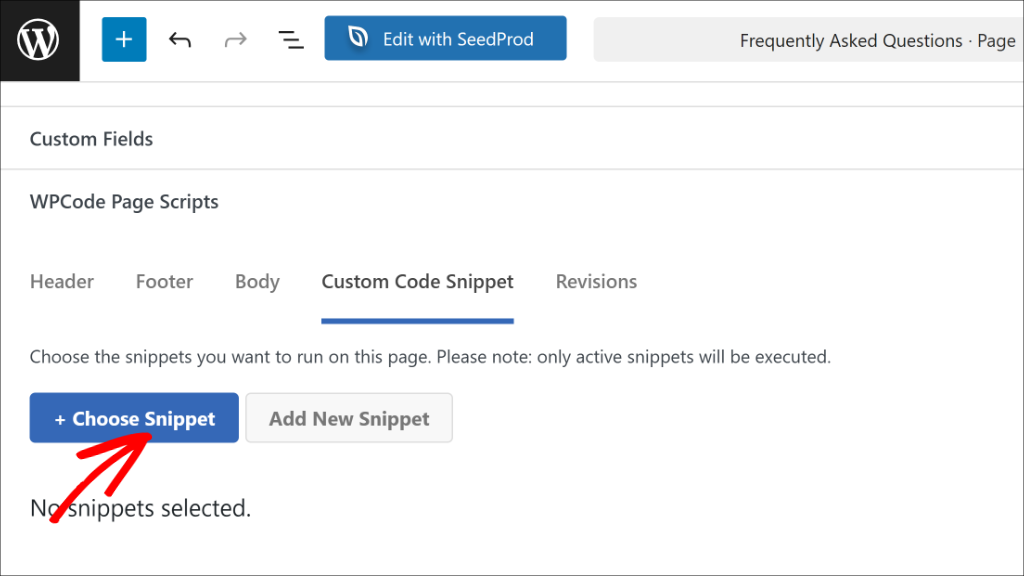
First, you’ll need to go to the post or page where you want to add the How-to schema. In the WordPress content editor, simply scroll down to find the WPCode Page Scripts section below your content area.
From here, you’ll need to switch to the ‘Custom Code Snippet’ tab and click the Choose Snippet button.
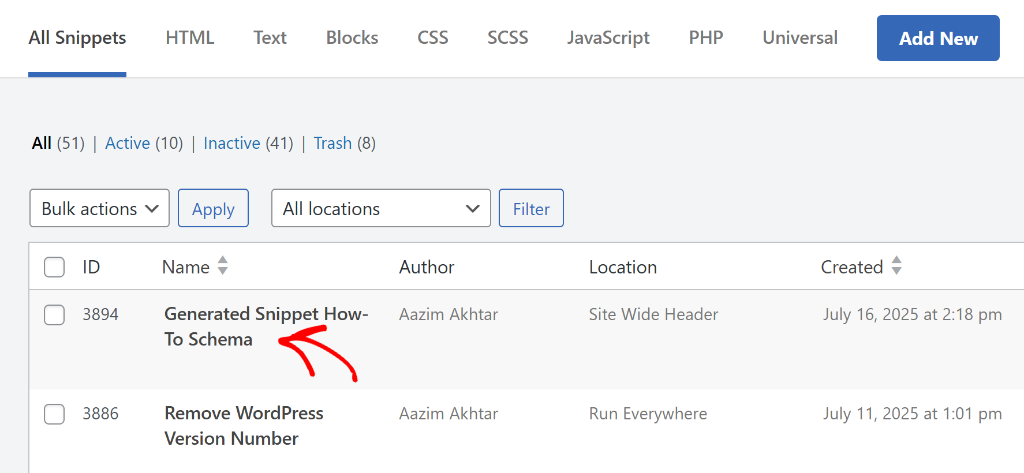
Next, you’ll see a list of all the code snippets you’ve created in WPCode.
After that, you can find your How-to schema snippet and click the toggle next to it to activate it for this specific post.

Once you’ve selected it, simply publish or update your post.
2. Use Conditional Logic to Add the How-to Schema
Alternatively, you can also add the how-to schema to a specific post by using the conditional logic options in WPCode.
To start, you can go back to Code Snippets from your WordPress dashboard and select your How-to schema code snippet.
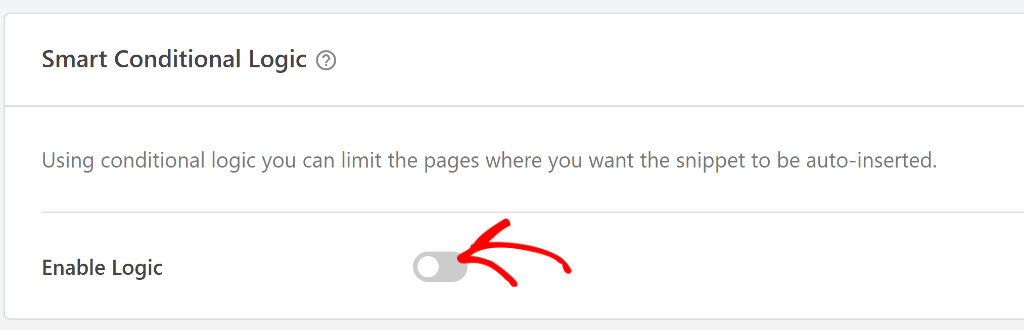
Next, you can scroll down to the ‘Smart Conditional Logic’ section
From here, click the toggle next to Enable Logic. This feature lets you control exactly when and where your schema appears.
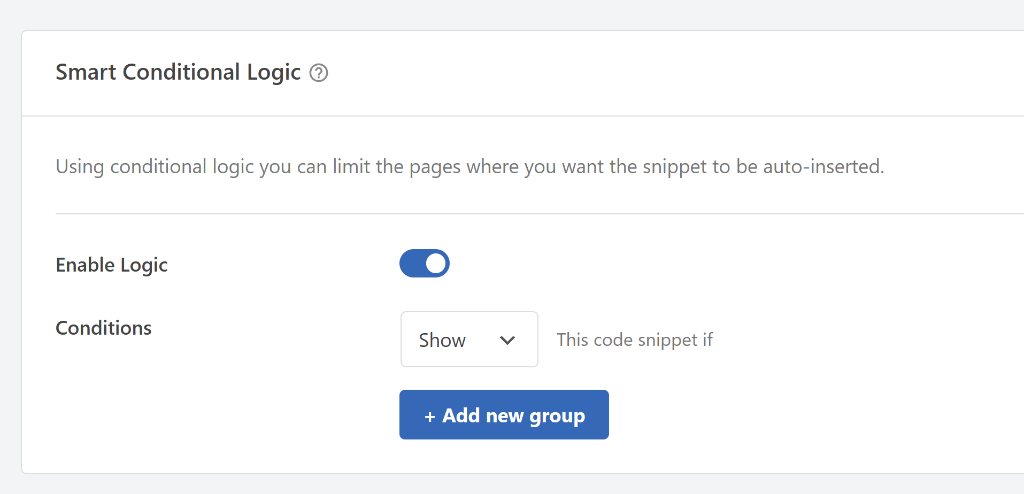
After that, you will need to select whether you’d like to Hide or Show the snippet.
Go ahead and choose the ‘Show’ option and click the Add new group button.
By default, WPCode sets the condition for logged-in users, but you need to change this.
Simply click on the condition dropdown to open the menu, then switch to the Where (page) tab on the left and then select Post/Page.
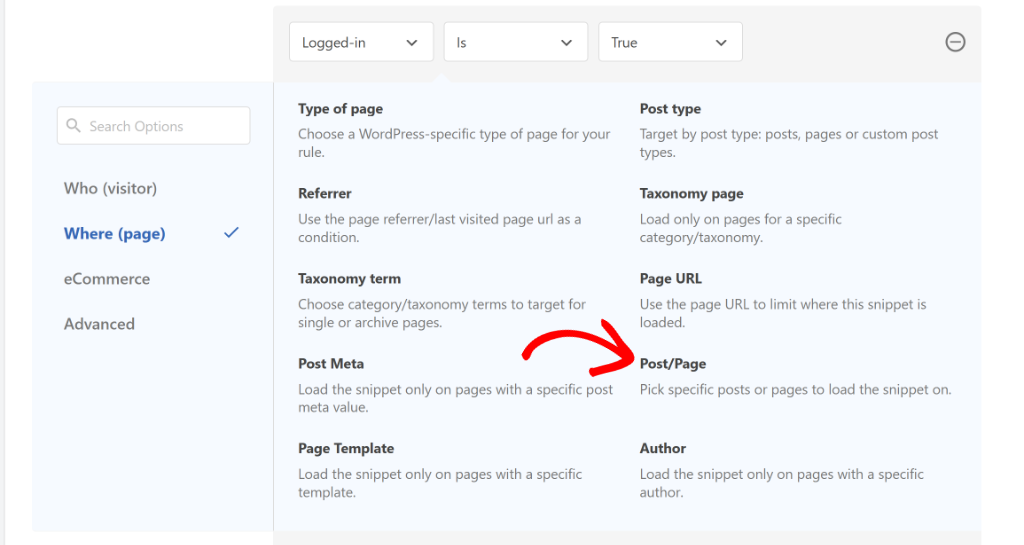
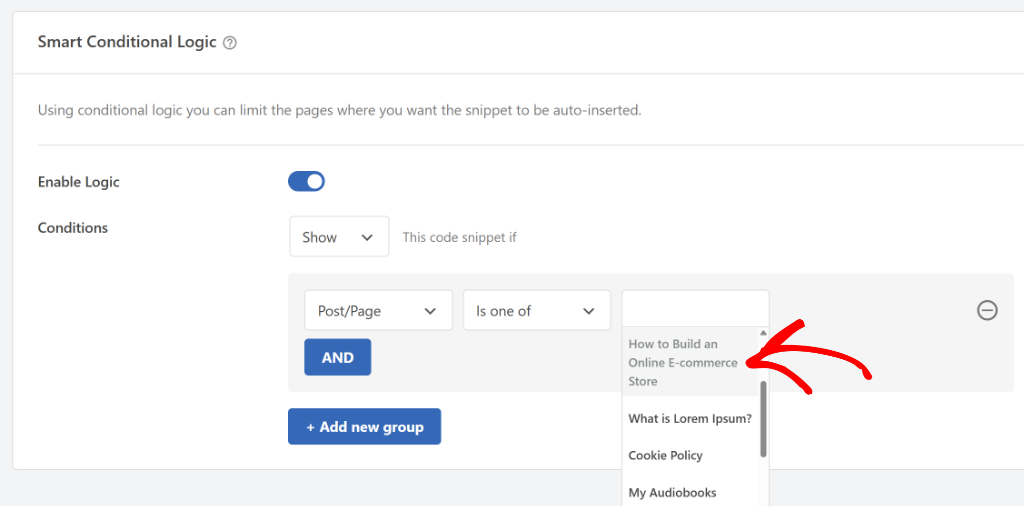
Next, you can change the condition to ‘Is one of’ and then select the page/post where you want to add the how-to schema.
Simply click on the last field and pick your content from the dropdown menu.
Once you’ve selected your target content, click the ‘Update’ button to save your conditional logic settings.
To learn more, you may want to see our guide on how to add scripts to specific pages in WordPress.
Now, your schema will only appear on the blog post or page you’ve specified.
Step 4: Test Your WordPress How-to Schema Markup
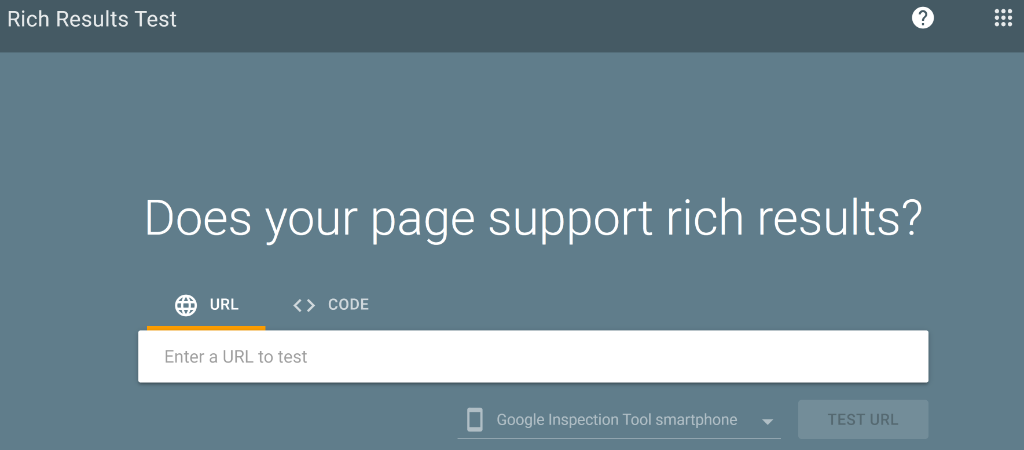
If you’re wondering if your how-to schema was added correctly and if it’s working properly, then you can test it using the Google’s Rick Results Test tool.
Simply visit the tool and enter the URL of the page where you added your how-to schema. From here, click the ‘Test URL’ button and wait for Google to analyze your page.
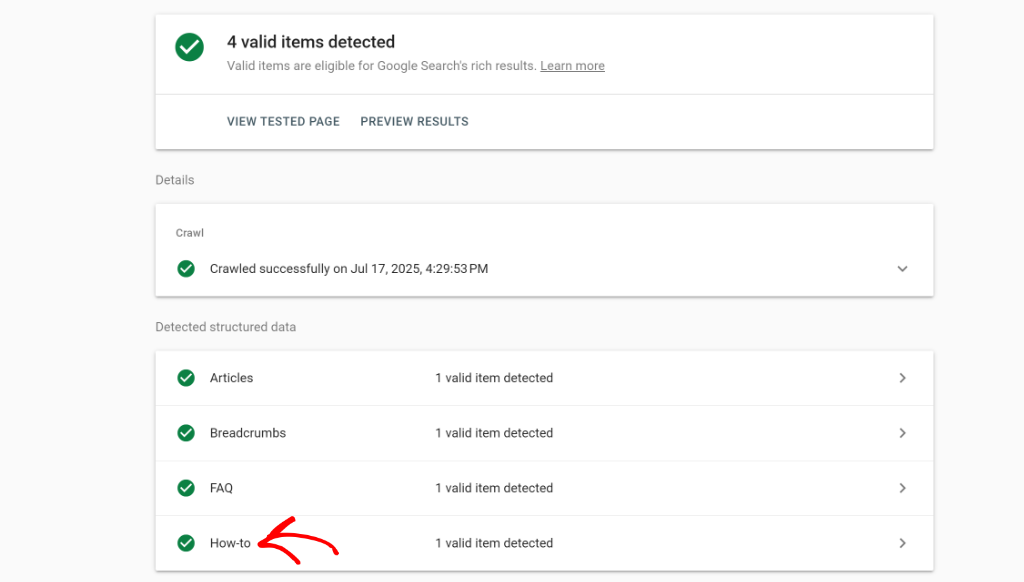
Once the scan completes, look for your How-to schema under the ‘Detected structured data’ section.
If it appears there without any errors, congratulations, you’ve successfully implemented How-to schema on your WordPress site.
I hope this article helped you learn how to add SEO-friendly ‘how-to’ schema in WordPress. You may also want to see our guides on how to replace image with different file extensions in WordPress and how to add social share buttons to your WordPress website.
If you need help, then feel free to leave a comment below. And don’t forget to follow us on X (formerly known as Twitter) and subscribe to our newsletter for all the latest updates.

