

Last year, I launched a food blog featuring my grandmother’s traditional recipes. I spent hours crafting detailed posts with beautiful photos and step-by-step instructions.
But when I searched for my recipes on Google, they were buried on page three, while other food blogs with similar content appeared at the top with eye-catching recipe cards.
That’s when I discovered recipe schema markup. It’s a special code that tells search engines exactly what your recipe contains, such as ingredients, cooking time, nutritional information, and ratings.
When implemented correctly, your recipes can appear in Google’s AI overviews and rich snippets with star ratings, cooking times, and calorie counts right in the search results.
In this article, I’ll show you how to add a recipe schema to your WordPress site using a very simple method.
What Is Recipe Schema and Why Use It?
Recipe schema is structured data markup that tells search engines exactly what your recipe contains. Think of it as a detailed label that explains every aspect of your recipe, from ingredients and cooking time to nutritional information and difficulty level.
When I first heard about schema markup, it sounded complicated and technical. But recipe schema is actually just a standardized way of organizing your recipe information, so search engines like Google can understand and display it better.
Without a recipe schema, your recipes show up as plain blue links in search results, competing with food blogs that display rich, visual snippets.
For example, when someone searches for “how to make chocolate chip cookies,” they’re more likely to click on results that show cooking time, star ratings, ingredients, and calorie counts right in the search results.
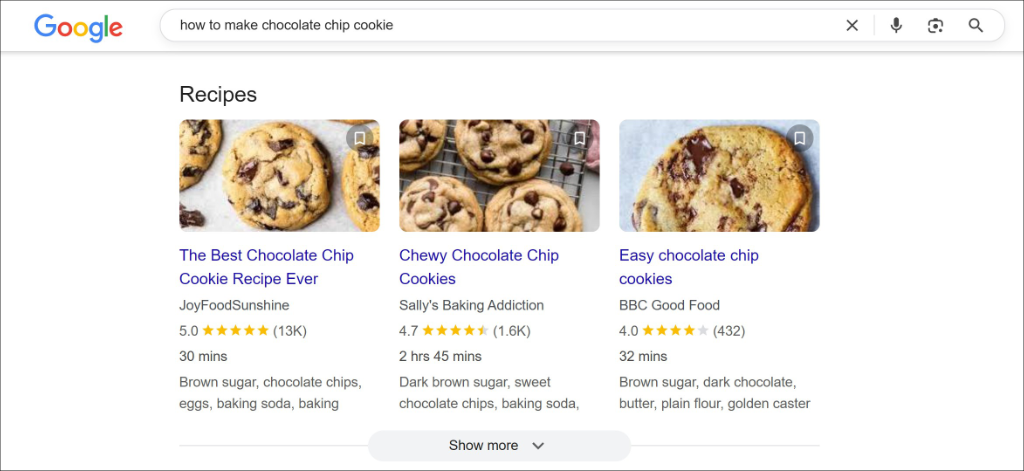
Recipe schema solves this problem by providing search engines with structured data about your recipes. Once implemented, Google can display your recipes with enhanced features like star ratings, prep time, and ingredient counts directly in search results.
These rich snippets make your recipes stand out visually and provide valuable information that helps users decide whether to visit your site.
The markup also helps your recipe appear in AI Overview on Google and also helps other Large Language Models (LLM) like ChatGPT, Gemini, and Claude to reference your recipes.
That said, let’s look at how you can add a recipe schema to your WordPress site.
Adding a Recipe Schema Markup in WordPress
When it comes to setting up a recipe schema for your WordPress website, many people think it’s too complicated. However, with WPCode, you can easily generate schema markups for your site.
The plugin makes adding structured data much easier than manually coding JSON-LD markup, especially if you’re not comfortable with technical code. You can use the schema generator to create all types of schema. For example, you can add structured data for FAQs, job postings, videos, articles, how-to tutorials, recipes, and more.
I’ve used WPCode on multiple food blogs, and it consistently delivers clean, error-free schema markup that Google recognizes immediately. The plugin also handles updates automatically, so you don’t have to worry about keeping up with schema.org changes.
Besides that, WPCode is the best code snippet plugin for WordPress. It helps you manage, add, and edit custom PHP, CSS, JavaScript, and other snippets. If you want to add a custom feature to your site, then the plugin also comes with a built-in snippet library from verified experts.
Note: For this tutorial, I’ll use the WPCode Pro version because it includes advanced features like Smart Tags for dynamic values when generating the schema, Page Scripts for inserting the schema markup on specific pages, and more. But there is also a WPCode Lite version to create schema markup for WordPress.
Now, let’s look at the steps you need to follow to add a recipe schema markup.
Step 1: Install and Activate WPCode
To start, you’ll need to visit the WPCode website and sign up for a new account.
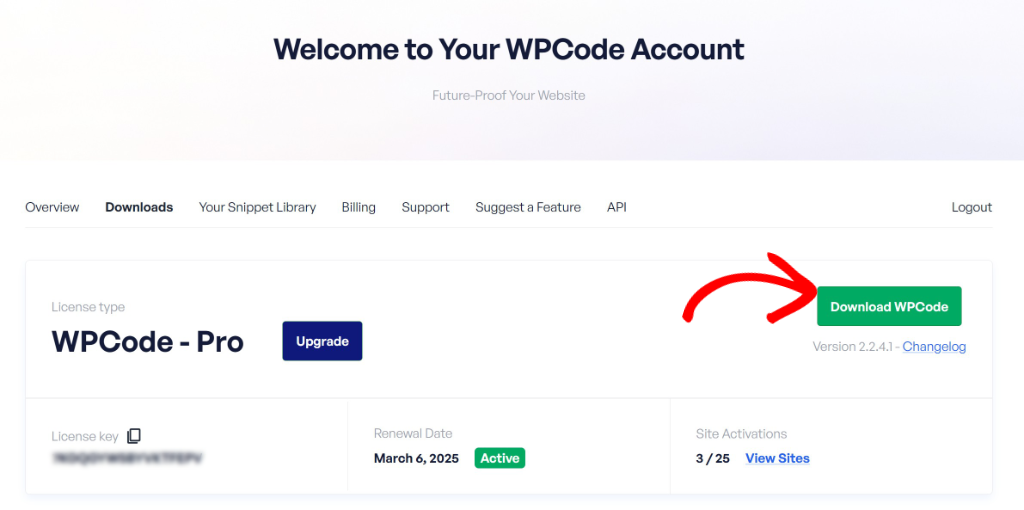
After that, you will need to go to your WPCode account area and find the plugin file in your account area under the ‘Downloads’ tab.
Simply click the Download WPCode button and save the plugin file on your computer.
Next, you can install and activate the plugin in WordPress. If you need help, then please see this guide on how to install a WordPress plugin.
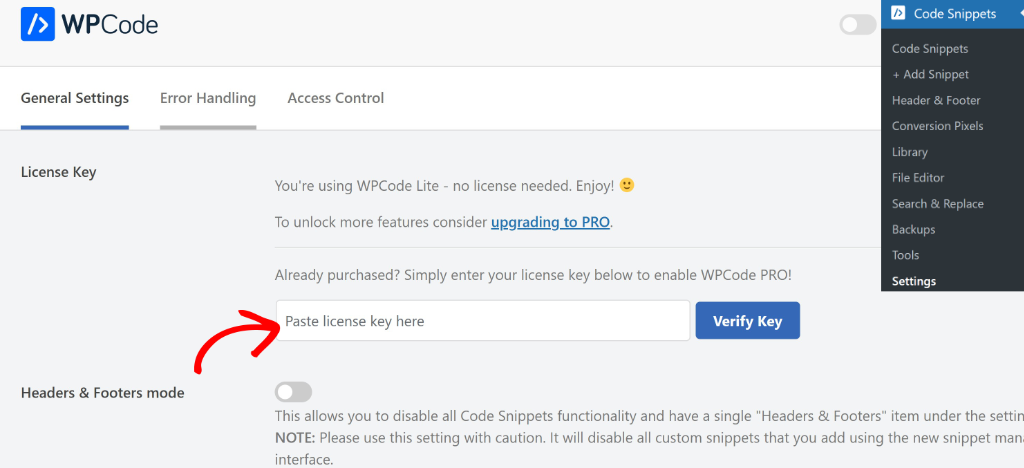
Once the plugin is active, you can head to Code Snippets » Settings from your WordPress dashboard and enter your license key. You can find this key in your WPCode account area.
Now, you’re ready to create recipe schema markup using WPCode.
Step 2: Generate a Recipe Schema Markup
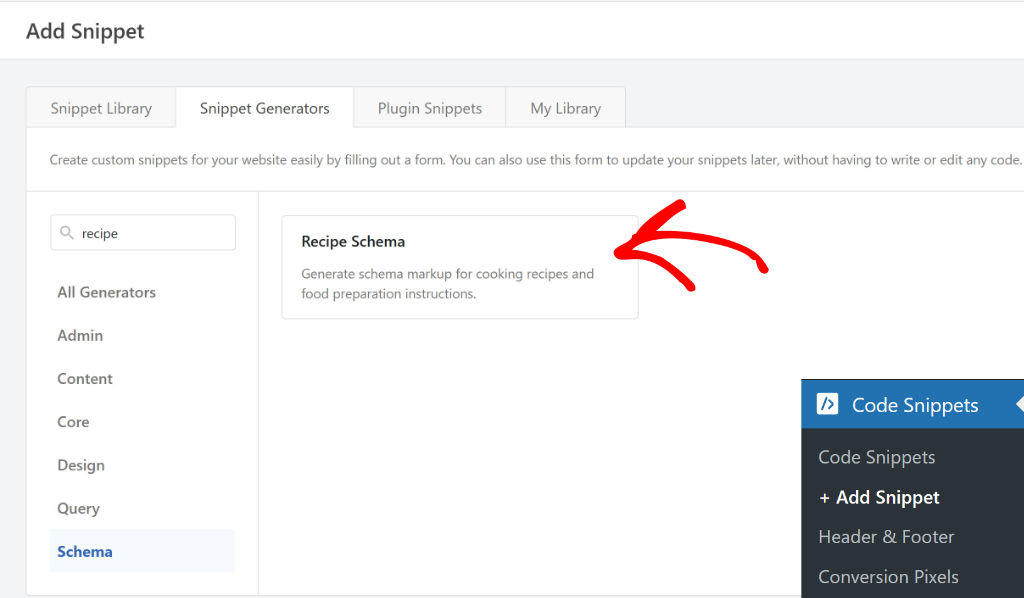
Next, you’ll need to head to Code Snippets » Add Snippet from your WordPress admin panel and then switch to the ‘Snippet Generators’ tab at the top.
WPCode also lets you filter snippet generators from the menu on the left. For instance, when you head to the ‘Schema’ tab and view all the options, simply search for the recipe schema.
Next, go ahead and select Recipe Schema.
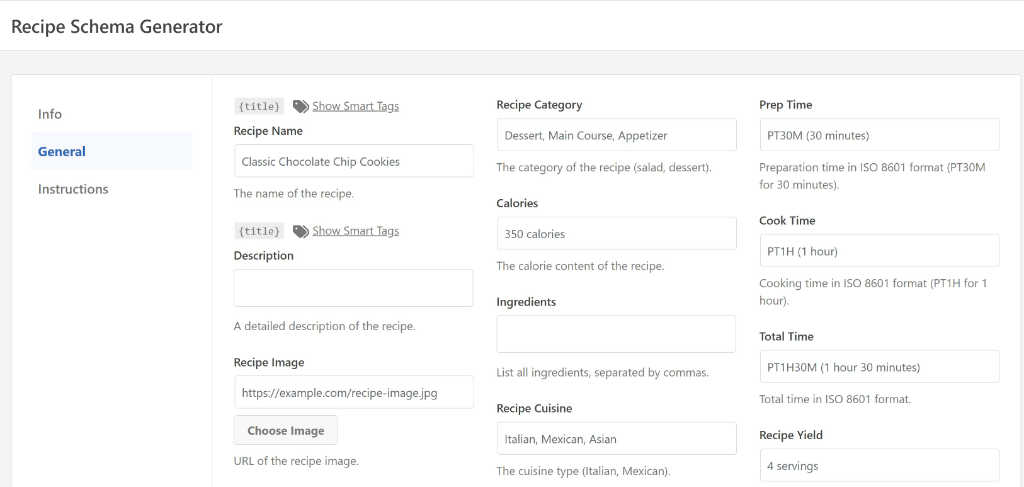
Next, you will see the ‘Info’ for the Recipe Schema Generator. After that, simply switch to the General tab.
Here, you will need to enter information about your recipe. For instance, enter the recipe name, description, ingredients list, prep time, cook time, recipe yield (serving size), image, and more.
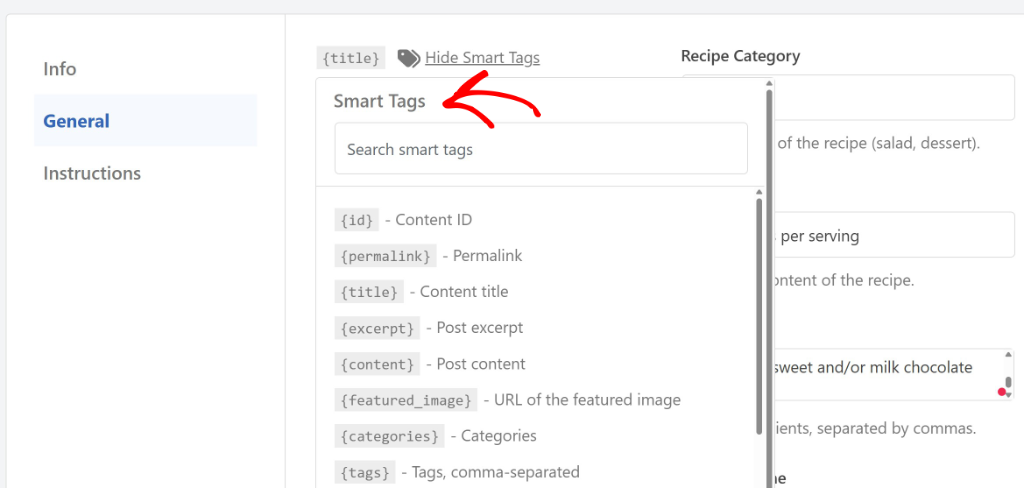
WPCode also lets you use smart tags to dynamically enter the values. For example, if your recipe name is the same as the blog post title on your site, then you can simply use the {title} tag. This will automatically fetch the content title and use it for the recipe schema.
To get started, simply click the Show Smart Tags option and select a tag from the dropdown menu. This feature has saved me hours of work when adding schema to existing recipe posts, since I don’t have to manually enter the same information twice.
Next, you can switch to the Instructions tab. Here, you’ll need to enter steps for your recipe.
To start, you can enter a step name, step text, and image. To add more instructions, simply click the ‘Add Another Step’ button and repeat this process.
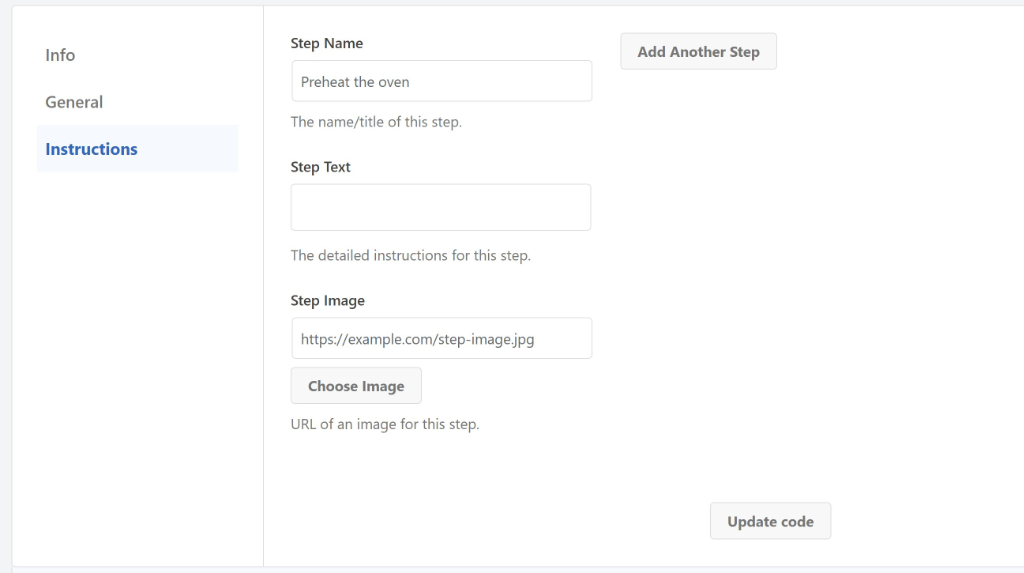
Once you’re done, simply click the Update code button at the bottom.
From here, you can scroll down and view the recipe schema markup under the ‘Code Preview’ section. Next, simply click the Use Snippet button to continue.
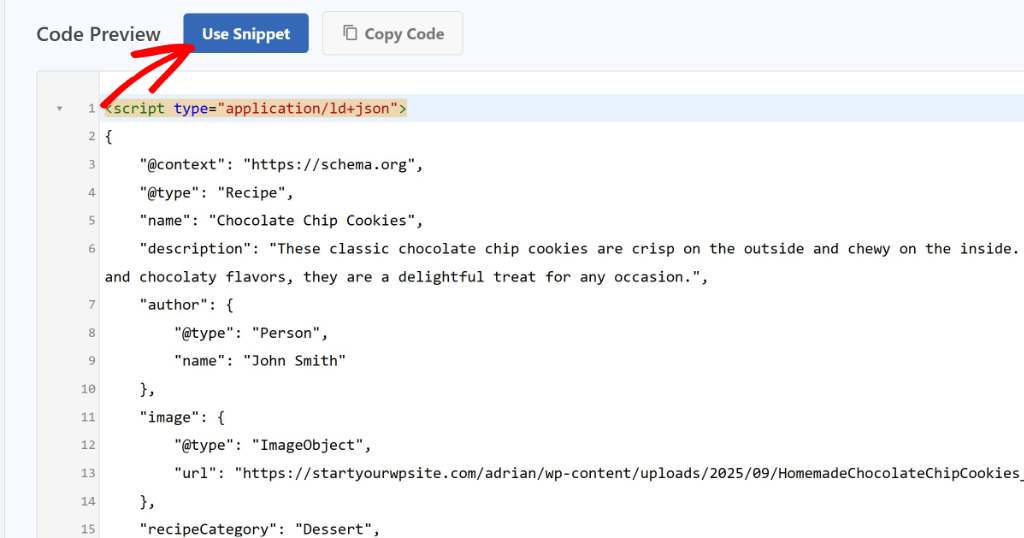
On the next screen, you will see the recipe schema snippet preloaded in the code editor.
From here, you can edit the code, make adjustments, or add smart tags to your schema markup.
WPCode also provides the option to make changes to your schema snippet.
If you click the Update Generated Snippet button, then you’ll be taken back to the schema generator page. This is helpful in case you need to update the instructions or edit the recipe details.
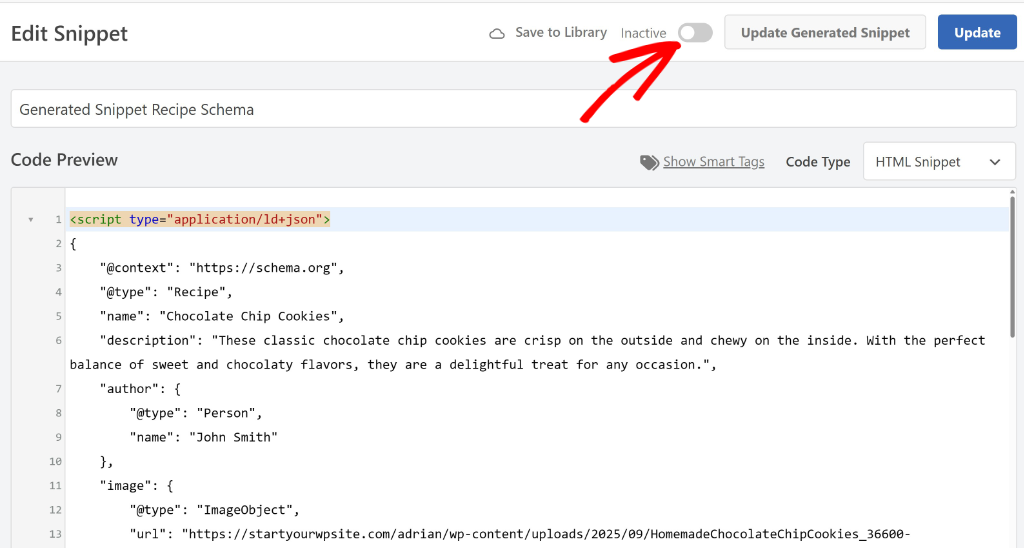
Now, you can click the toggle to make your schema Active and then click the ‘Update’ button.
When that’s done, you’re ready to add the recipe schema to a page or post on your site.
Step 3: Adding Recipe Schema to a Post or Page
Next, you can add the recipe schema to the blog post or landing page where you’ve published your recipe.
There are 2 ways to do this with WPCode. If you’re using the WPCode Pro version, then you can use the Page Scripts feature directly in the WordPress content editor. On the other hand, you can also use conditional logic in WPCode to specify the posts or pages to add the schema.
Let’s look at both methods.
1. Add Recipe Schema Using WPCode Page Scripts
In this approach, you can use the WPCode Page Scripts feature that lets you insert custom snippets to any blog post or landing page inside the block editor.
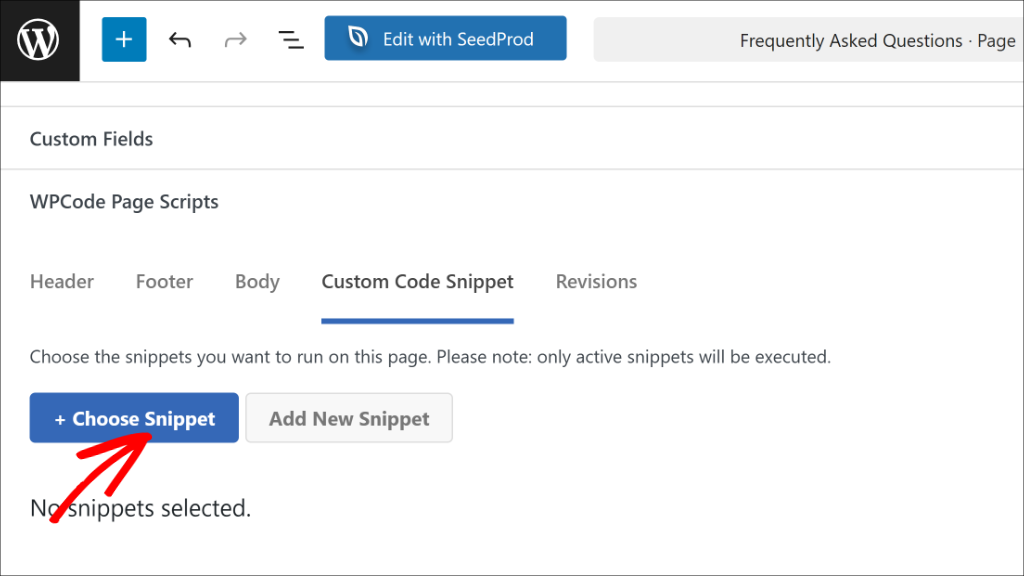
First, you’ll need to go to the post or page where you want to add the recipe schema. When you’re in the WordPress content editor, simply scroll down to the WPCode Page Scripts section.
Next, you’ll need to switch to the ‘Custom Code Snippet’ tab and click the Choose Snippet button.
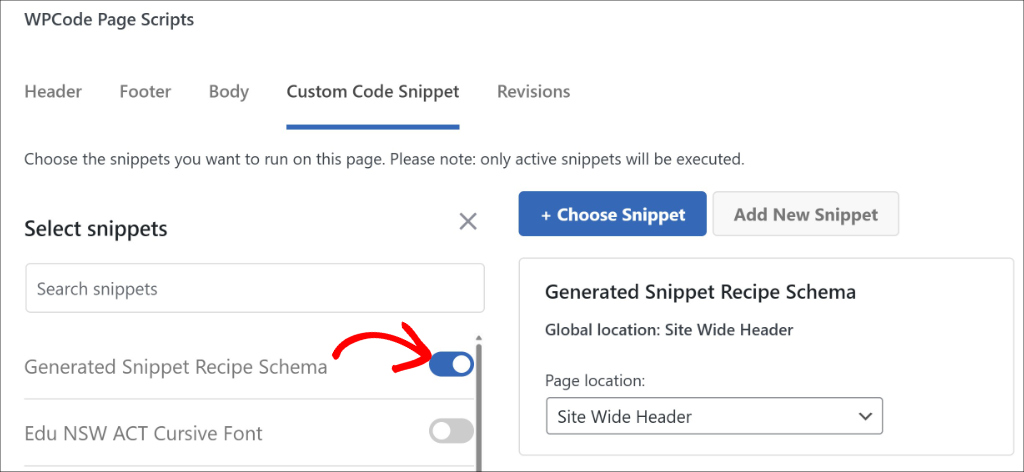
On the next screen, you will see a list of all the code snippets you’ve created in WPCode.
Go ahead and select the recipe schema snippet and click the toggle next to it to activate it.
Next, you can simply publish or update your blog post or landing page.
2. Add Recipe Schema Using Conditional Logic
Another way to add the recipe schema snippet is by using the conditional logic rules in WPCode.
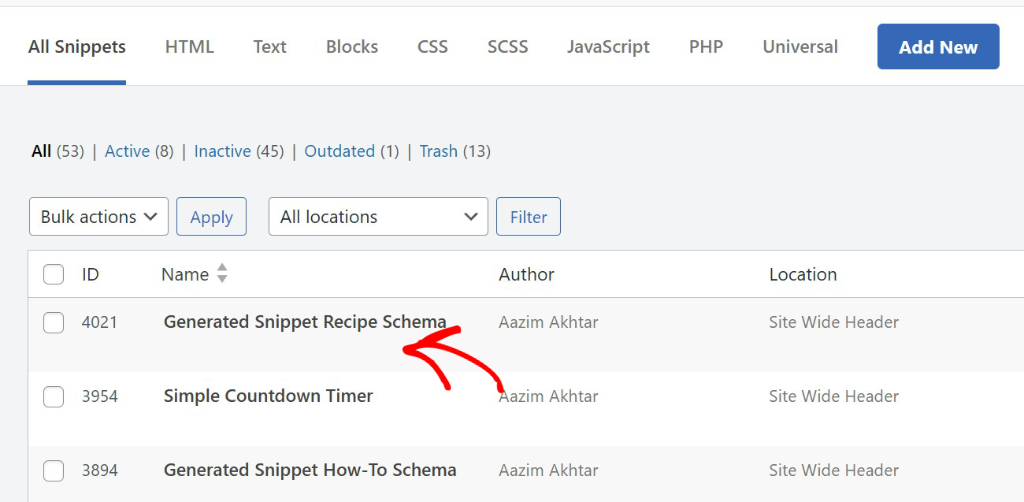
To start, you will need to go back to Code Snippets from your WordPress dashboard and select your Recipe schema code snippet.
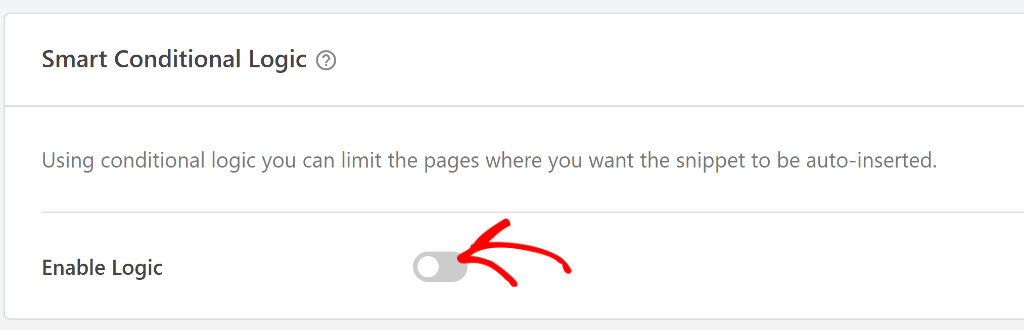
Next, you can scroll down to the ‘Smart Conditional Logic’ section.
From here, simply click the toggle to Enable Logic.
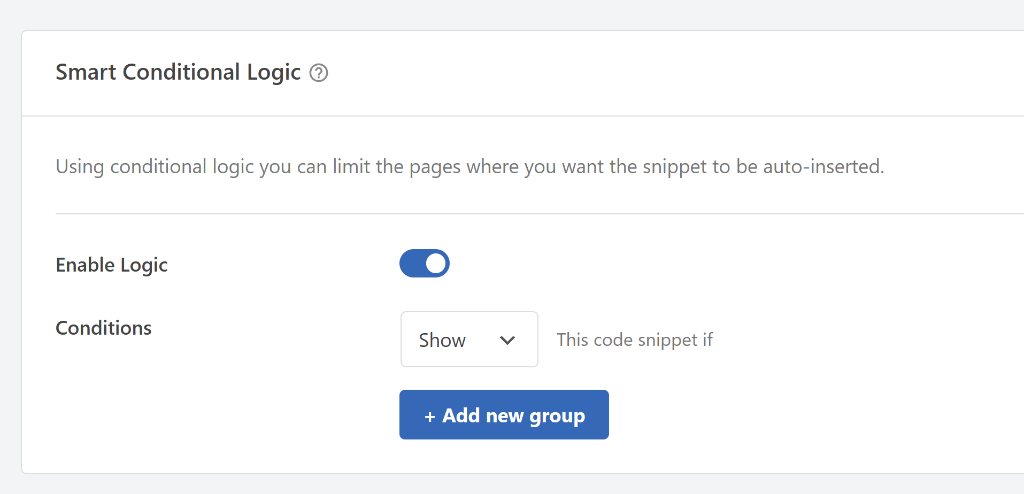
Once that’s done, you can pick whether you’d like to Hide or Show the snippet.
Go ahead and choose the ‘Show’ option and click the Add new group button.
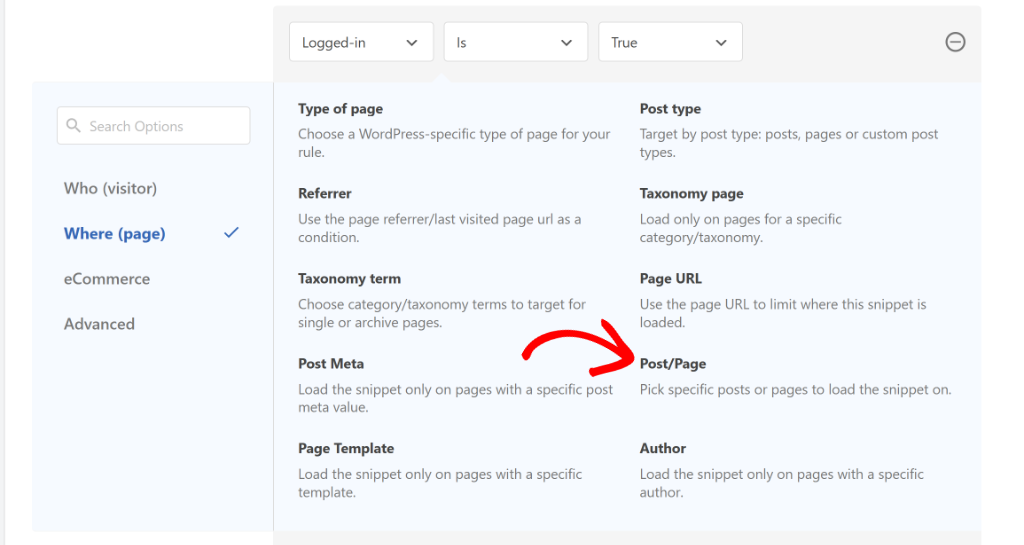
By default, WPCode will set the condition for logged-in users, but you need to change this.
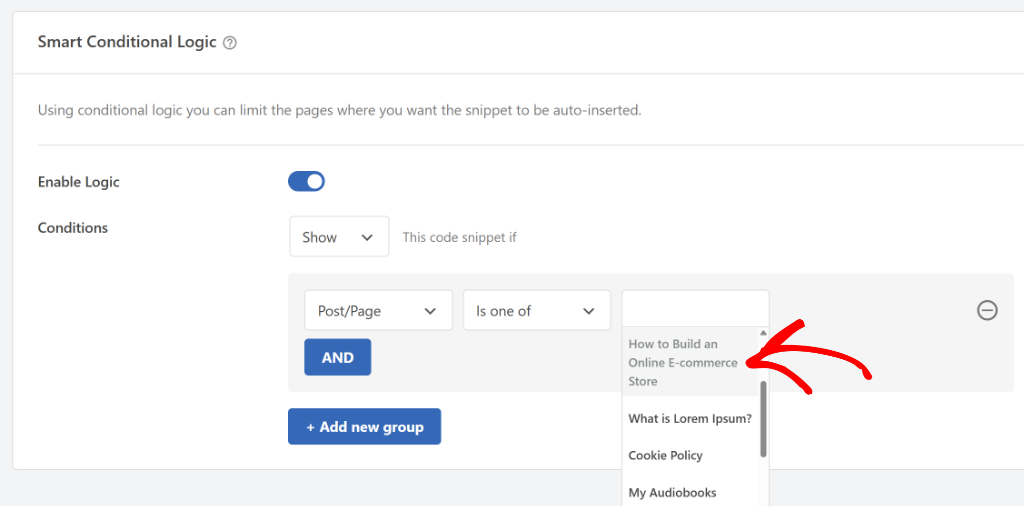
Simply click on the condition dropdown to open the menu, then switch to the Where (page) tab on the left and then select Post/Page.
Next, you will need to change the condition to ‘Is one of’ and then pick the page/post where you want to add the recipe schema markup.
Once you’ve done that, click on the last field and select your blog post or landing page from the dropdown menu.
After you’re finished, scroll to the top and update your code snippet to save the conditional logic settings.
For more details, please see our guide on how to add scripts to specific pages in WordPress.
That’s it, you’ve successfully added the recipe schema to your WordPress site. This conditional logic method works great when you want to apply the same schema template to multiple recipe posts automatically.
Step 4: Test Your Recipe Schema Markup
After you’ve added the recipe schema to your site, the next step is to check if it’s working properly or if you need to make changes to the schema details.
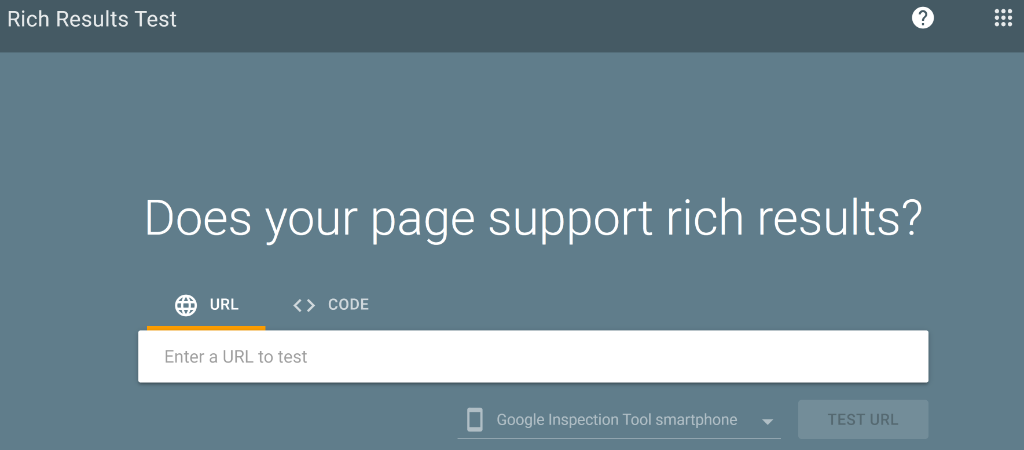
The easiest way to do that is by using Google’s Rich Results Test tool.
Simply visit the tool and enter the URL of the page where you added your recipe schema markup. Then, click the ‘Test URL’ button and wait for Google to analyze your page.
Now, the tool will scan your page and look for the schema markup.
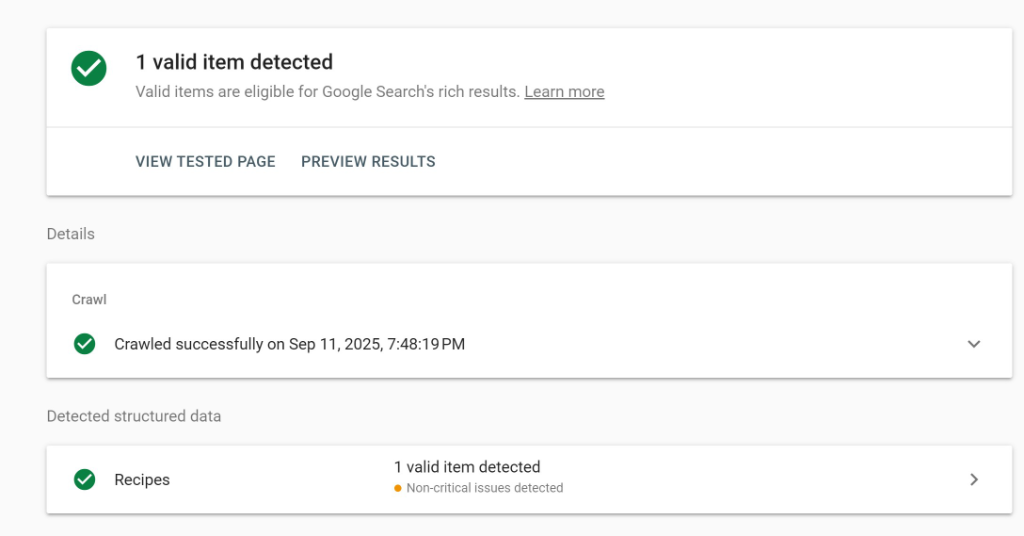
Once the scan is complete, you will see the schema markups added to your page under the ‘Detected structured data’ section along with any errors that you need to address.
Go ahead and look for ‘Recipes’ under this section. If it appears there without any errors, then it means you’ve successfully added the recipe schema on your site.
I always test my recipe schema immediately after implementation because it’s much easier to fix issues right away than to discover problems weeks later. The Rich Results Test tool will show you exactly what Google sees when it crawls your recipe page.
Pay close attention to any warnings or errors in the test results. Common issues I’ve encountered include missing required fields like cooking time or ingredient measurements. The tool will tell you exactly what needs to be fixed.
Bonus: Enahnce Your Food Blog with WP Tasty Recipes
Now that you’ve set up a recipe schema in WordPress, you can optimize them for more traffic and better user experience using the WP Tasty Recipes plugin.
It is the best recipe plugin for WordPress and offers lots of features to make your recipes more attractive and engaging.

For instance, you can use it to create recipe cards and choose from pre-built themes. The plugin also helps you add an ingredient checkbox, custom share and save buttons, video integrations, jump to recipe shortcuts, and more.
Besides that, WP Tasty also offers lots of customization options. So you have full control over how your recipe cards will look like, which color the buttons be, and more.
To learn more, you can follow this guide on how to make recipe cards in WordPress.
FAQs About Recipe Schema in WordPress
Here are some common queries users have about adding a recipe schema in WordPress.
1. How long does it take for recipe rich snippets to appear in search results?
Google typically takes 2-4 weeks to start displaying rich snippets after you add a recipe schema. However, it can sometimes take longer depending on how often Google crawls your site and your overall site authority.
2. Can I add a recipe schema to existing recipe posts?
Yes, you can easily add recipe schema to existing posts using either the Page Scripts method or conditional logic. I recommend using the WPCode Page Scripts approach for existing content since it gives you more control over individual posts.
3. Will recipe schema work with any WordPress theme?
Recipe schema works with any WordPress theme because it’s added to the page’s HTML code, not the visual design. The schema markup is invisible to visitors but provides structured data that search engines can read.
I hope this article helped you learn how to add a recipe schema to your WordPress site. You may also want to see our guide on how to add a video schema in WordPress and how to add custom code in WordPress.
If you need help, then feel free to leave a comment below. And don’t forget to follow us on X (formerly known as Twitter) and subscribe to our newsletter for all the latest updates.

