
Recently, I encountered a challenging issue while optimizing my WordPress site for better performance.
Many images on the site were stored in the traditional JPEG format, but I wanted to get the benefits of the WEBP format. This format is more efficient for the web and offered faster loading speeds due to its superior compression capabilities without a loss in quality.
So, my goal was to update all image from to WEBP format throughout the WordPress database. But doing this manually was tedious and open to a lot of errors, with the potential of missing some important changes.
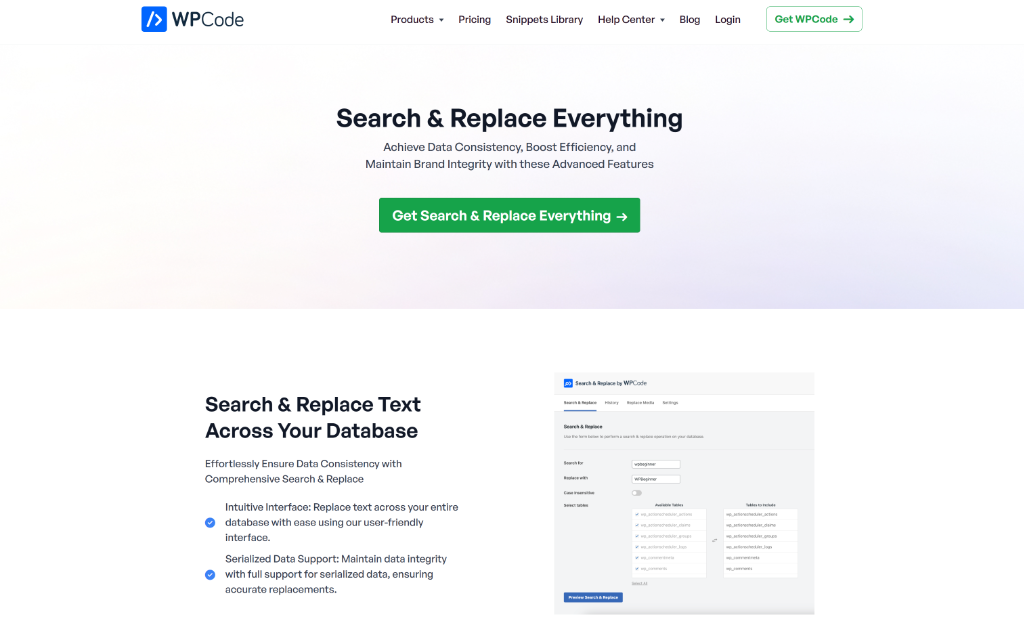
This is where Search & Replace Everything came in handy. It let me replace images with different file extension across the entire database with ease.
In this article, I’ll show you how to replace image with different file extensions in WordPress.
Why You Need to Replace Image File Extensions?
Replacing image file extensions is a common task that can significantly impact your WordPress site’s performance.
A typical scenario is during site optimization efforts. While converting images to the WEBP format is excellent for web optimization, failing to update database references to reflect these changes can lead to inconsistencies.
WEBP images offer better compression and faster loading times, which is crucial for enhancing user experience and improving your WordPress SEO, as Google values fast-loading pages.
When your database references the wrong extension, you’re not getting the benefits of the format you’re actually using. Your site might be serving optimized WEBP images but telling browsers they’re JPEGs, which defeats the purpose of the optimization.
By ensuring your database includes the correct file extensions, you can fully get the benefits of the image formats in use, like enjoying the speedy loading times of WEBP images instead of serving them as JPEGs. This small change can make a significant difference in site performance and user satisfaction.
That said, let’s look at an easy way to quickly replace image file extensions in WordPress.
Replacing Image File Extensions in WordPress
Replacing and fixing file extension mismatches in WordPress requires careful database editing, which can be tricky for beginners.
The best way to do this is by using Search & Replace Everything, and it makes this process much safer than manually editing your database.
Designed by WPCode team, Search & Replace Everything also lets you replace images, update media file URLs globally across your site, preview changes and prevent accidental damage to your site, instant 1-click revert changes option, and more.
Note: You’ll need the Search & Replace Everything Pro version because it includes the Replace File Extension feature. However, there is also a Search & Replace Everything free version that lets you perform basic search and replace operations.
To start, you can visit the WPCode website and head to Search & Replace Everything page to create a new account.
Next, you’ll need to install and activate the Search & Replace Everything plugin on your site. If you need help, then please see this guide on how to install a WordPress plugin.
Upon activation, you’ll need to go to Tools » WP Search & Replace page from the WordPress dashboard. After that, simply go to the ‘Settings’ tab and enter your license key. You can find the key in your Search & Replace Everything account area.
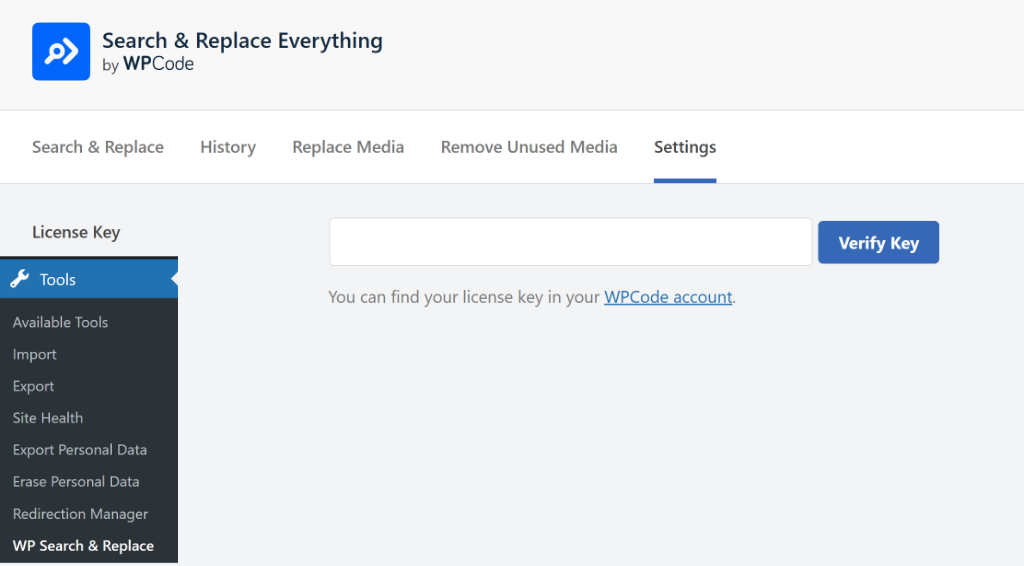
After entering the license key, simply click the ‘Verify Key’ button.
From here, you can switch to the Replace Media tab. Here, you’ll see all the files in your WordPress Media Library, including images, documents, videos, and more.
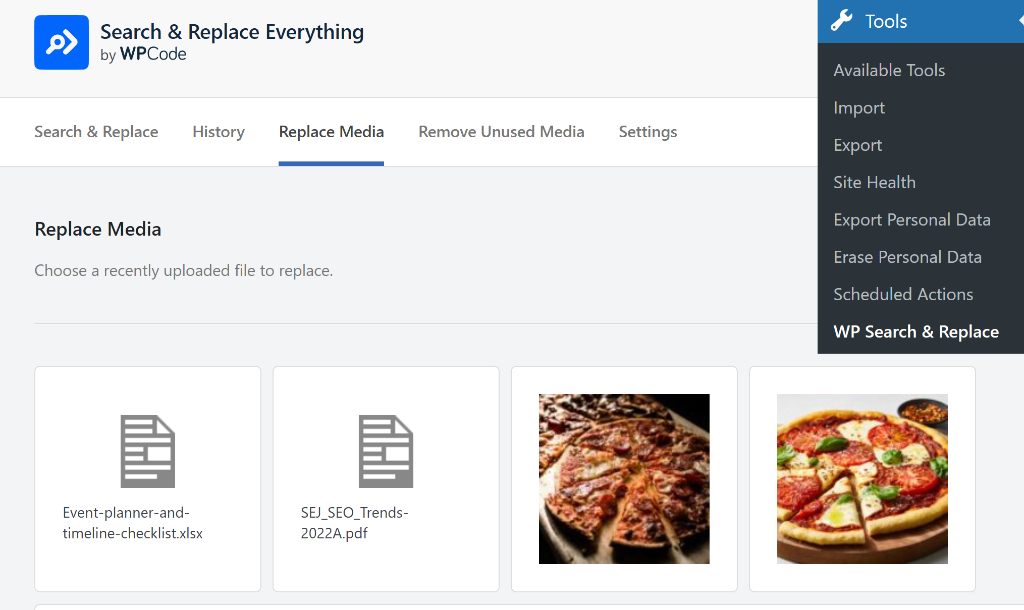
Go ahead and select the image that requires file extension replacement.
Next, you can scroll down and click the toggle to enable the Replace File Extension option.
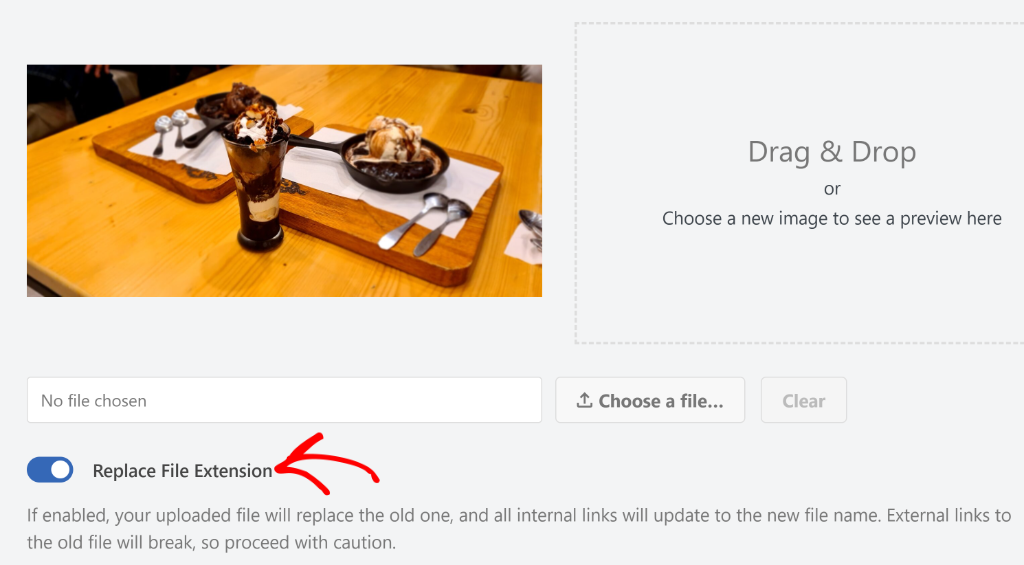
From here, you can upload the image with a different file extension or simply drag and drop the file onto the file replacement area.
Once that’s done, go ahead and click the ‘Replace Source File’ button and the plugin change the old media file with the new one.

That’s it! You’ve successfully replaced an image with a different file extension on your site.
FAQs About Replacing Image File Extensions
Now that you know to easily swap image file extensions, here are some common questions people have:
1. Can I change file extensions by just renaming the files in my media library?
No, simply renaming files in your media library won’t fix the problem completely. WordPress stores file references in multiple database tables, including post content, custom fields, and theme options. You need to update all these database references using a plugin like Search & Replace Everything to ensure the changes work across your entire site.
2. Will changing file extensions break my existing images?
Changing file extensions in the database won’t break your images as long as the actual image files remain unchanged. The database changes only update how WordPress references these files. However, if you’re also converting image formats (like changing actual JPEG files to PNG), make sure both the old and new files exist during the transition period.
3. How often should I clean up file extensions on my WordPress site?
I recommend checking your file extensions whenever you migrate content, change hosting providers, or notice image loading issues. For most sites, an annual review of your media library is sufficient, unless you’re frequently importing content from external sources.
I hope this article helped you learn how to replace images with different file extensions in WordPress. You may also want to see our guide on how to delete unused images from WordPress media library and how to allow SVG file upload to WordPress.
If you need help, then feel free to leave a comment below. And don’t forget to follow us on X (formerly known as Twitter) and subscribe to our newsletter for all the latest updates.

